Welcome to Trackstar! This page will tell you everything you need to know about installing, setting up, and using the plugin. It will take a few minutes to get through, but it should answer everything. If you have any questions, feel free to contact us. Otherwise, here’s what the page will cover:
- Activate your subscription
- Download the plugin
- Install the plugin
- Set up the plugin
- Plugin walkthrough
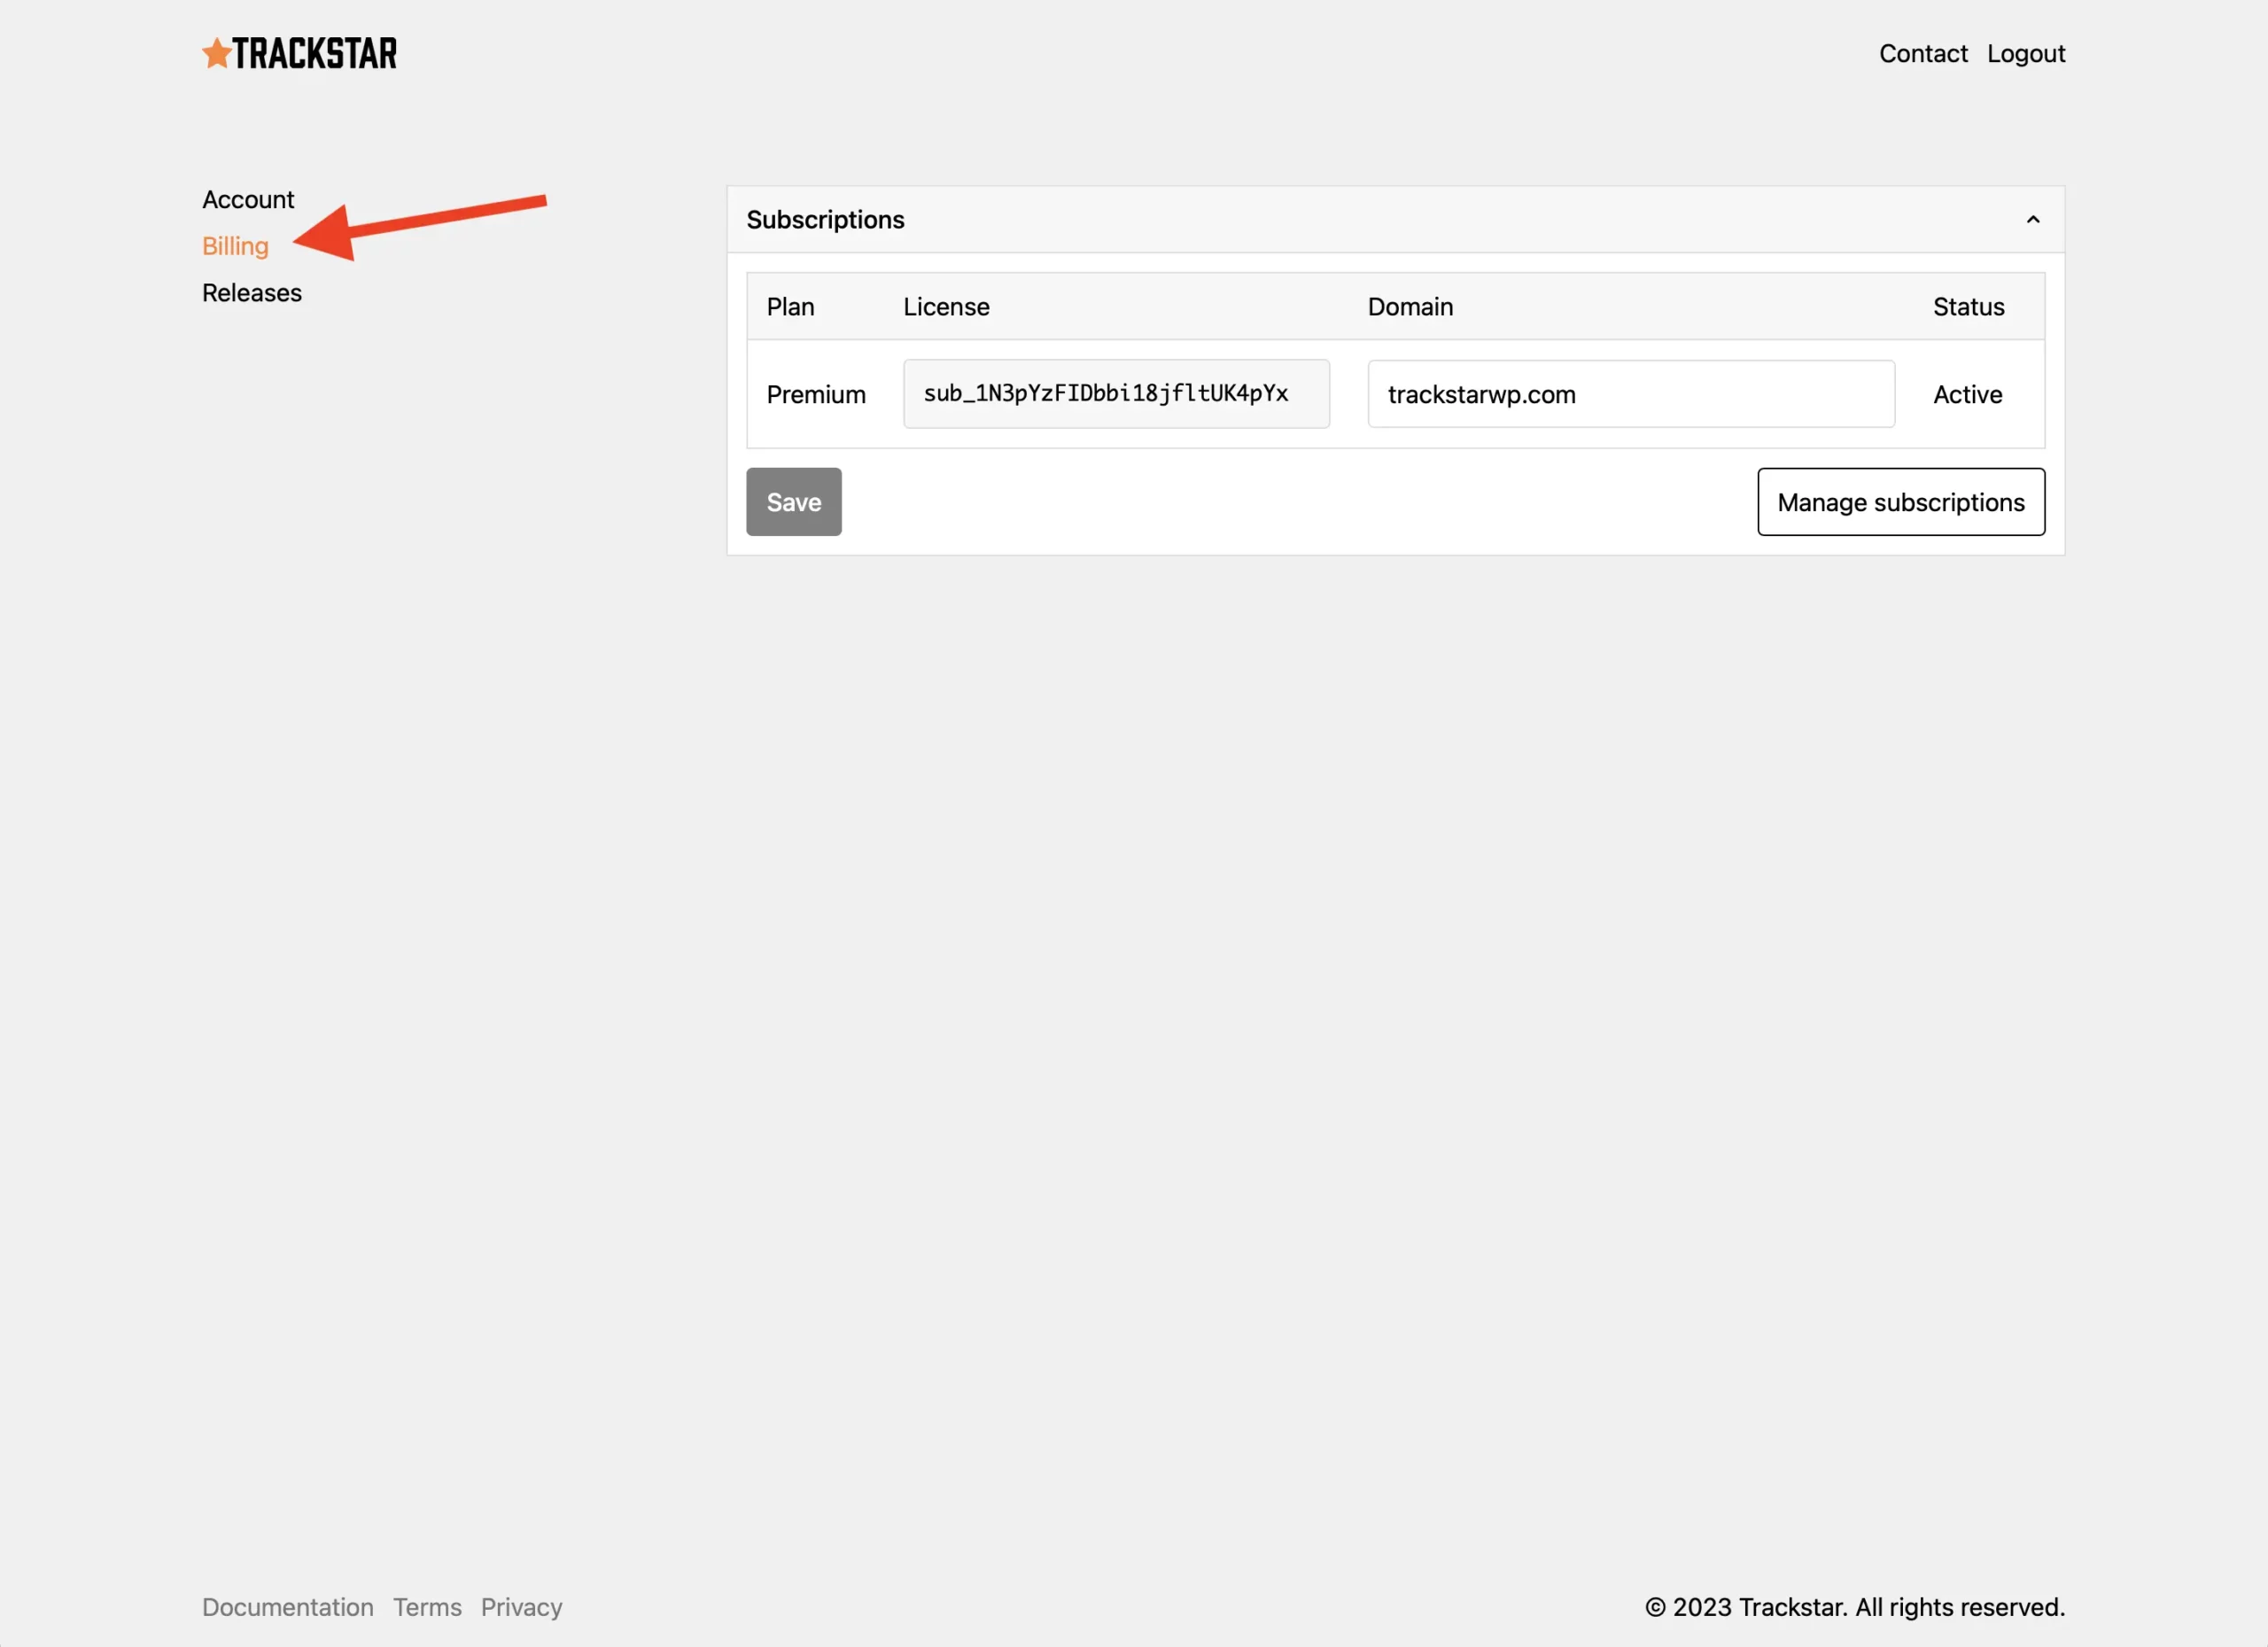
Activate your subscription
Assuming you’re already logged into your Trackstar account, navigate to Billing.
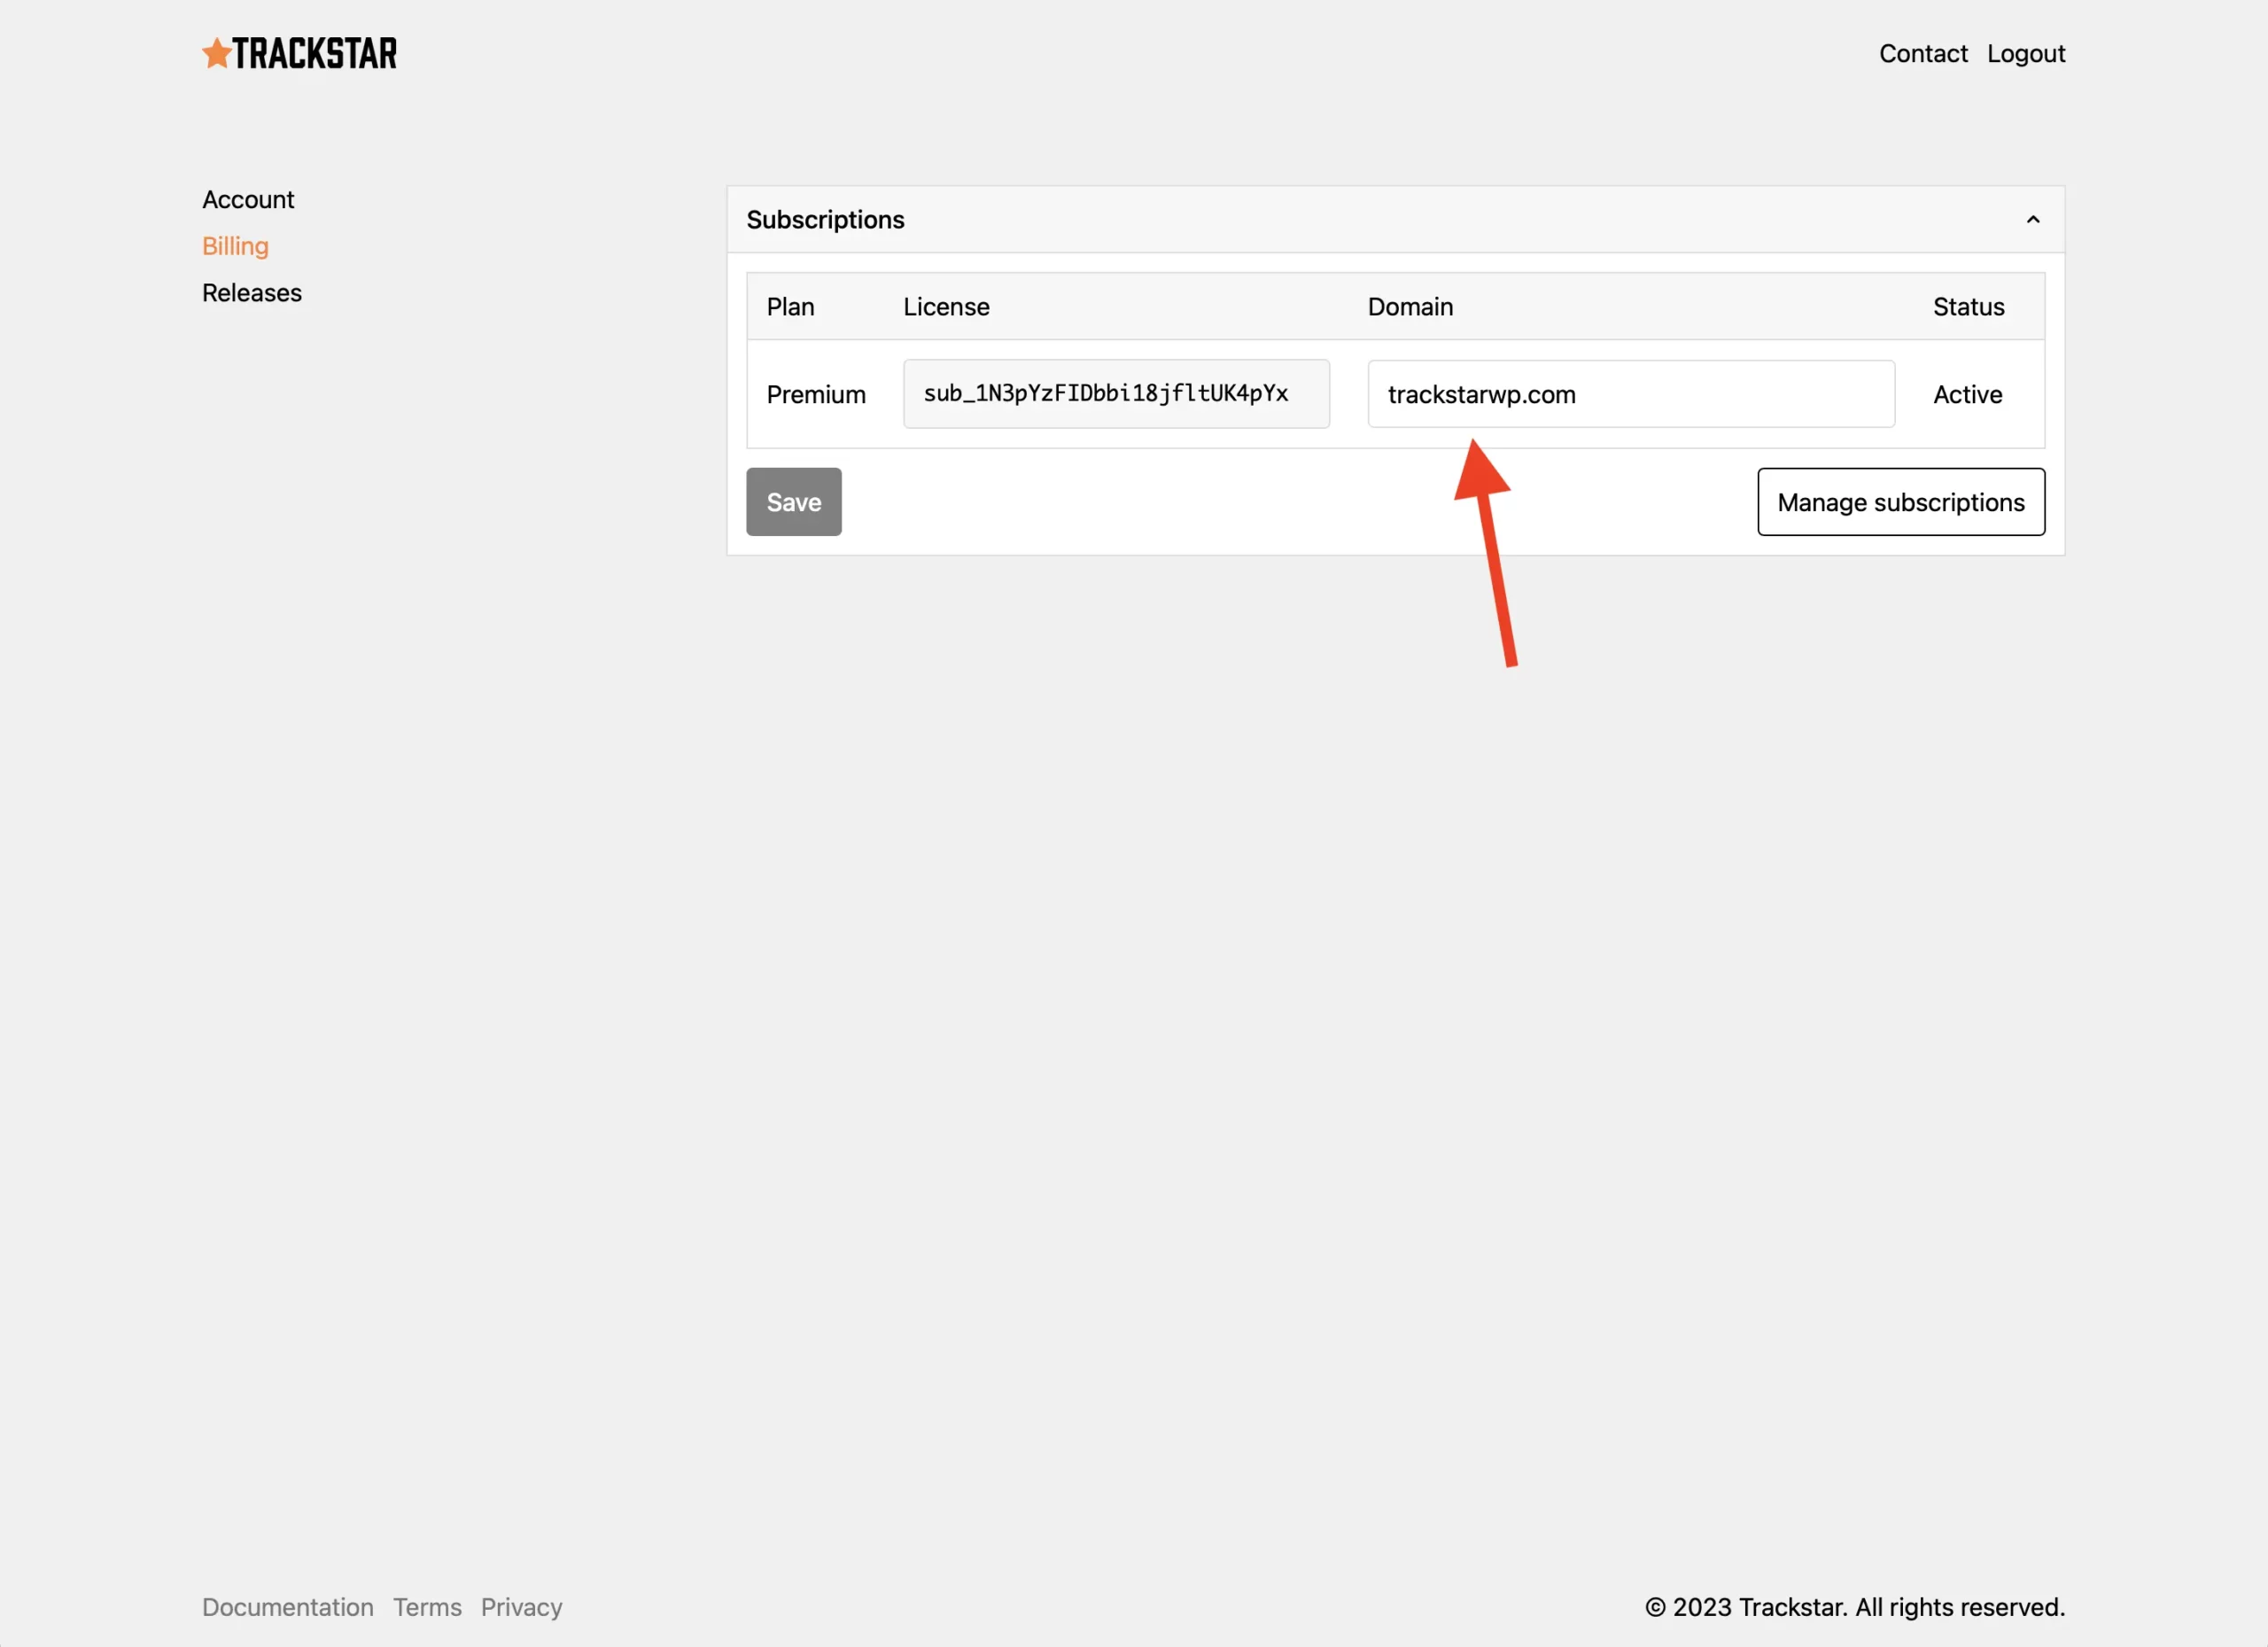
Find the subscription you want to activate and enter your domain name. Important: enter your domain name exactly as it’s used on your site. If you use a subdomain (like www), include it, otherwise don’t.
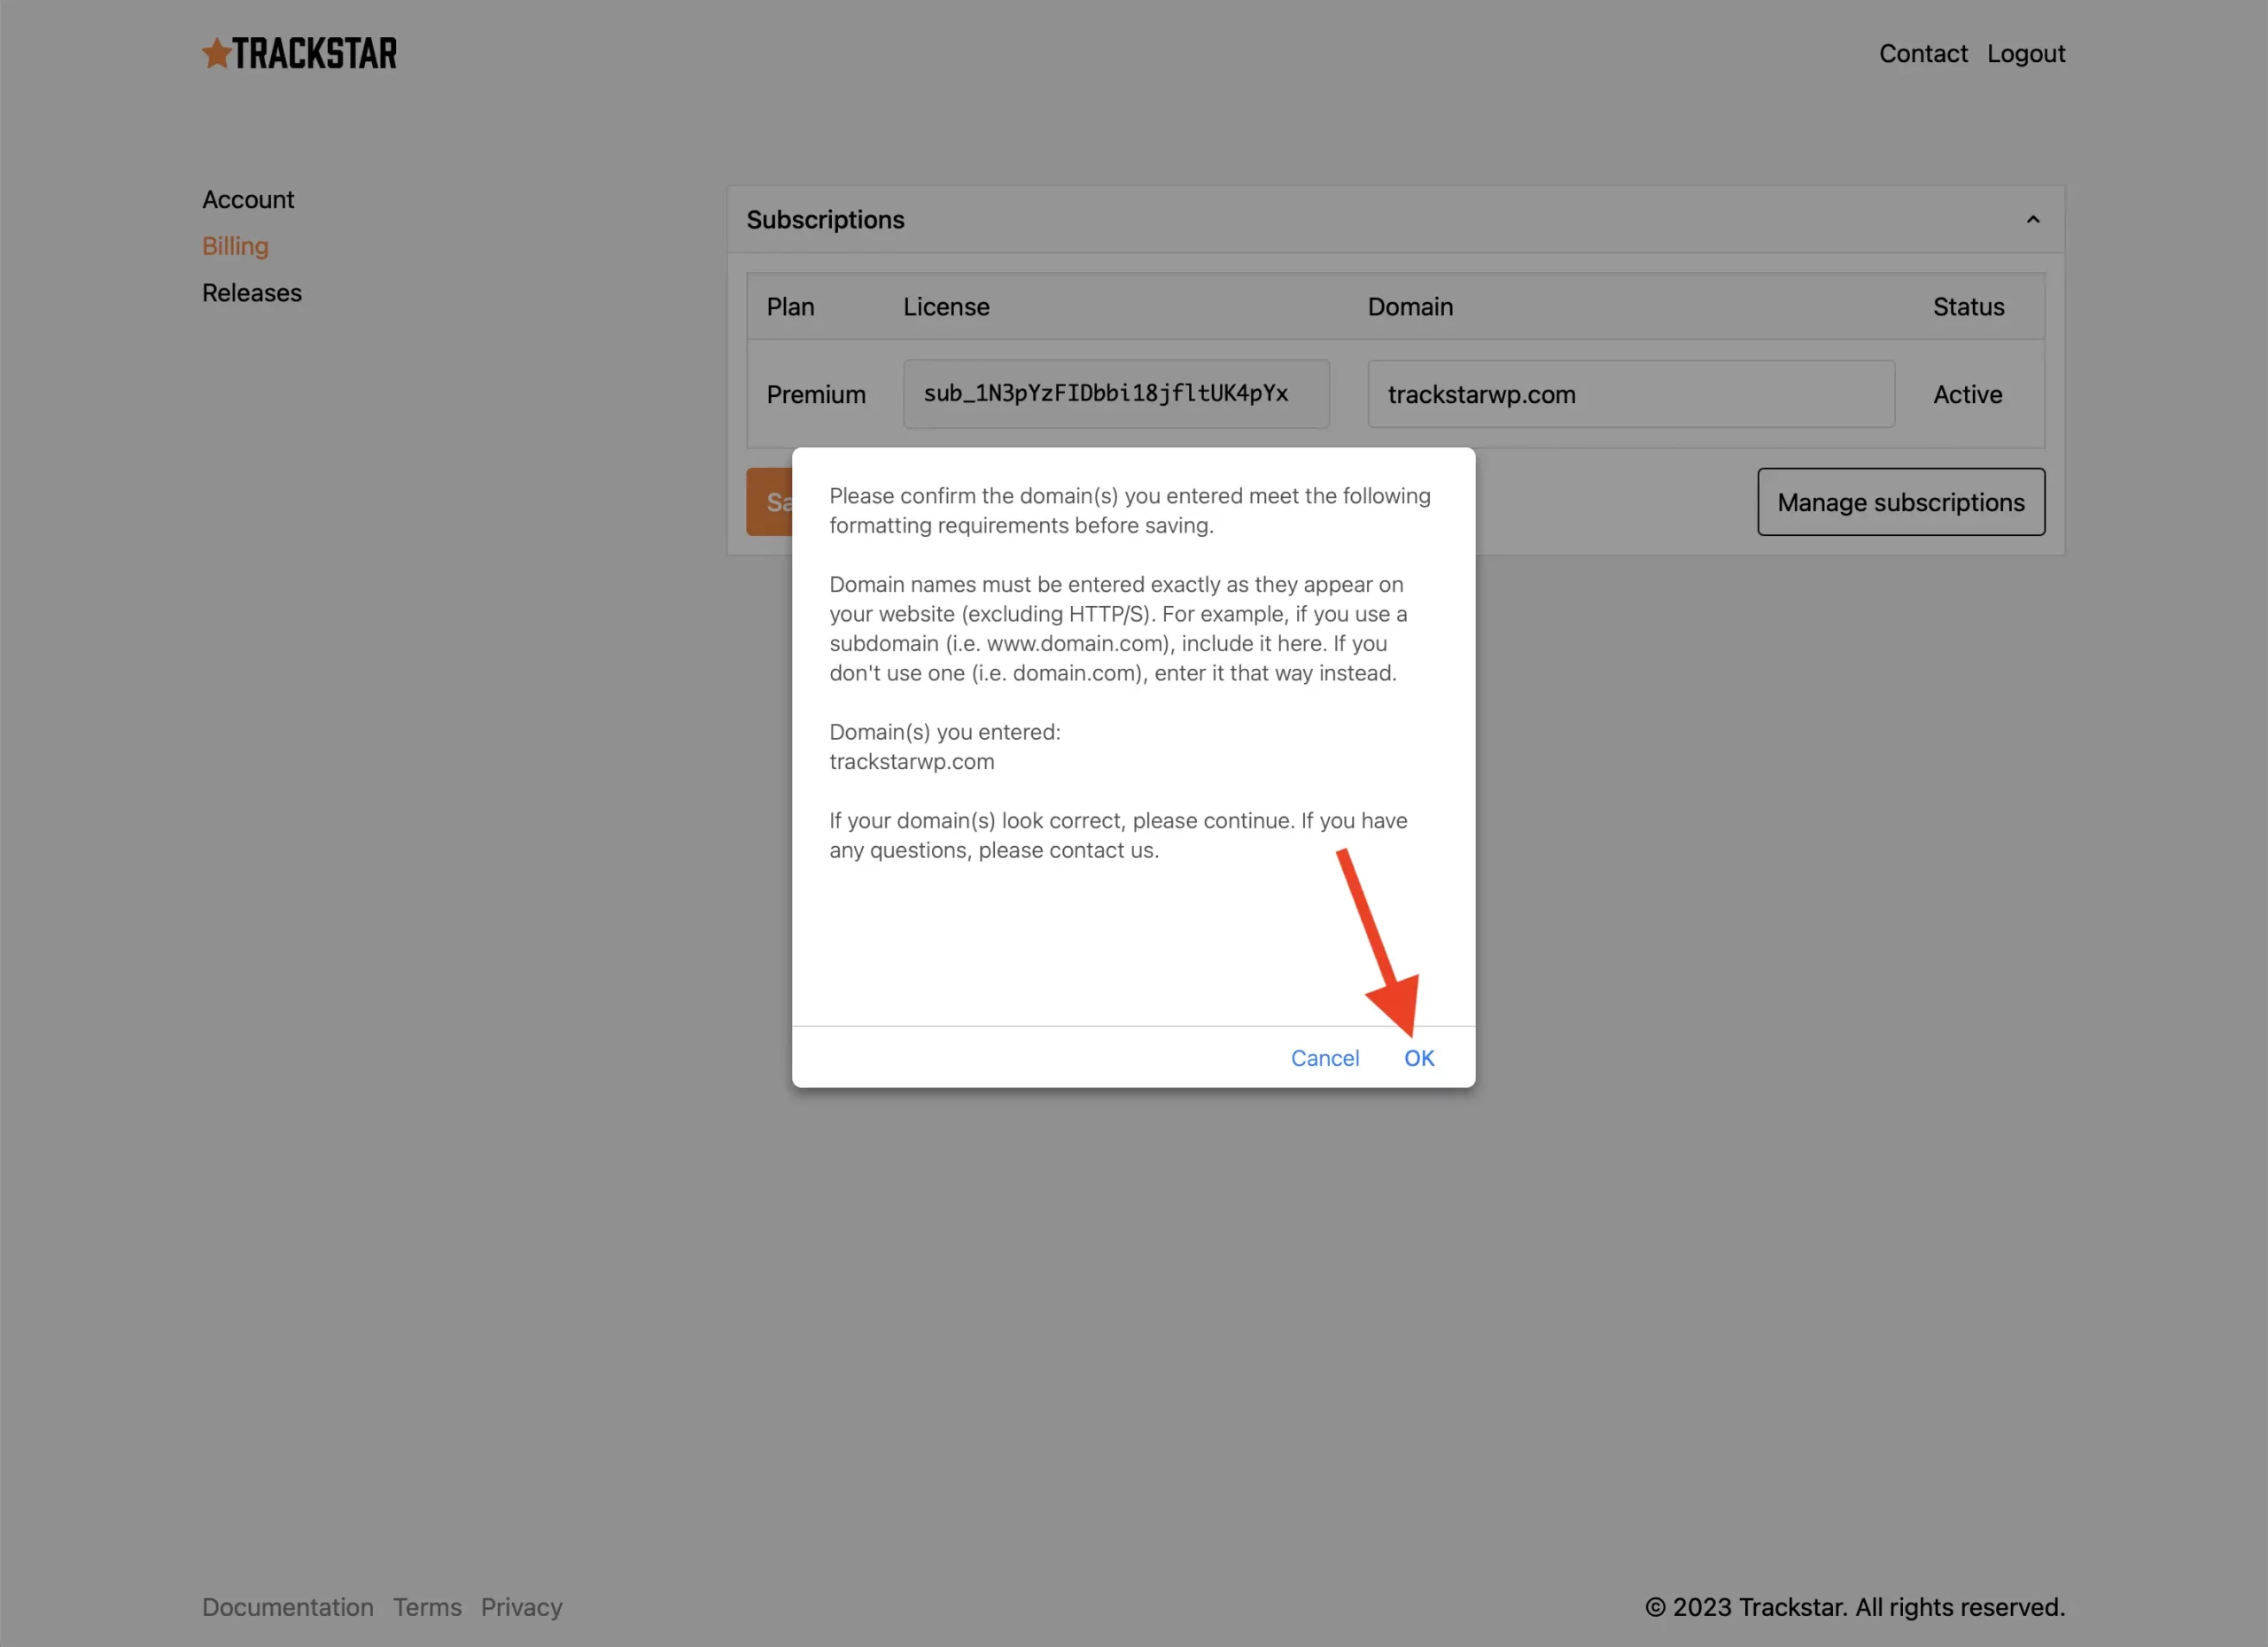
Click the Save button. You will see an alert to confirm your domain name matches the expected format. Click OK to proceed with saving.
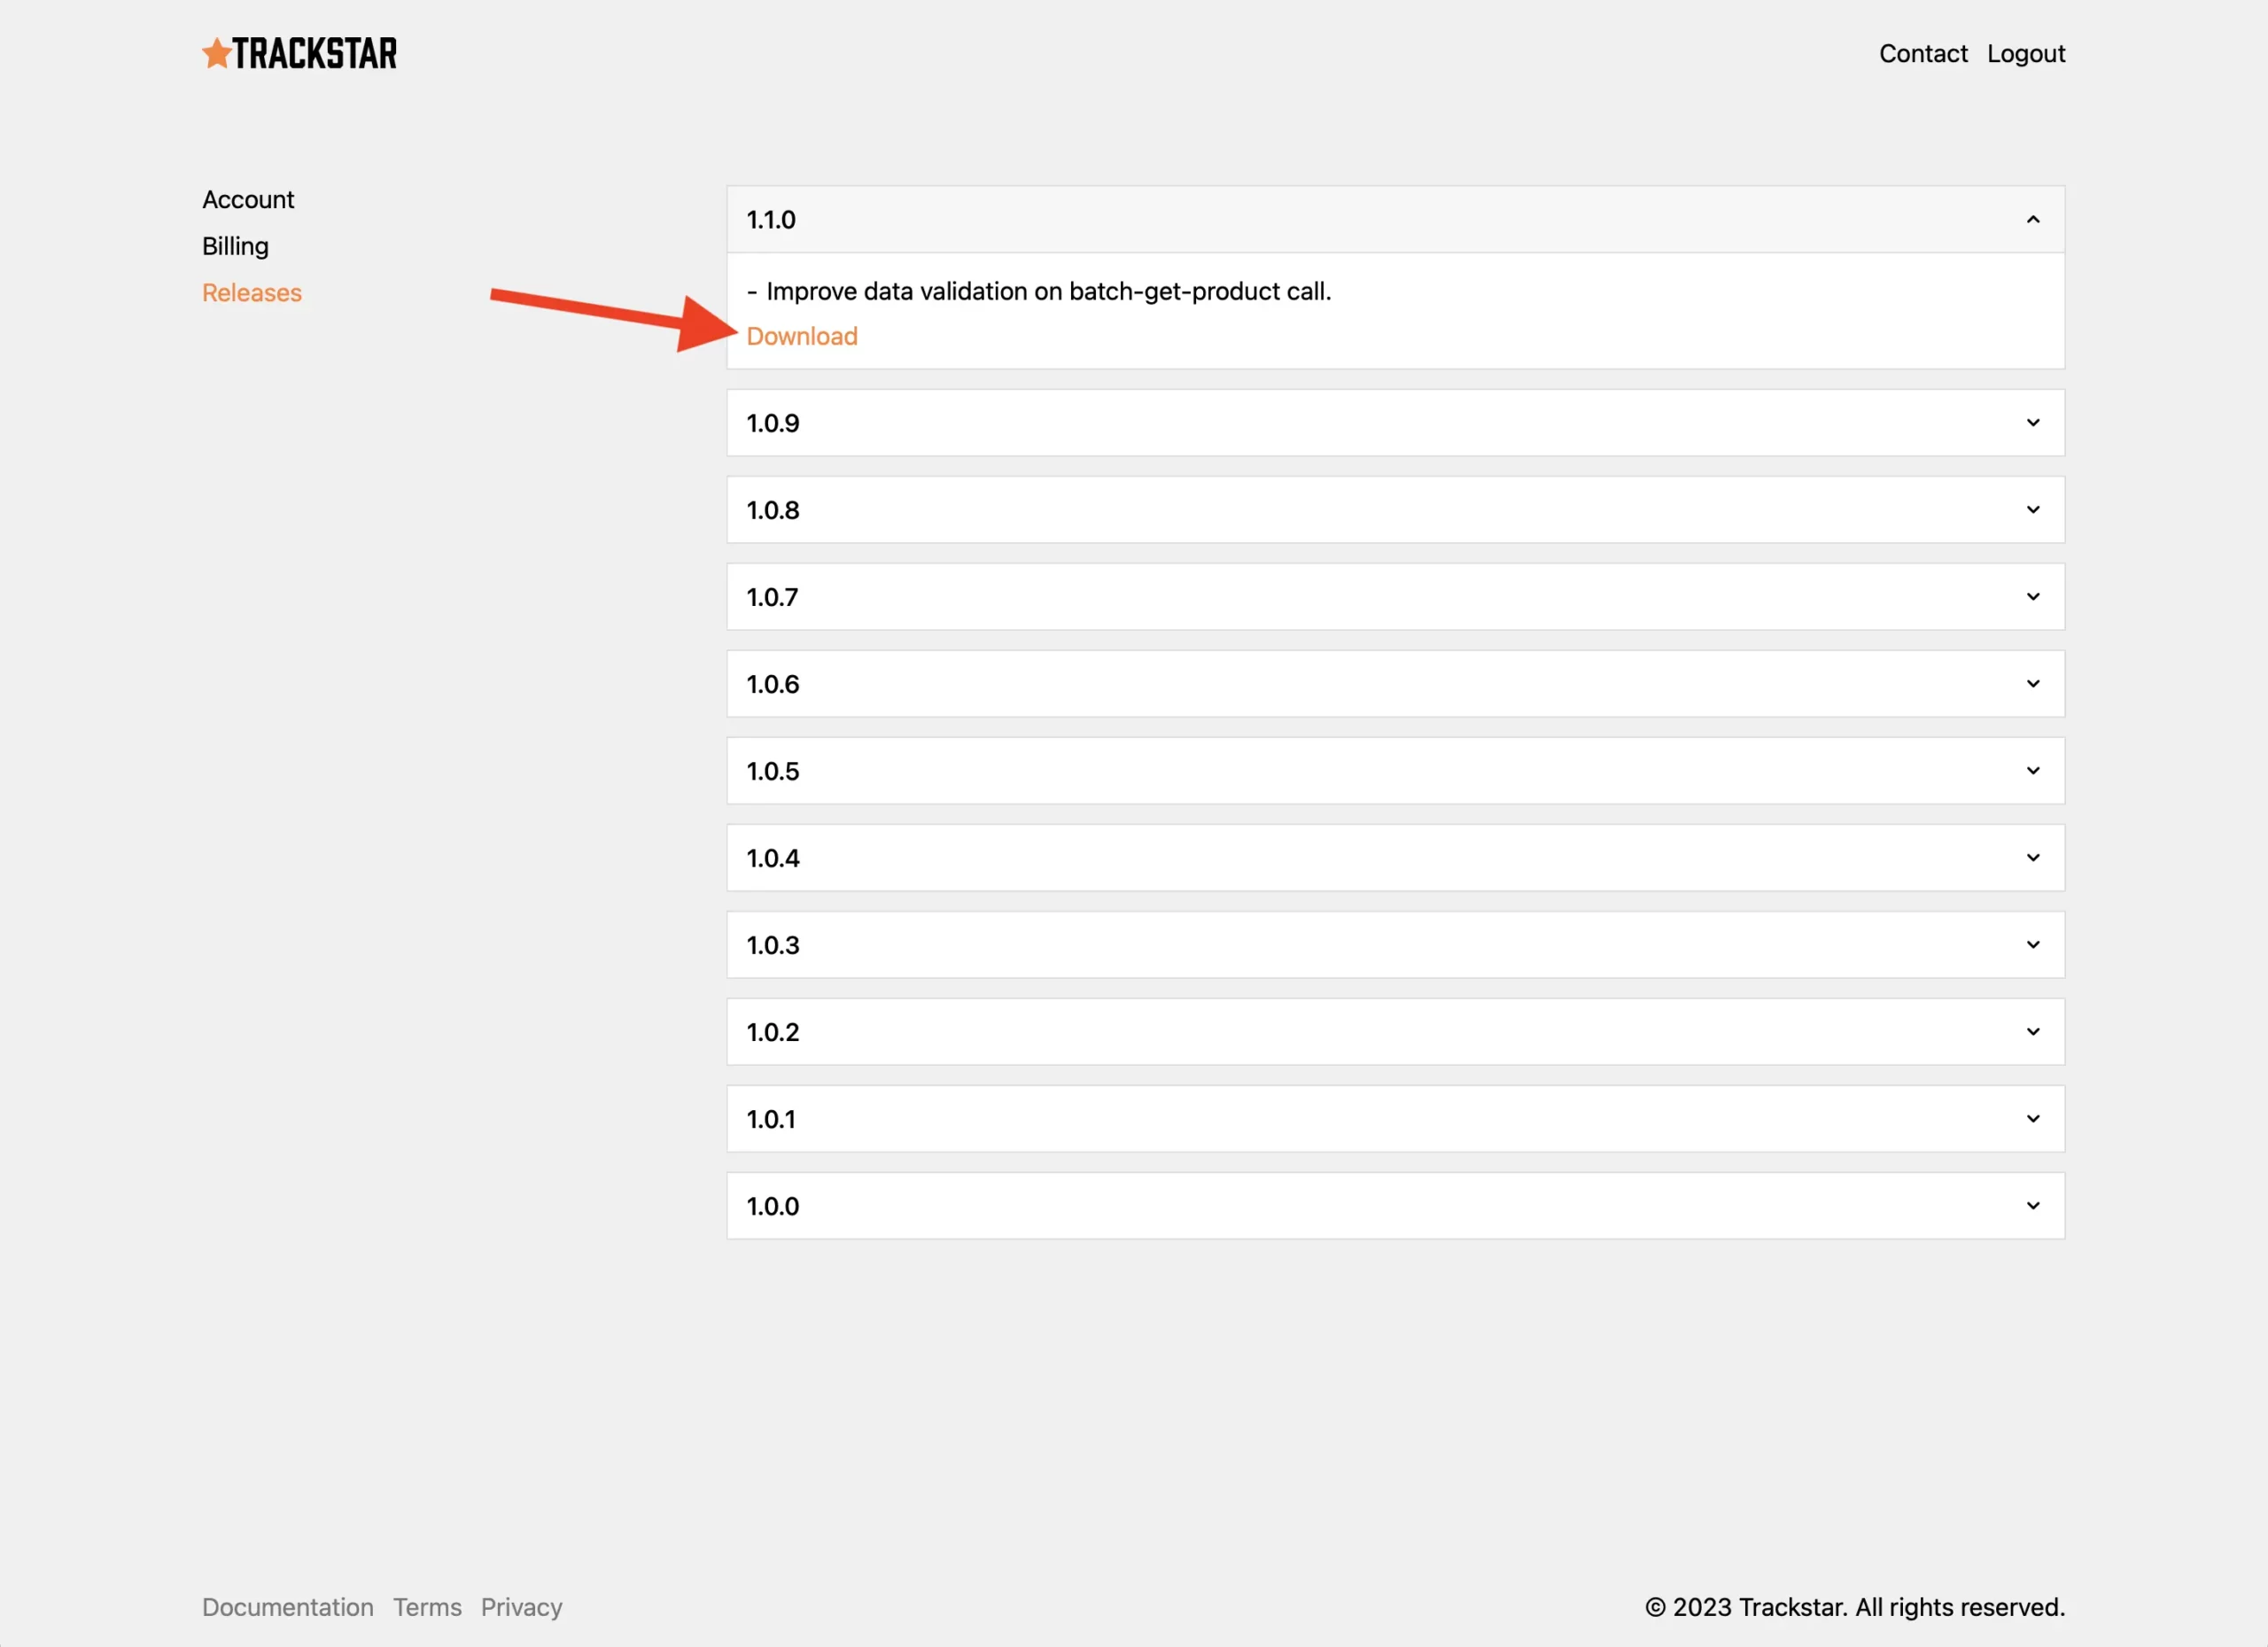
Download the plugin
Assuming you’re still logged into your Trackstar account, navigate to Releases.
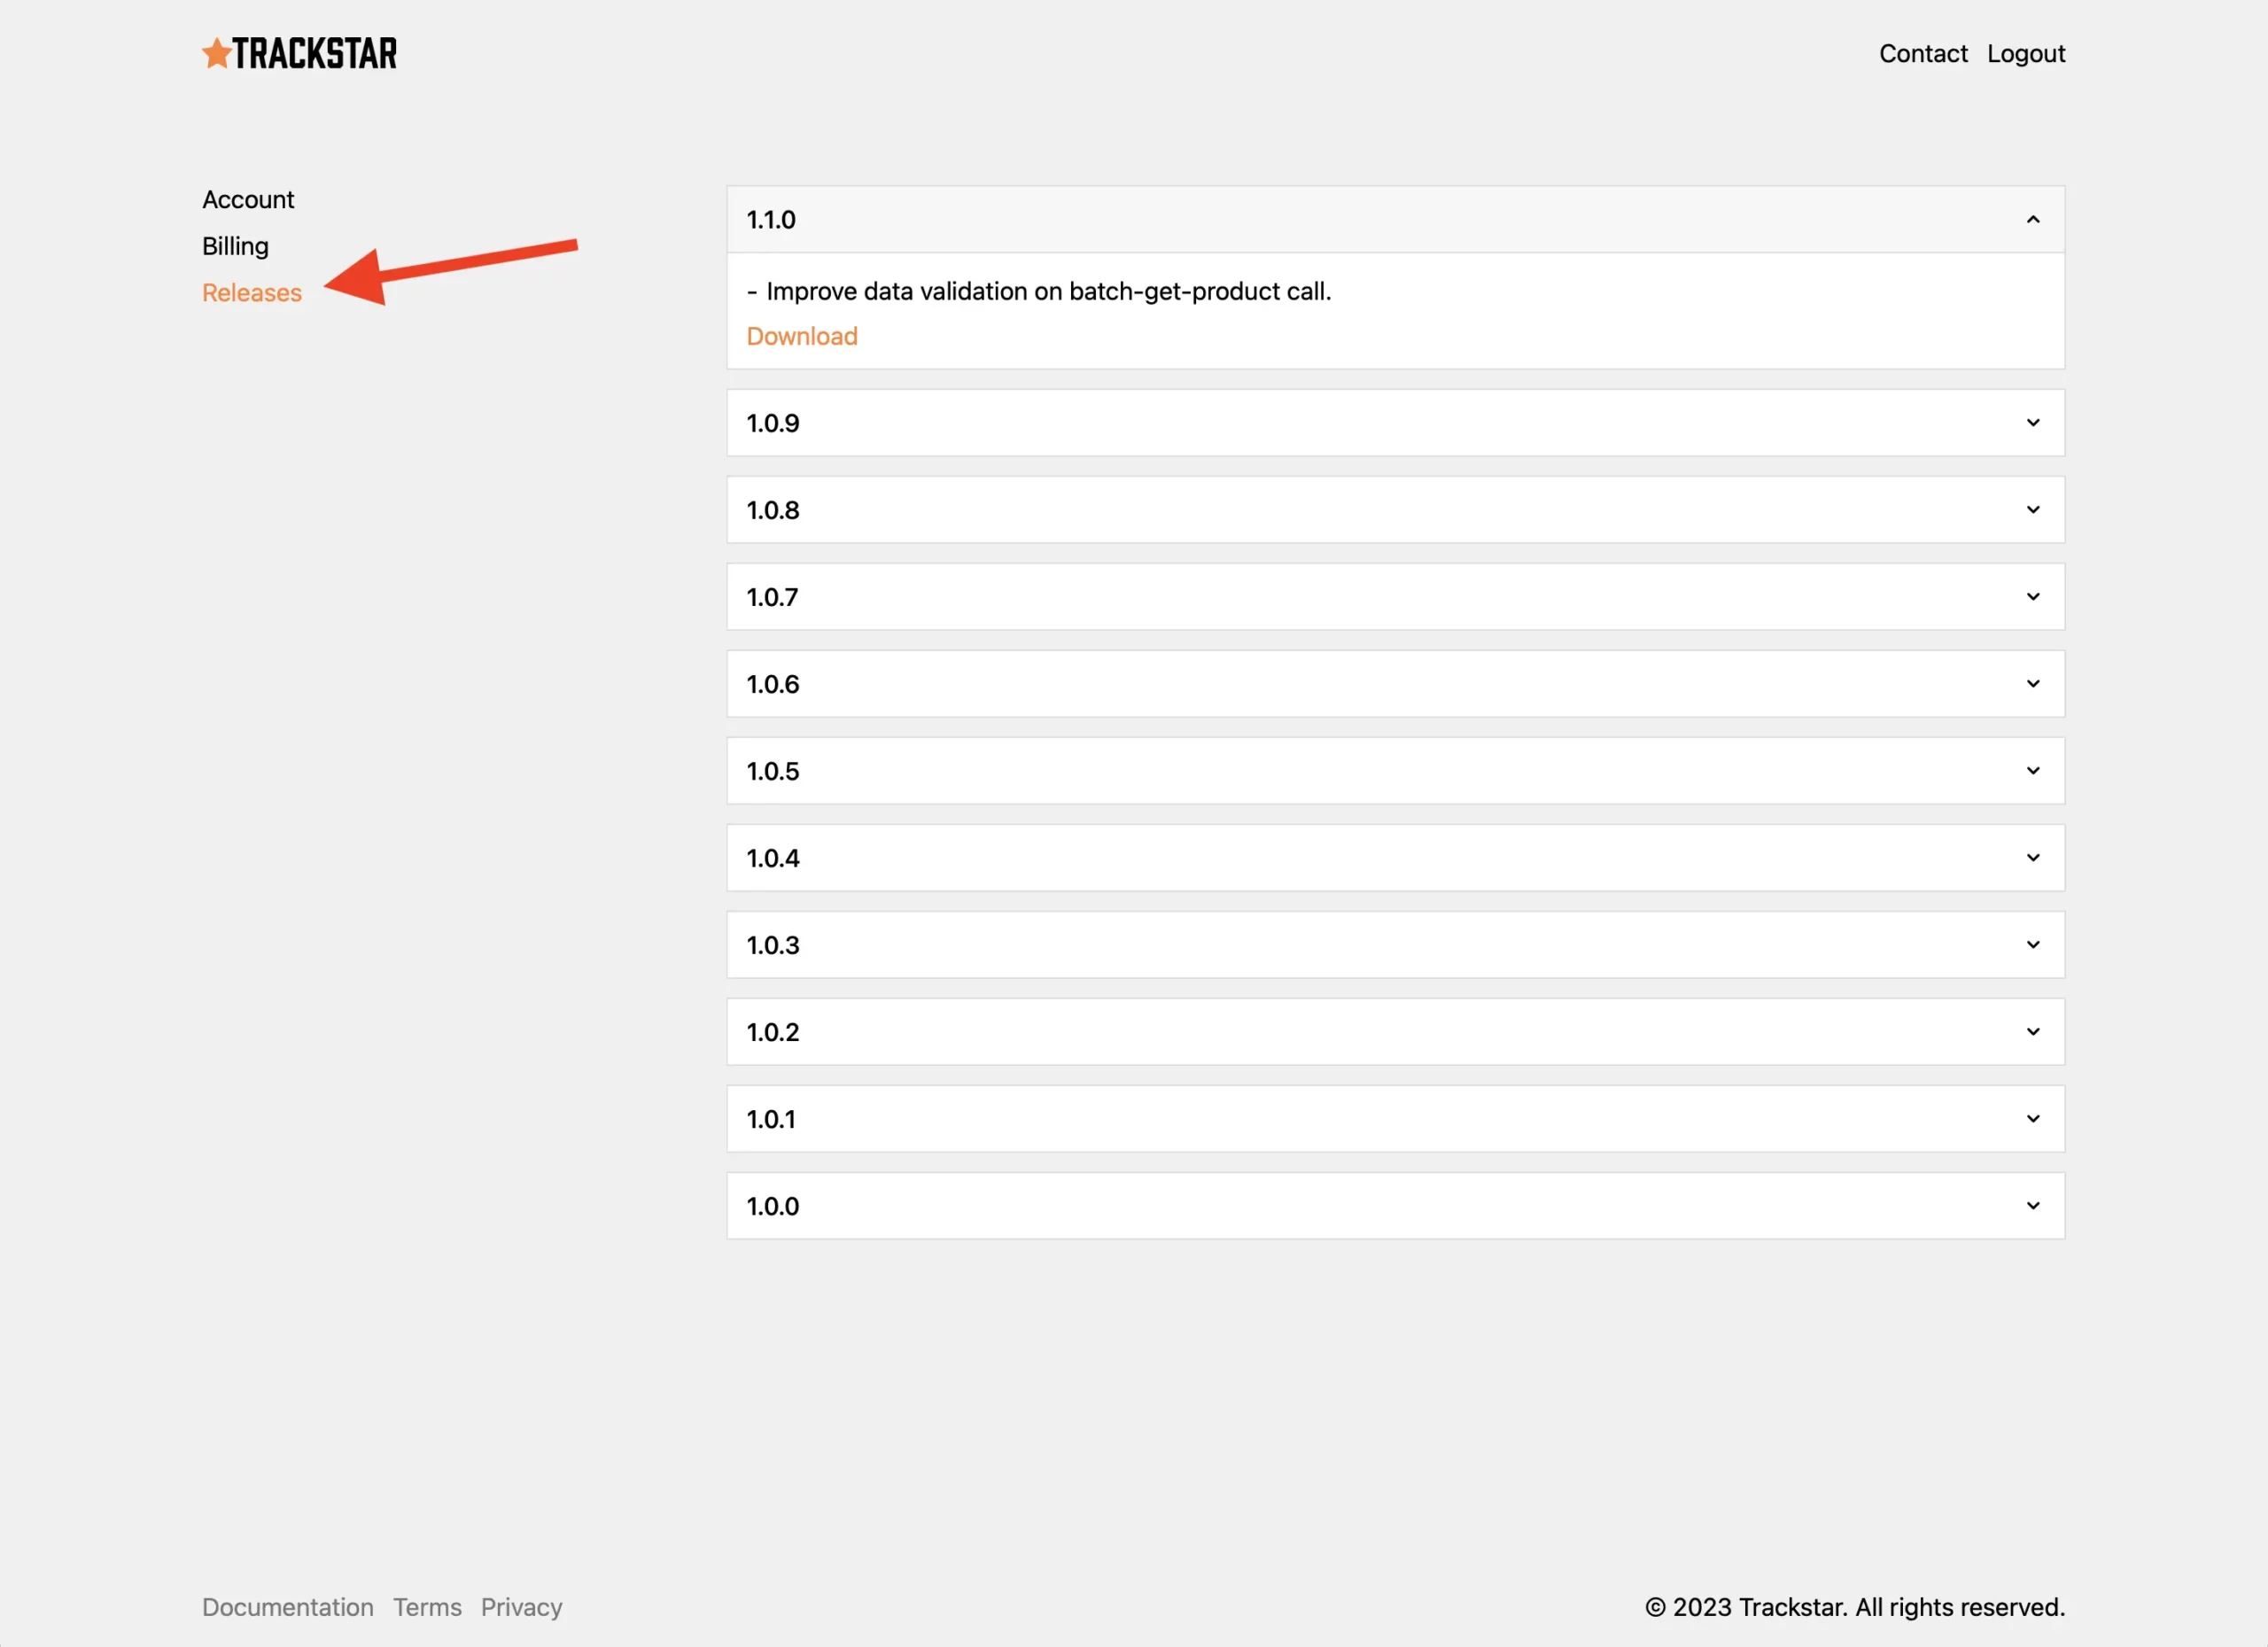
The latest release will be at the top of the page. Click the Download link. Depending on your browser, you may have to give permission to allow the download.
Install the plugin
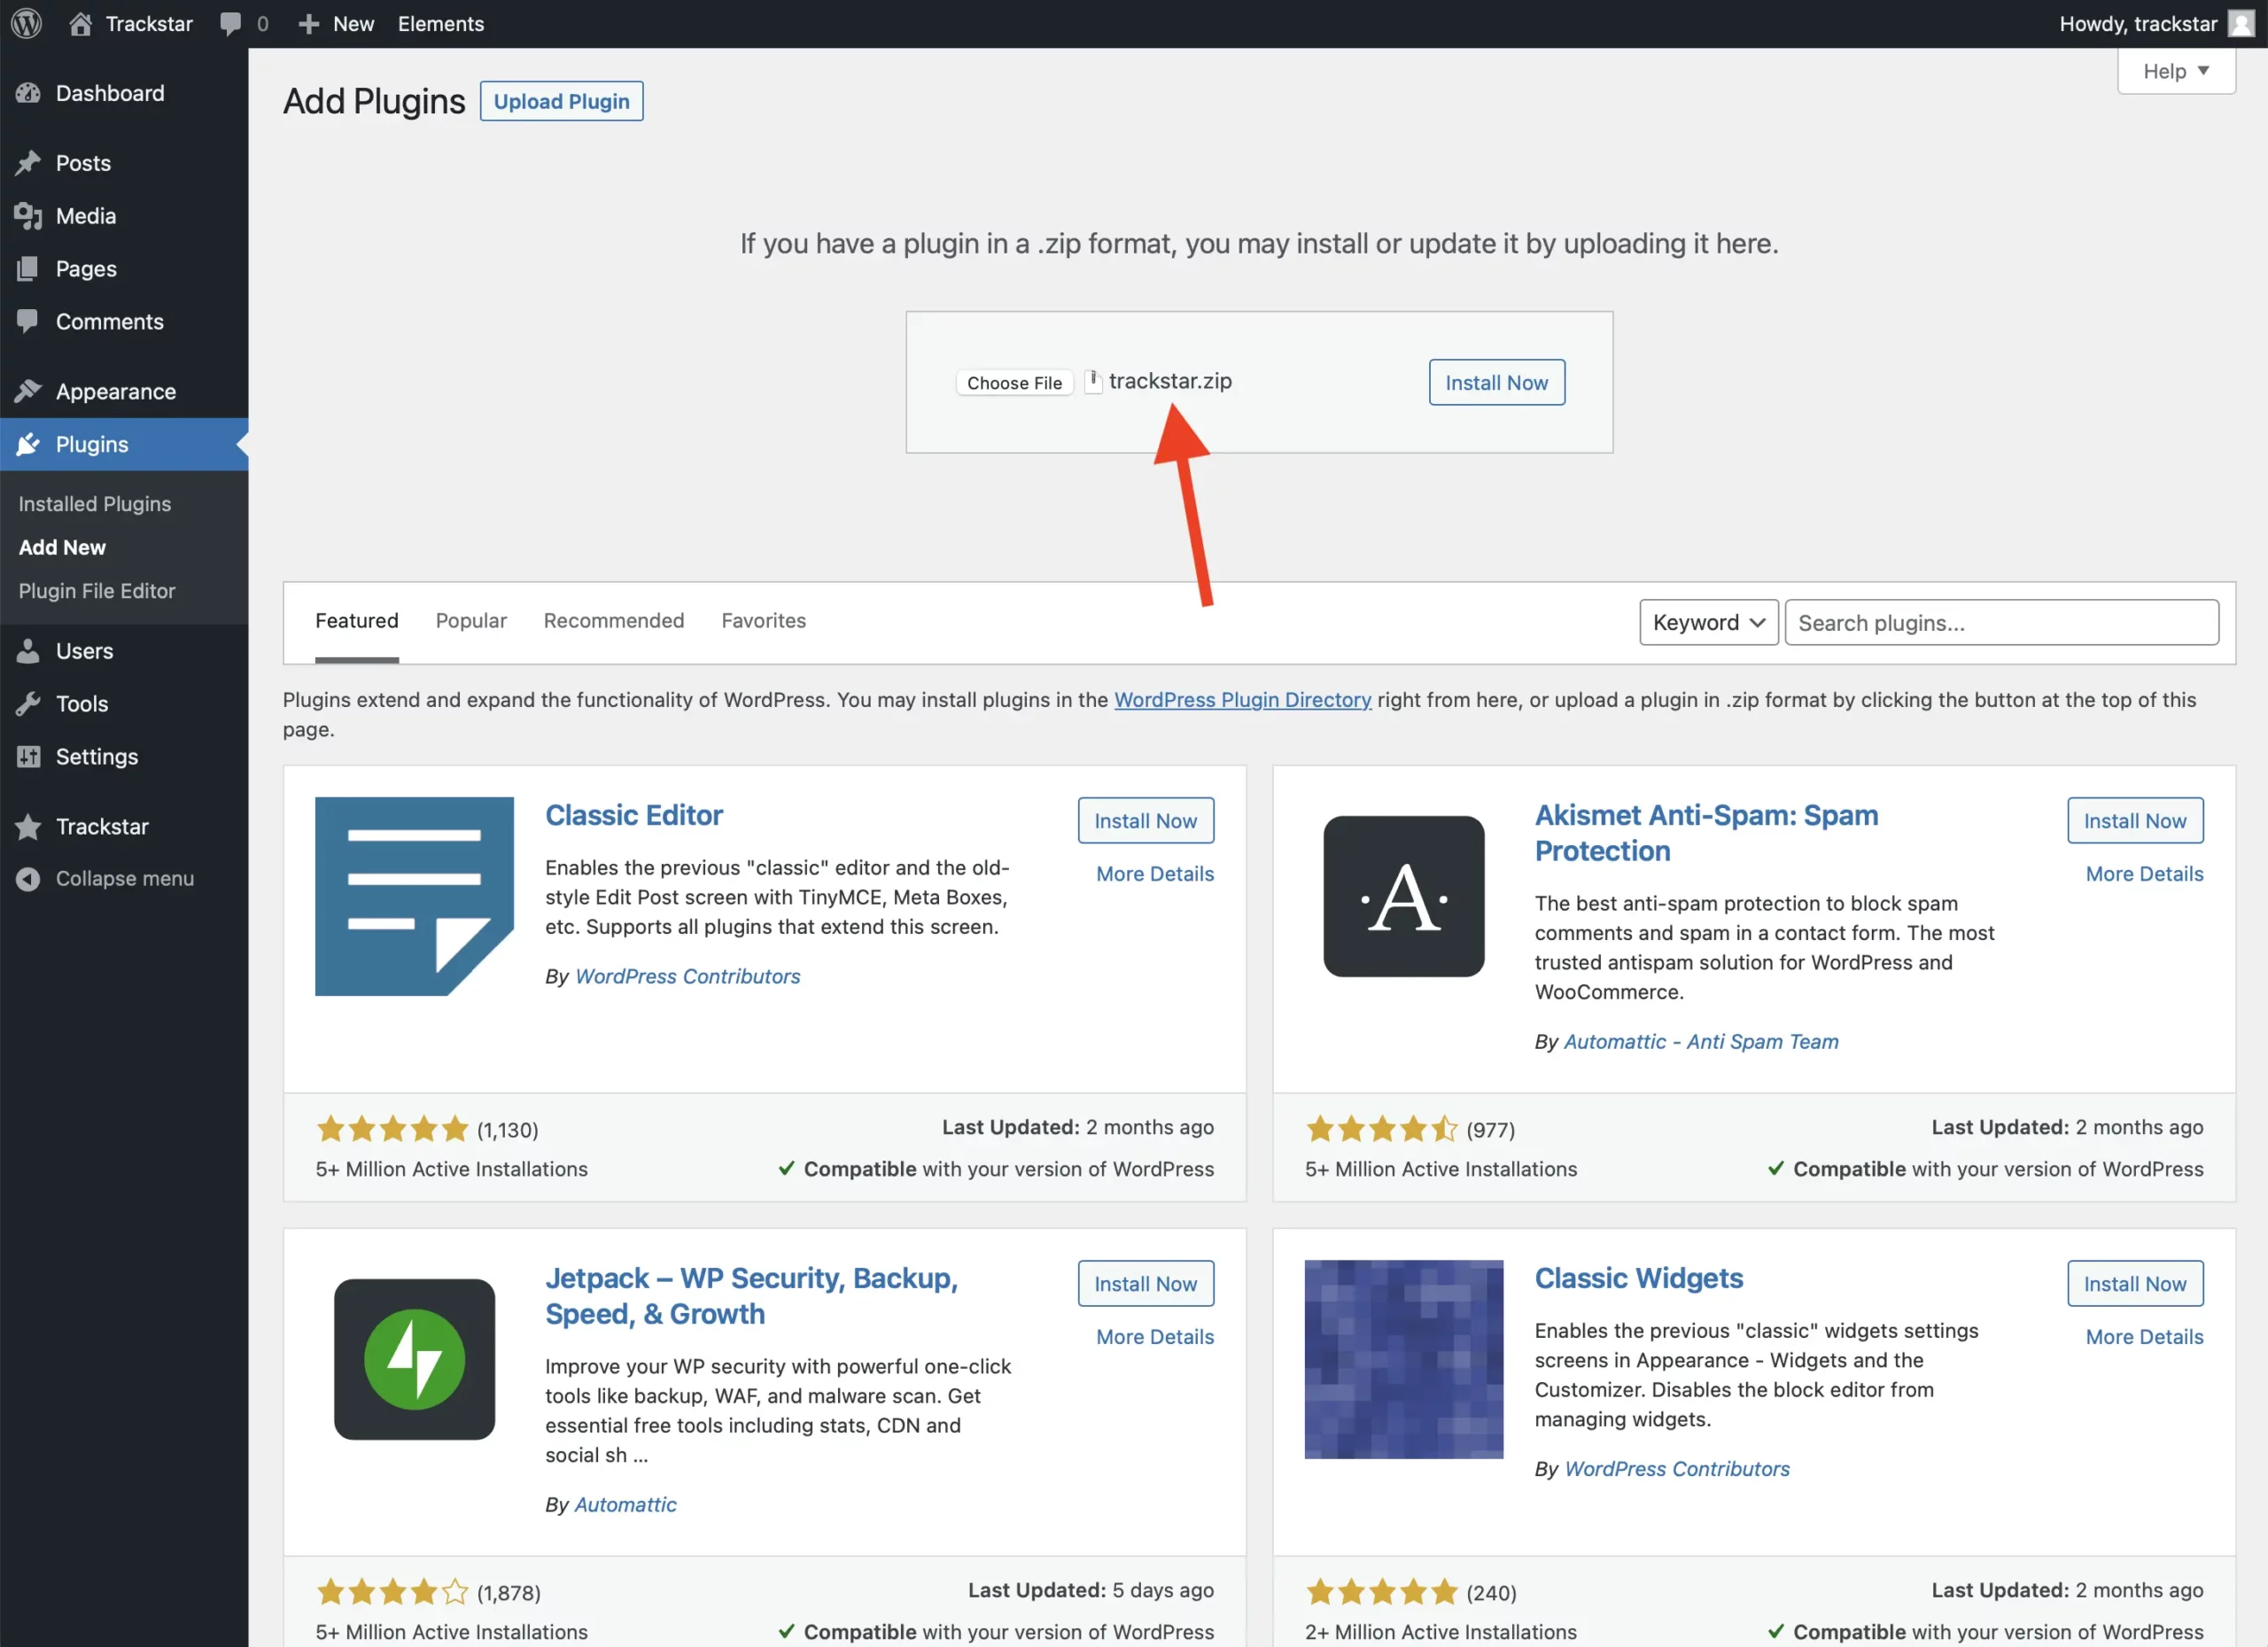
Assuming you’re logged into your WordPress admin, navigate to Plugins > Add New.
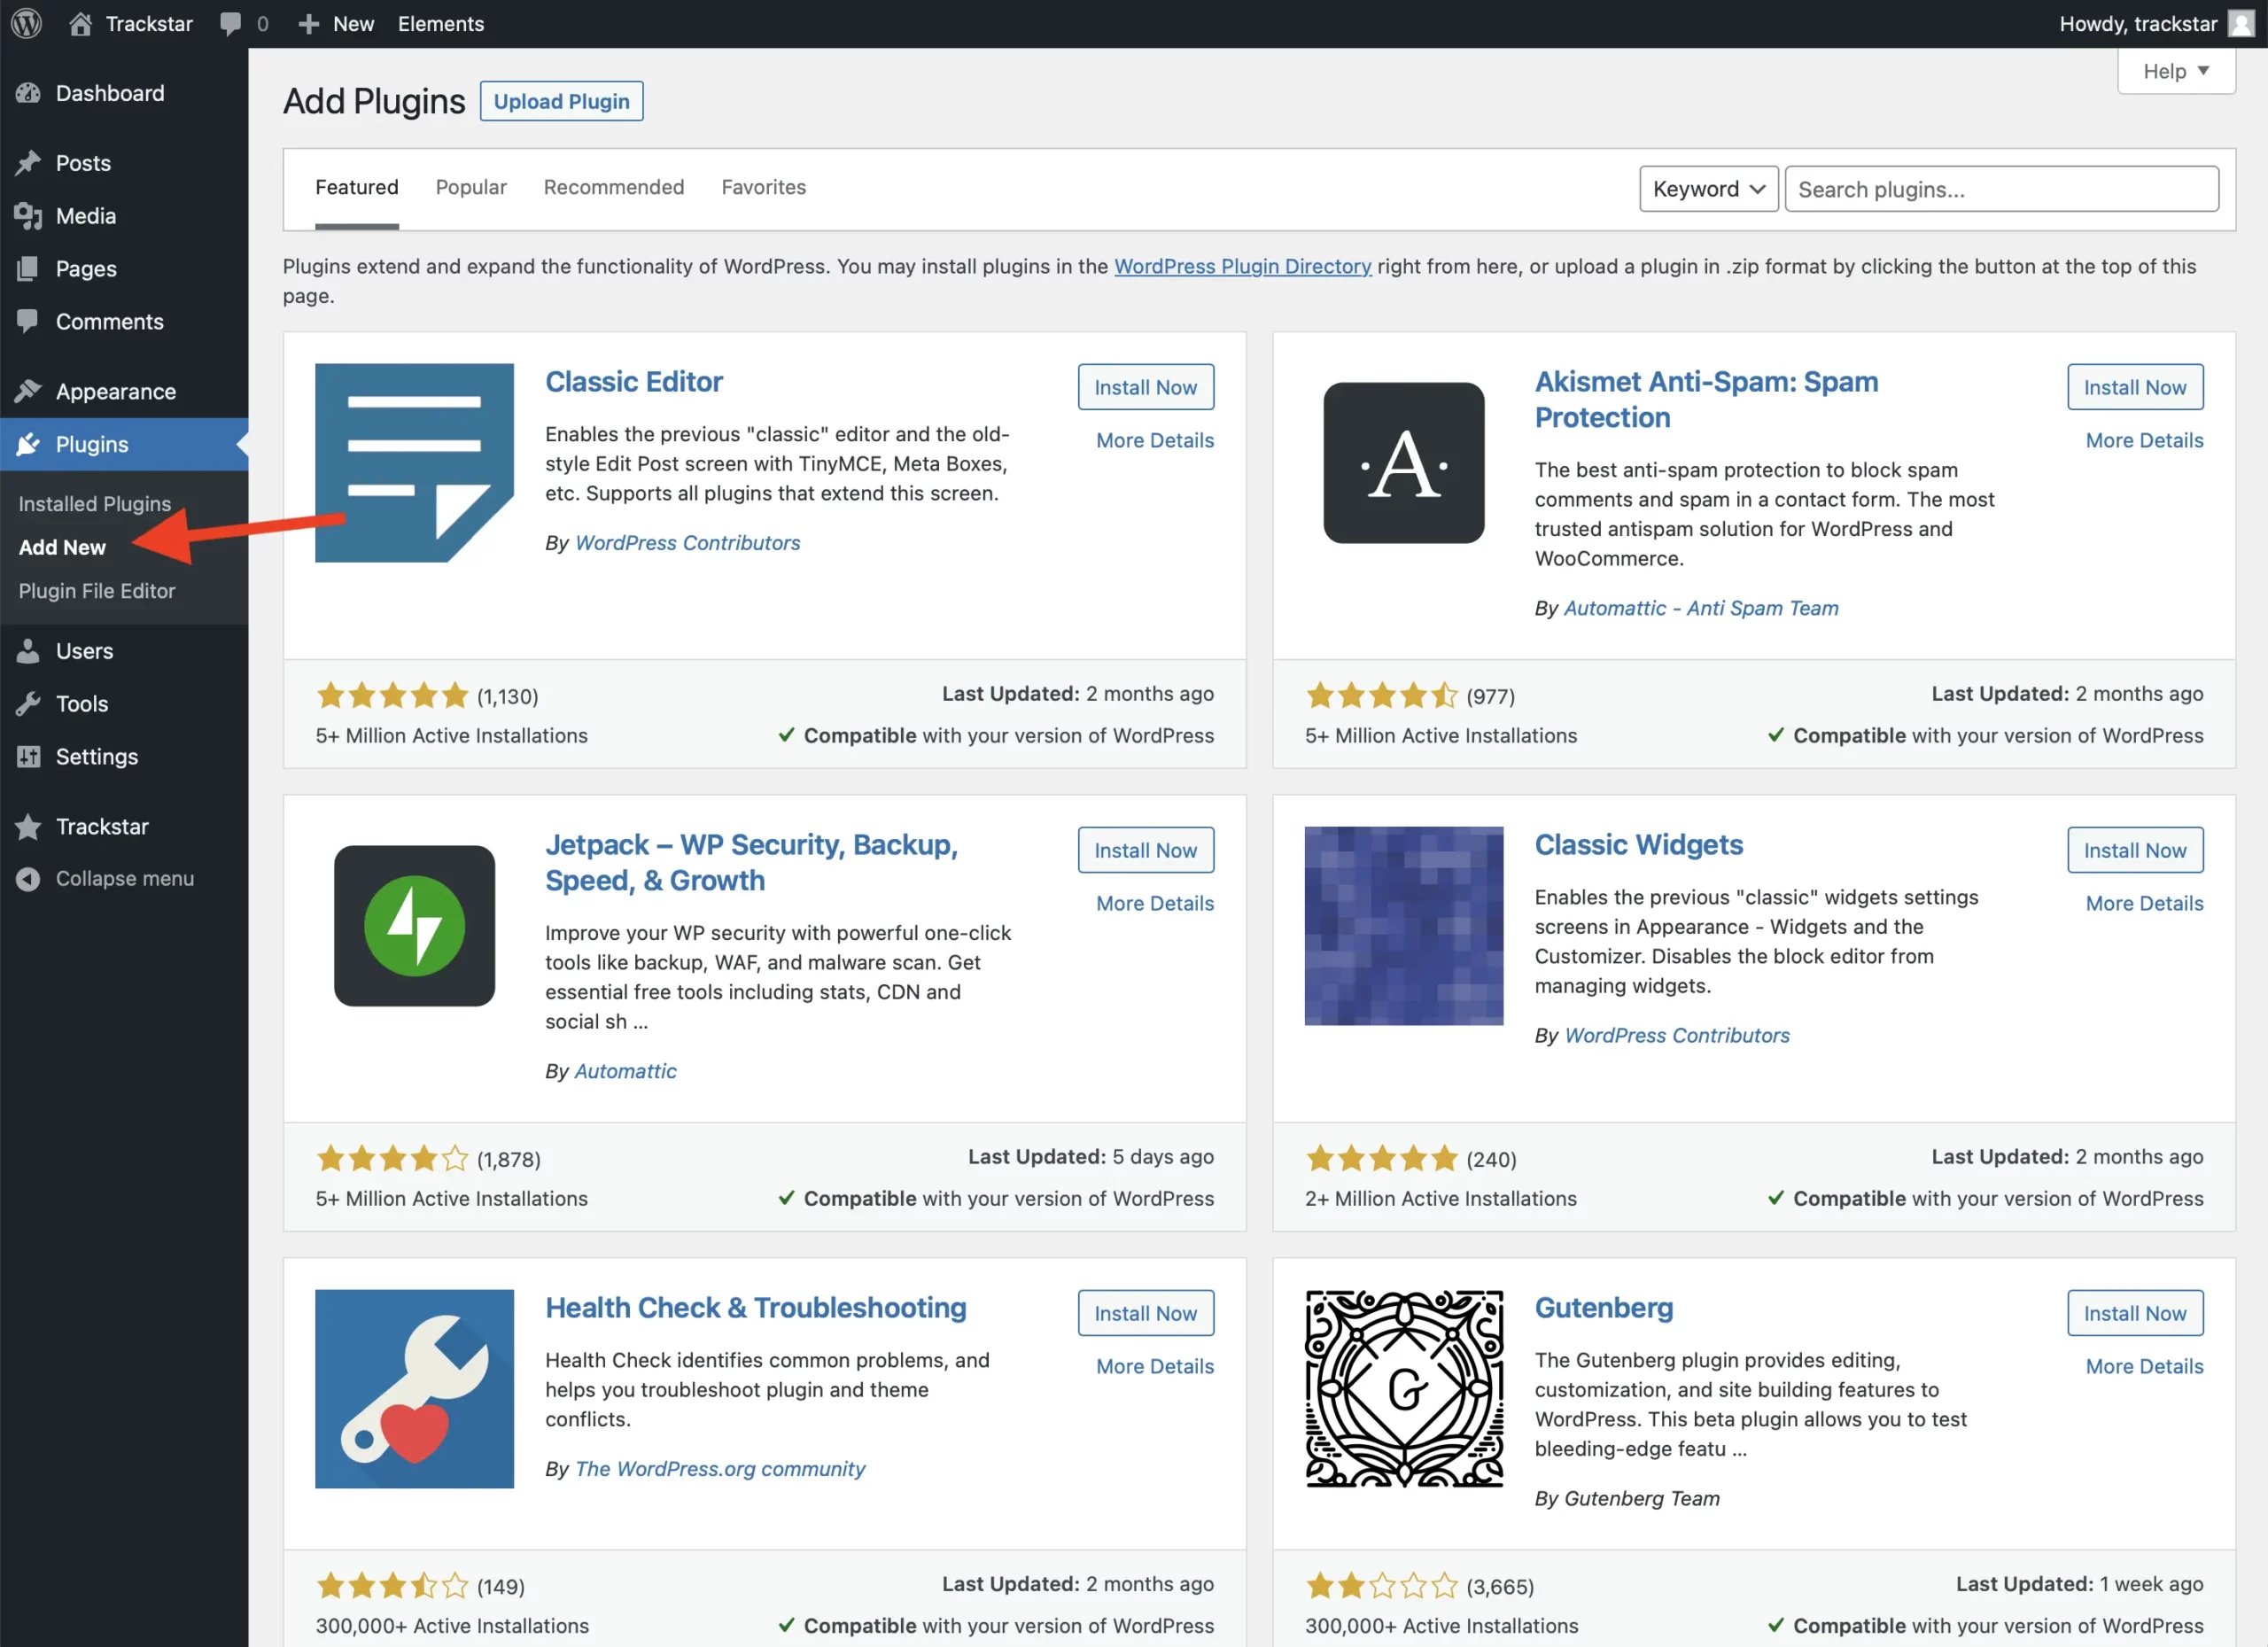
Click the Upload Plugin button.
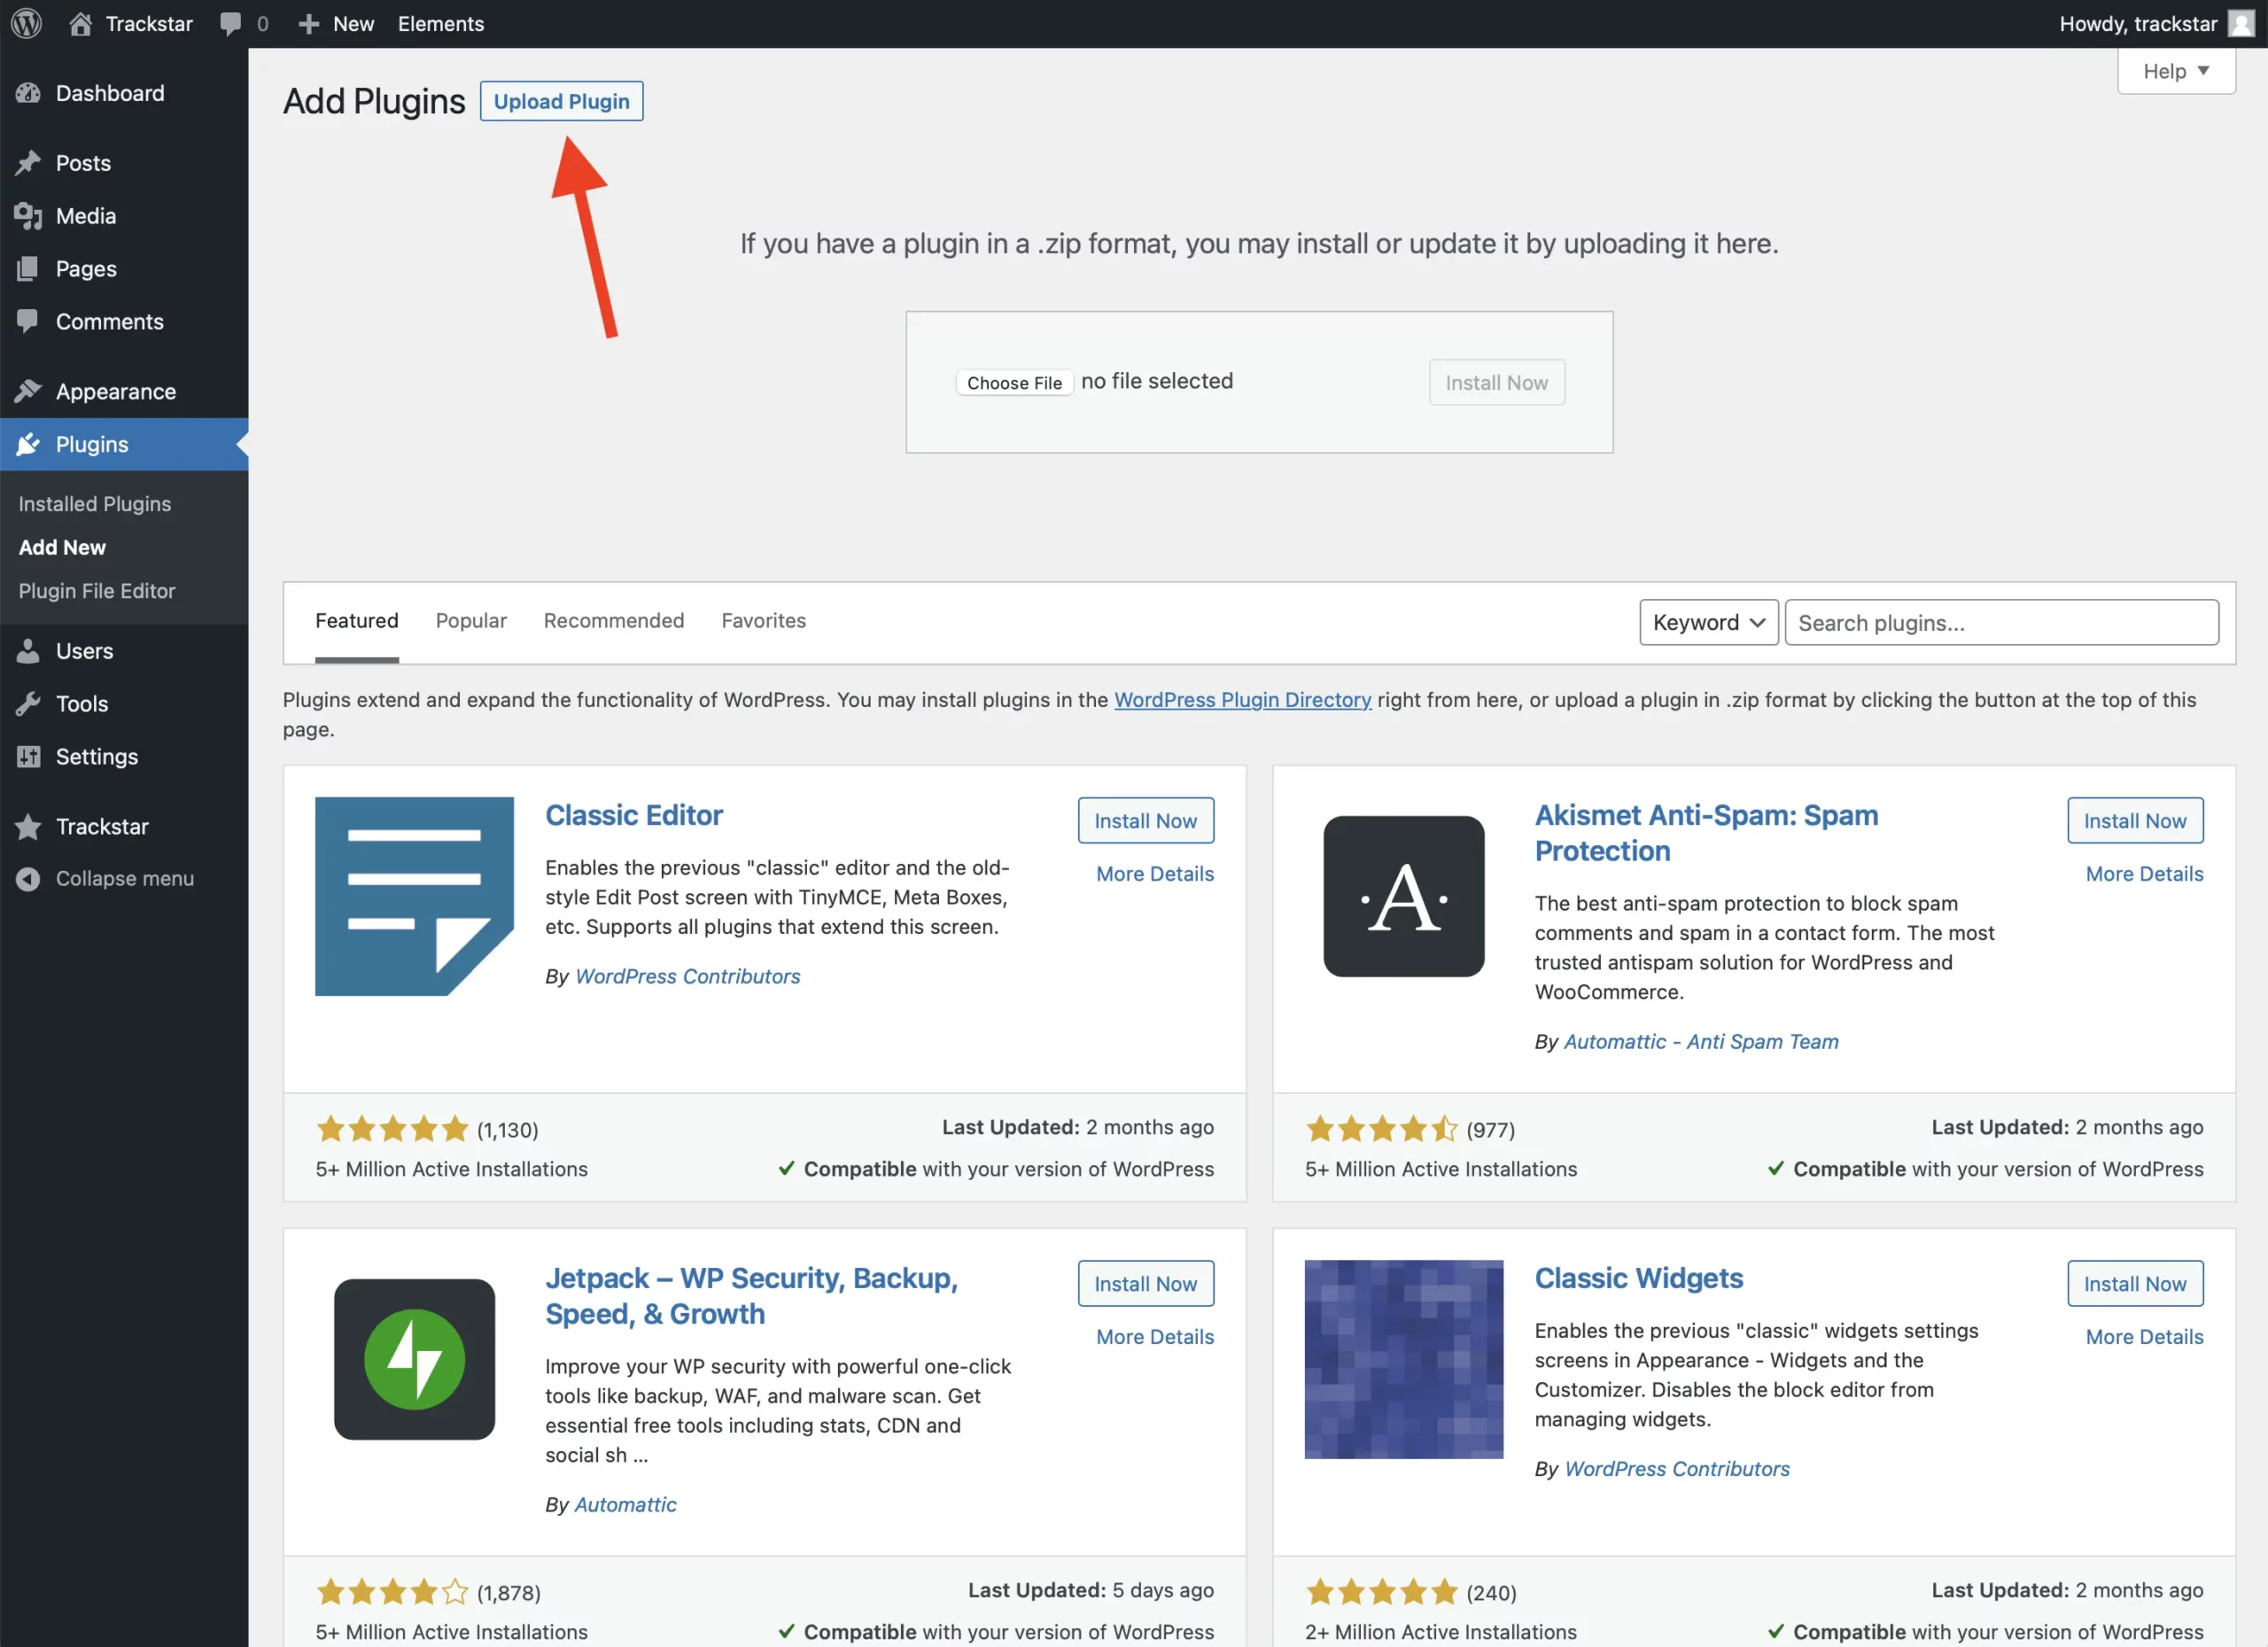
Click the Choose File button. This will open a file picker. Find and select the downloaded plugin. Important: make sure the downloaded plugin is in .zip format and the name of the .zip is trackstar. Depending on your computer, the plugin may have been automatically unzipped or renamed when you downloaded it.
Click the Install Now button.
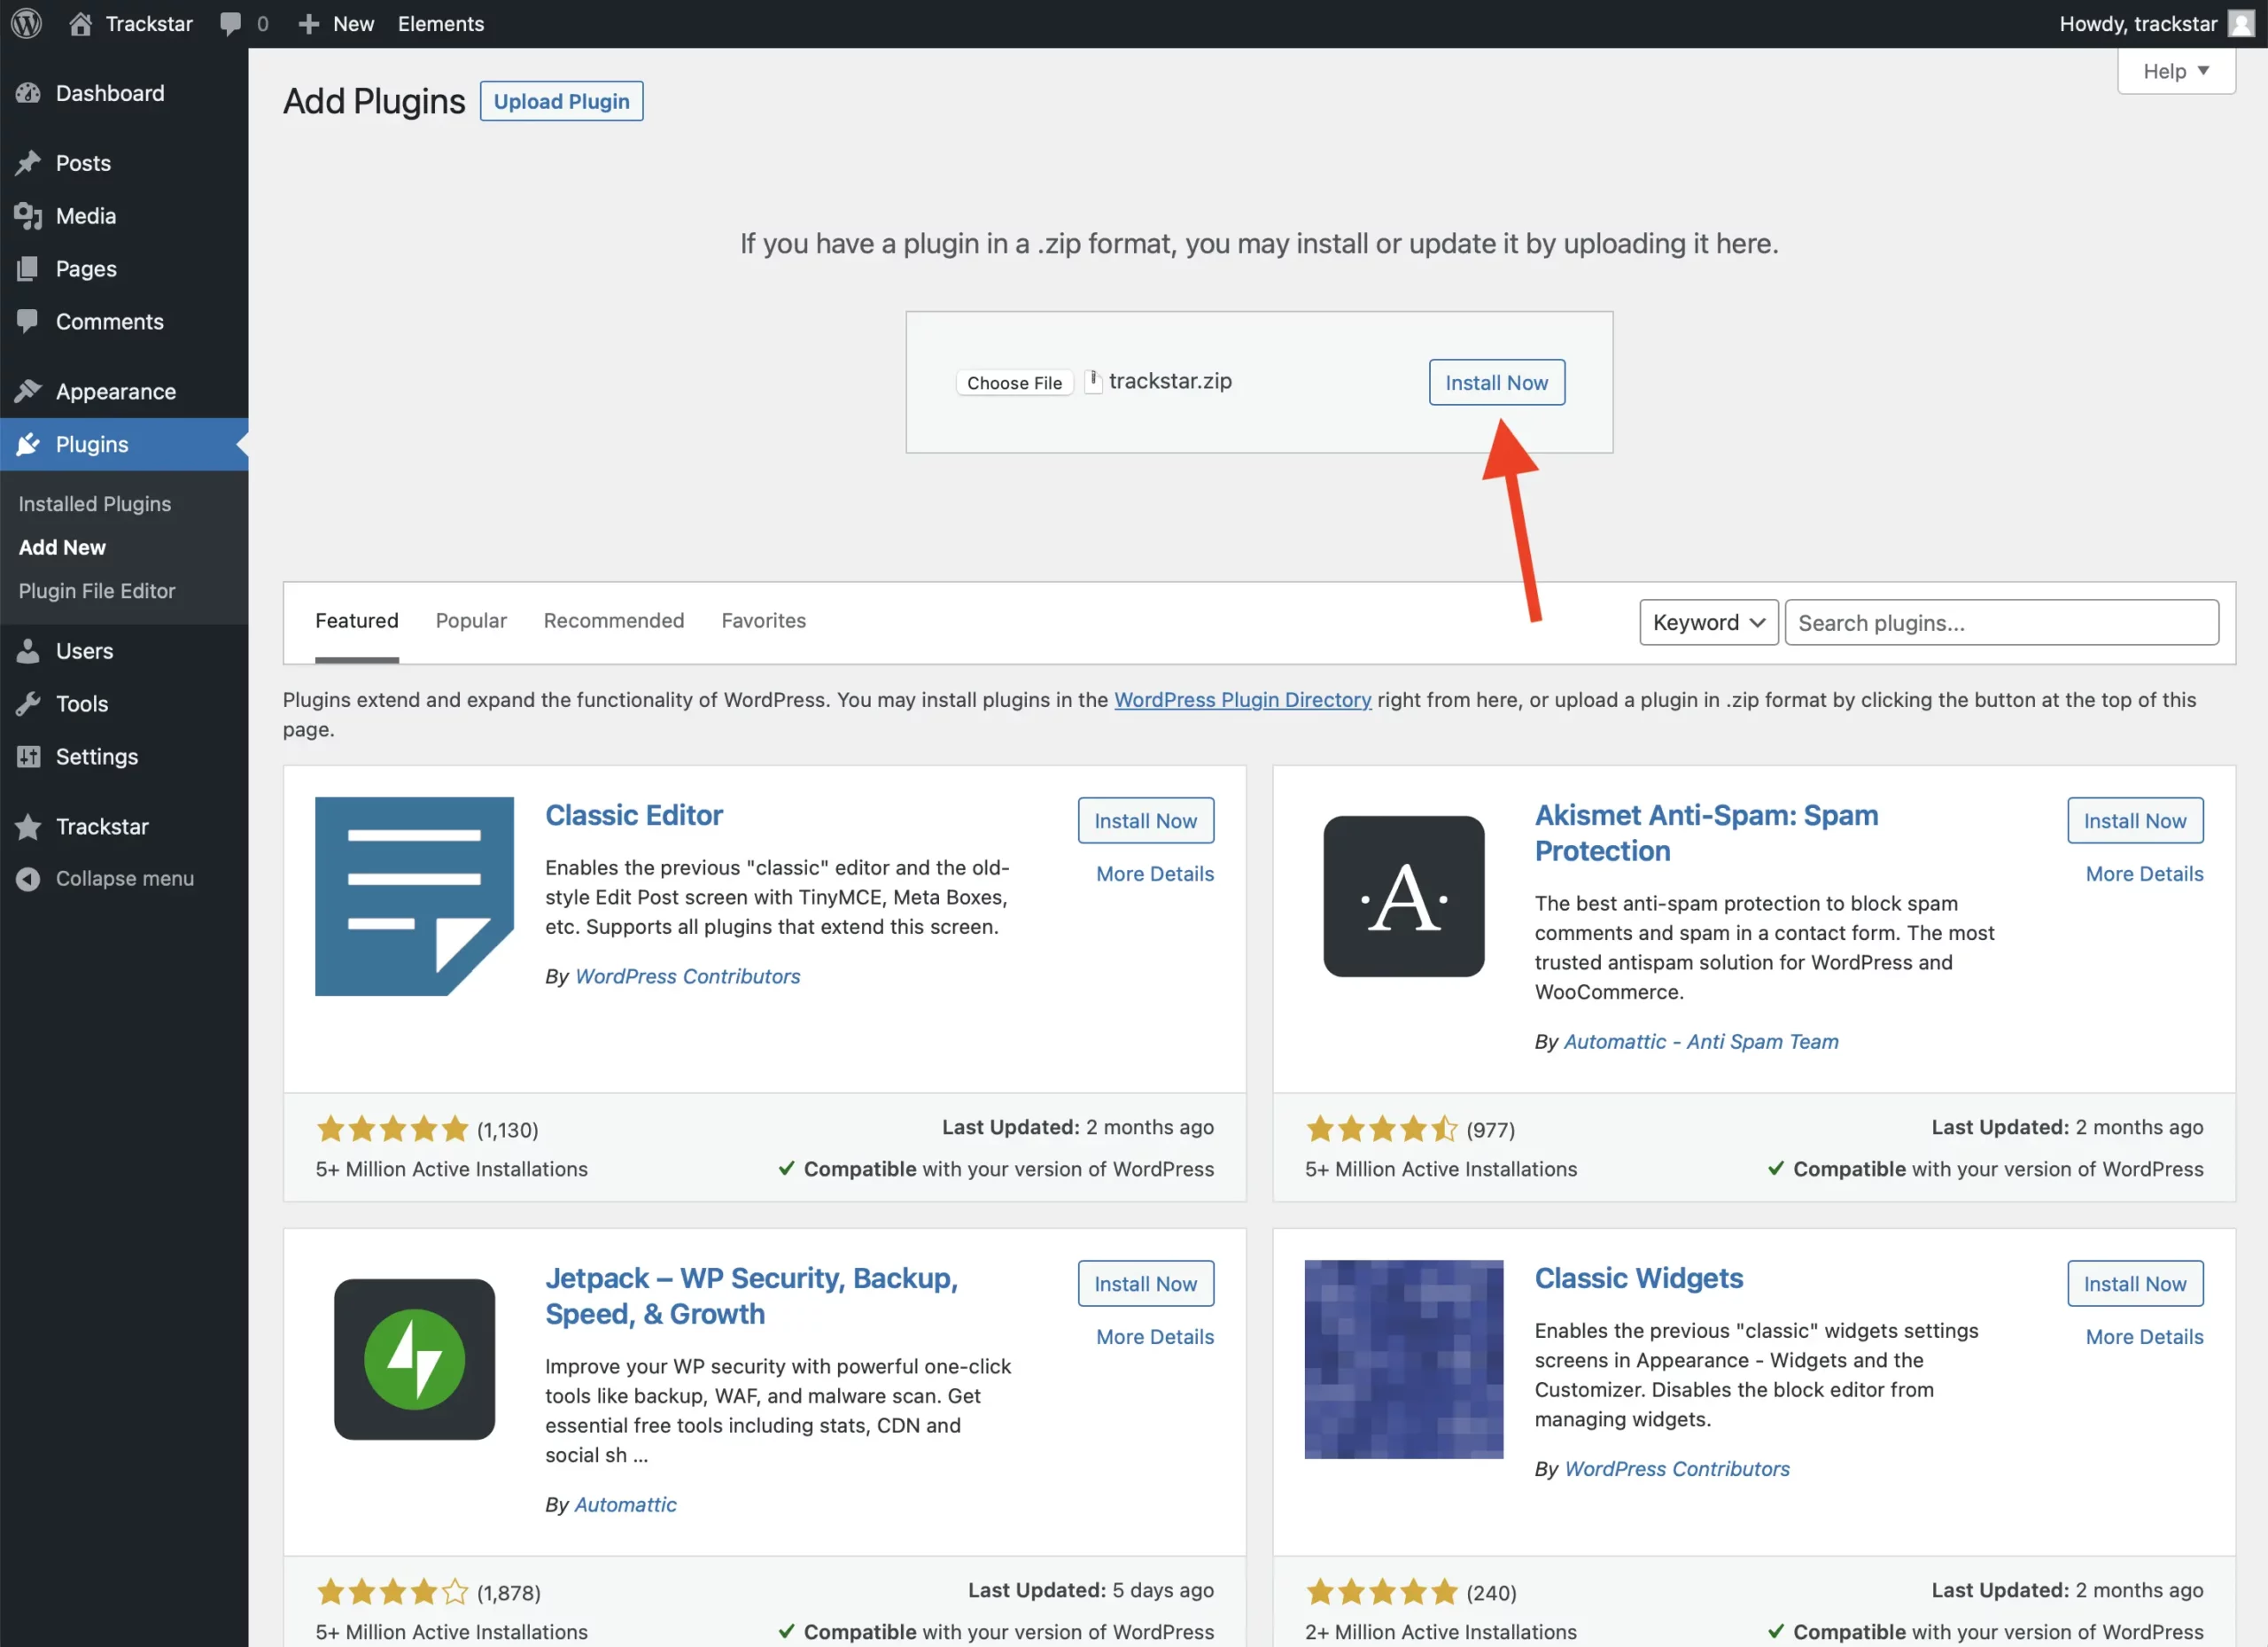
Assuming the installation was successful, click the Activate button.
Set up the plugin
Assuming you’re still logged into your WordPress admin, navigate to Trackstar.

You should see the following Setup page. Enter your customer ID and subscription ID. Scroll down for instructions on where to find these IDs in your Trackstar account.

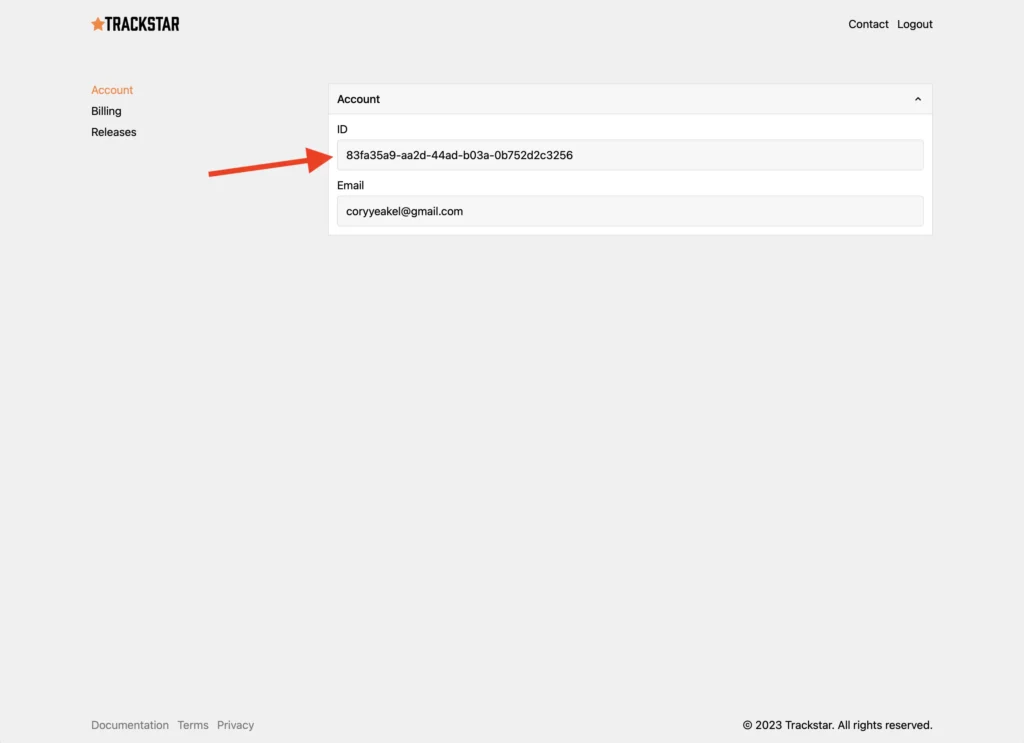
To find your customer ID, login to your Trackstar account and navigate to Account. Copy the ID shown here.
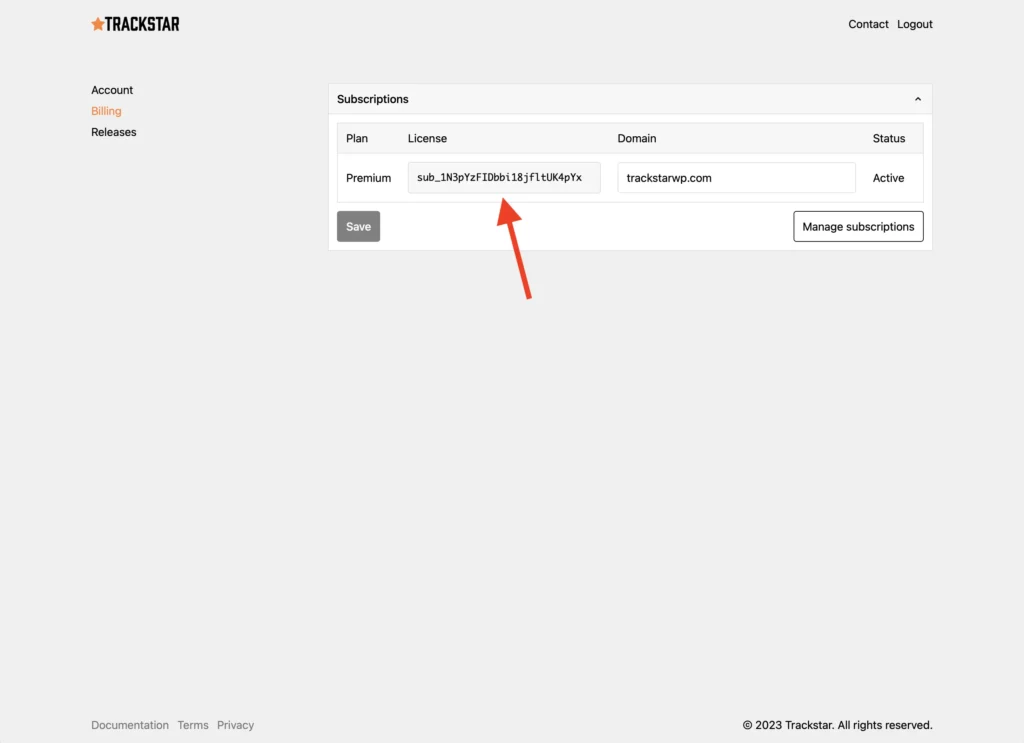
To find your subscription ID, login to your Trackstar account and navigate to Billing. Copy the ID of the subscription that is activated for this domain name.
Assuming your customer ID, subscription ID, and domain name are correct and activated, you should now have access to the plugin.
Plugin walkthrough
Product dashboard
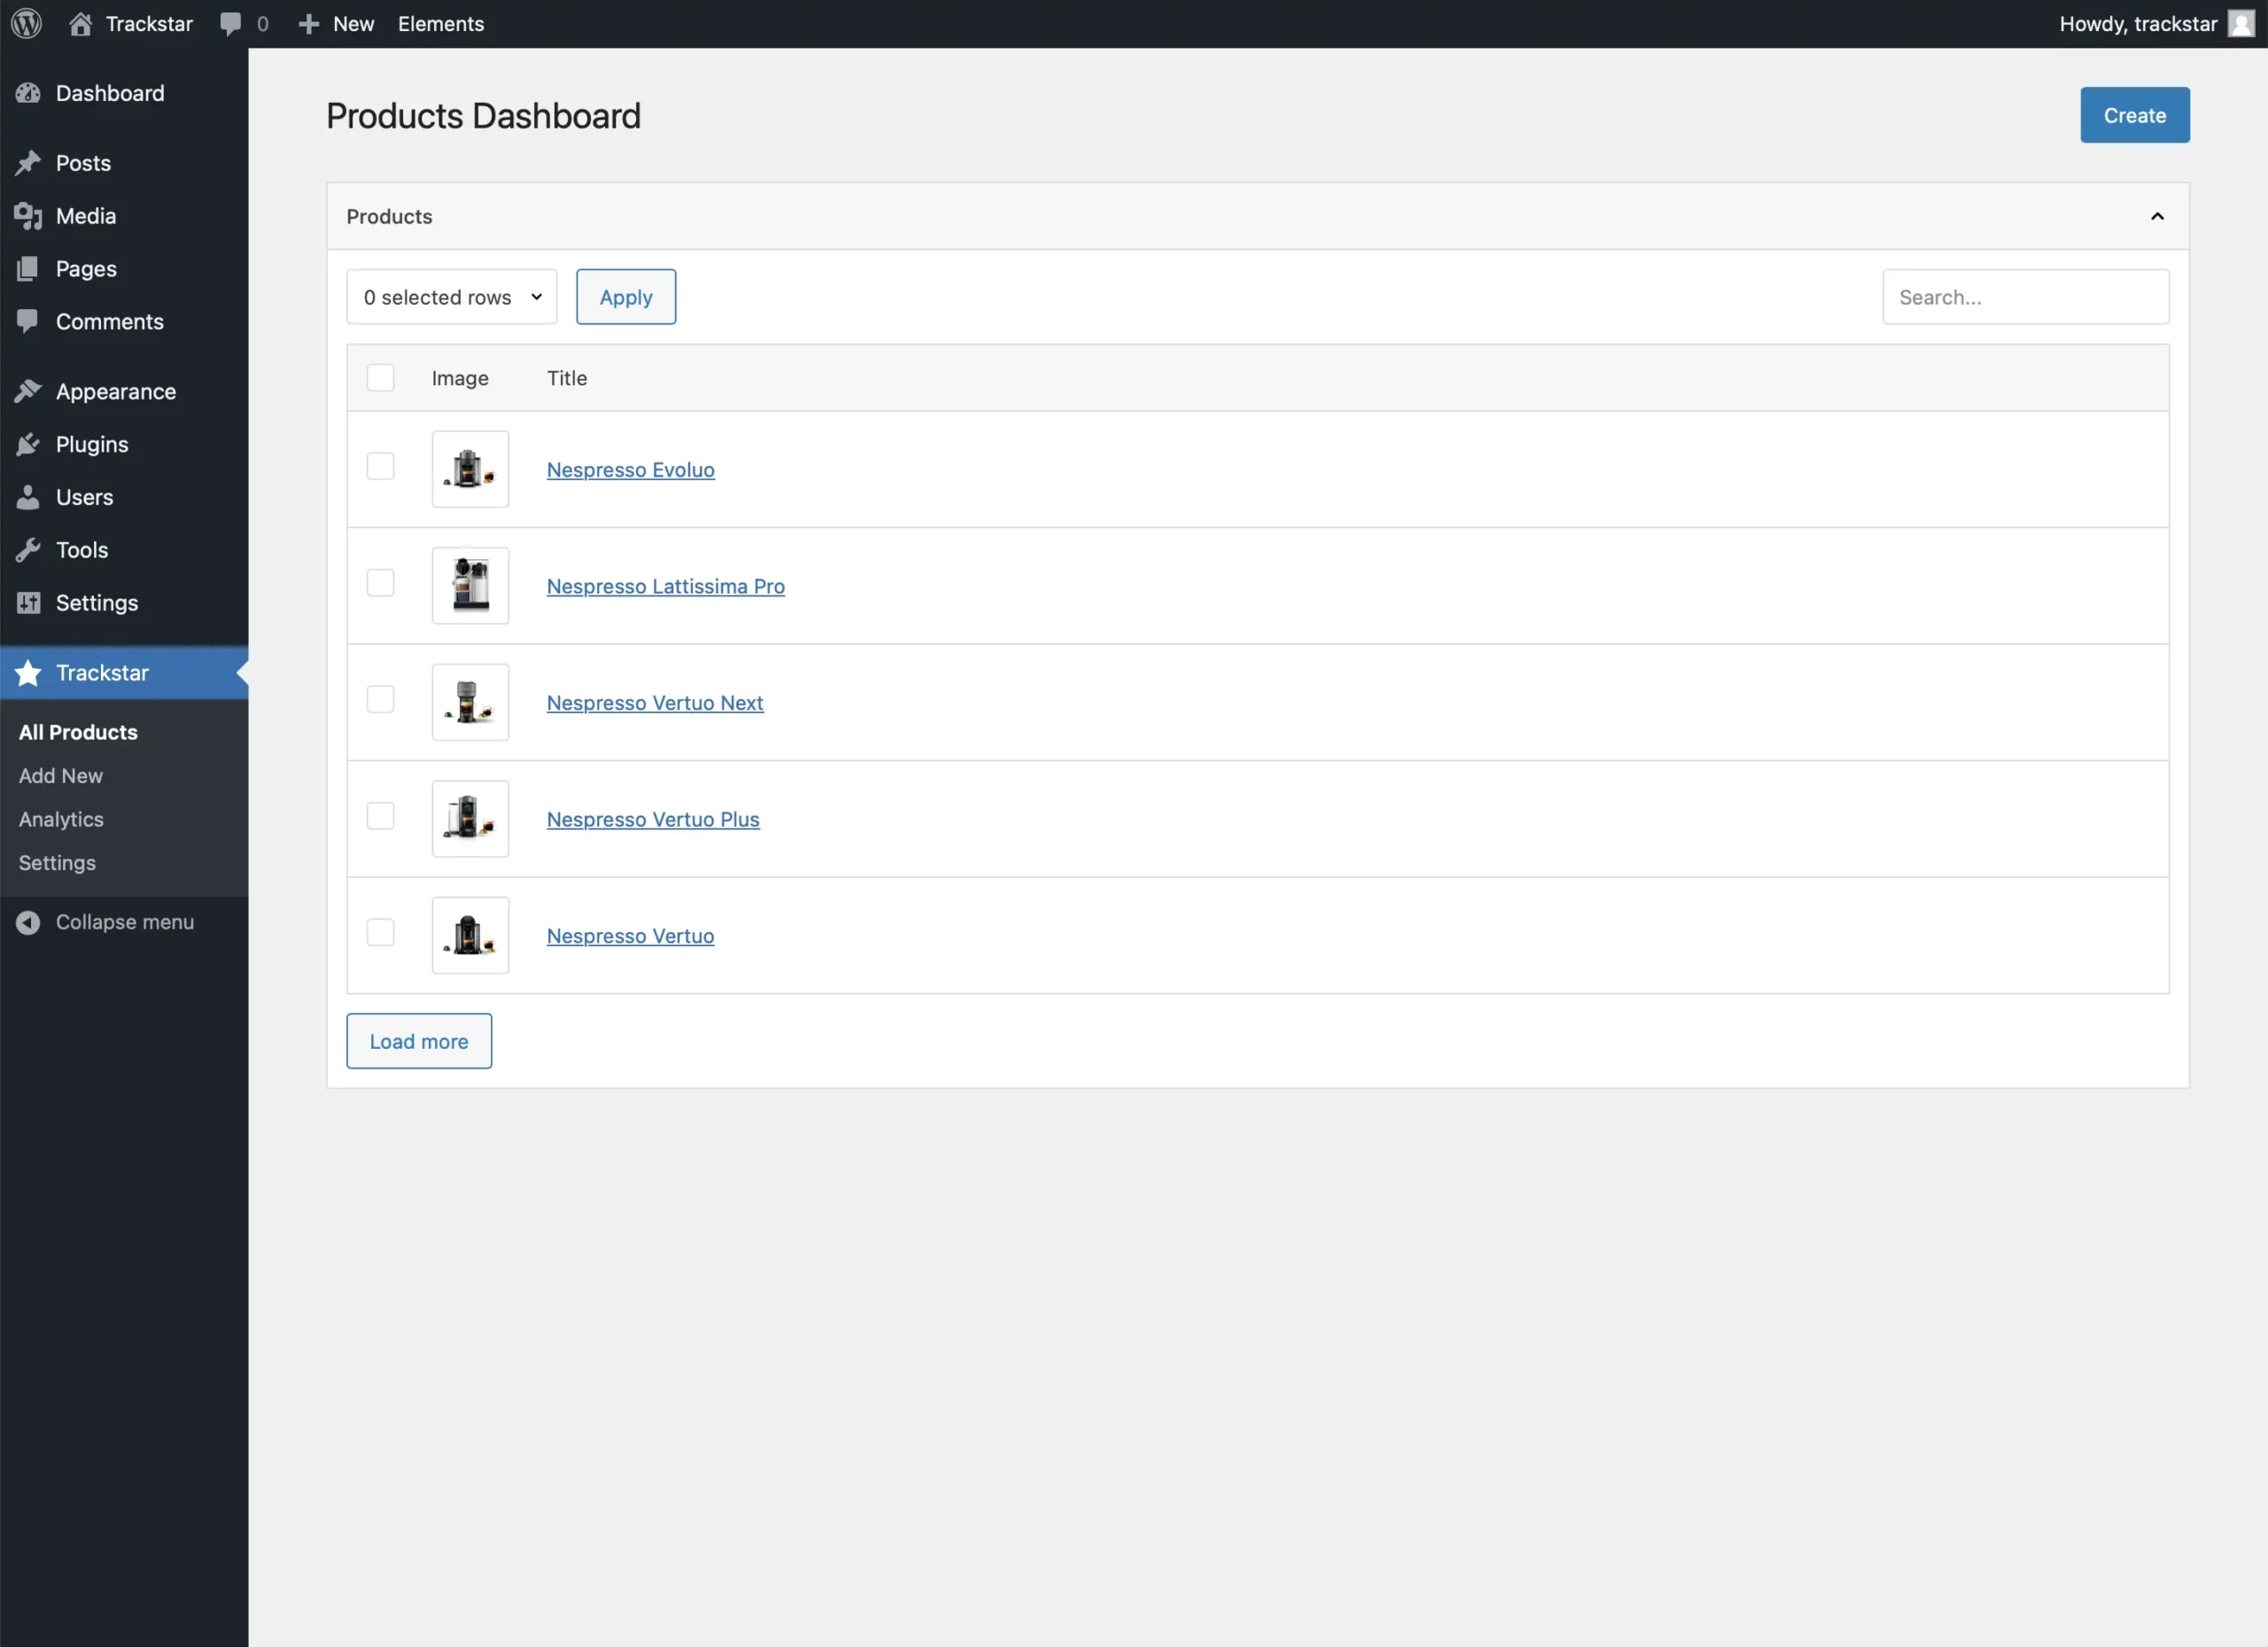
Navigate to Trackstar > All Products.
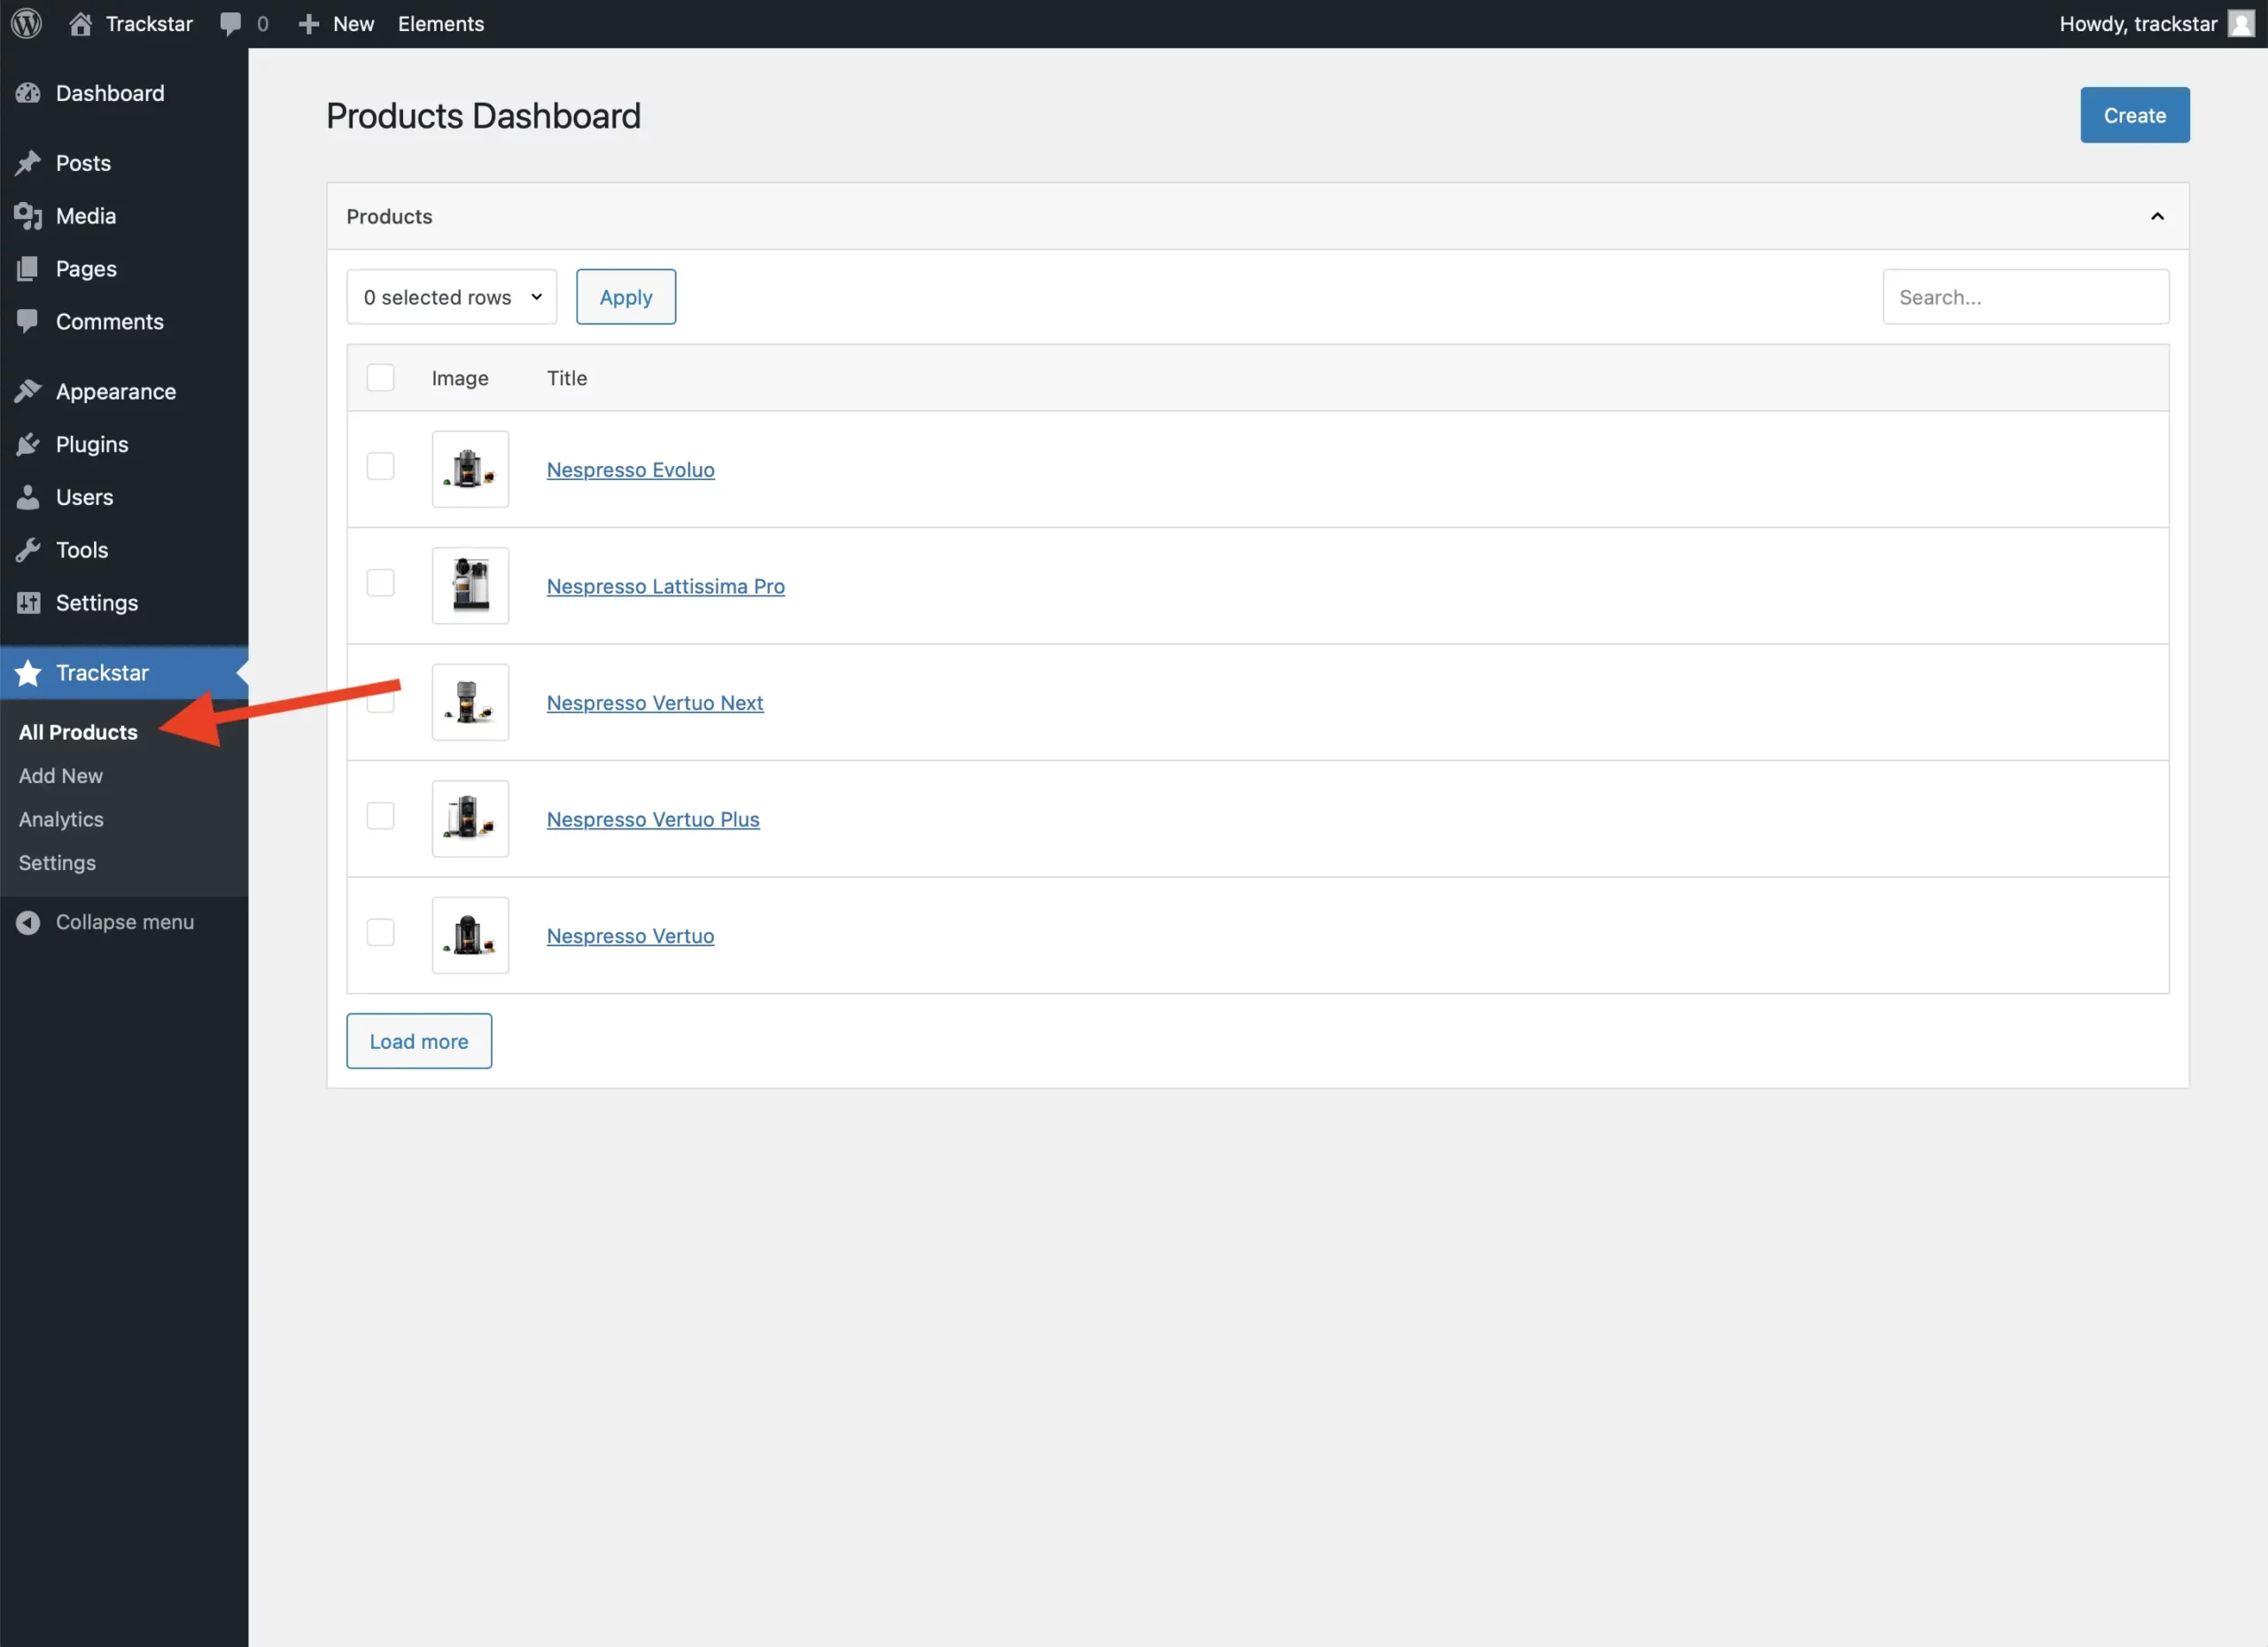
This is where you manage the products you’ve created with the plugin. It’s a simple list, sorted by new, that allows you to search and delete, if necessary.
Adding a new product
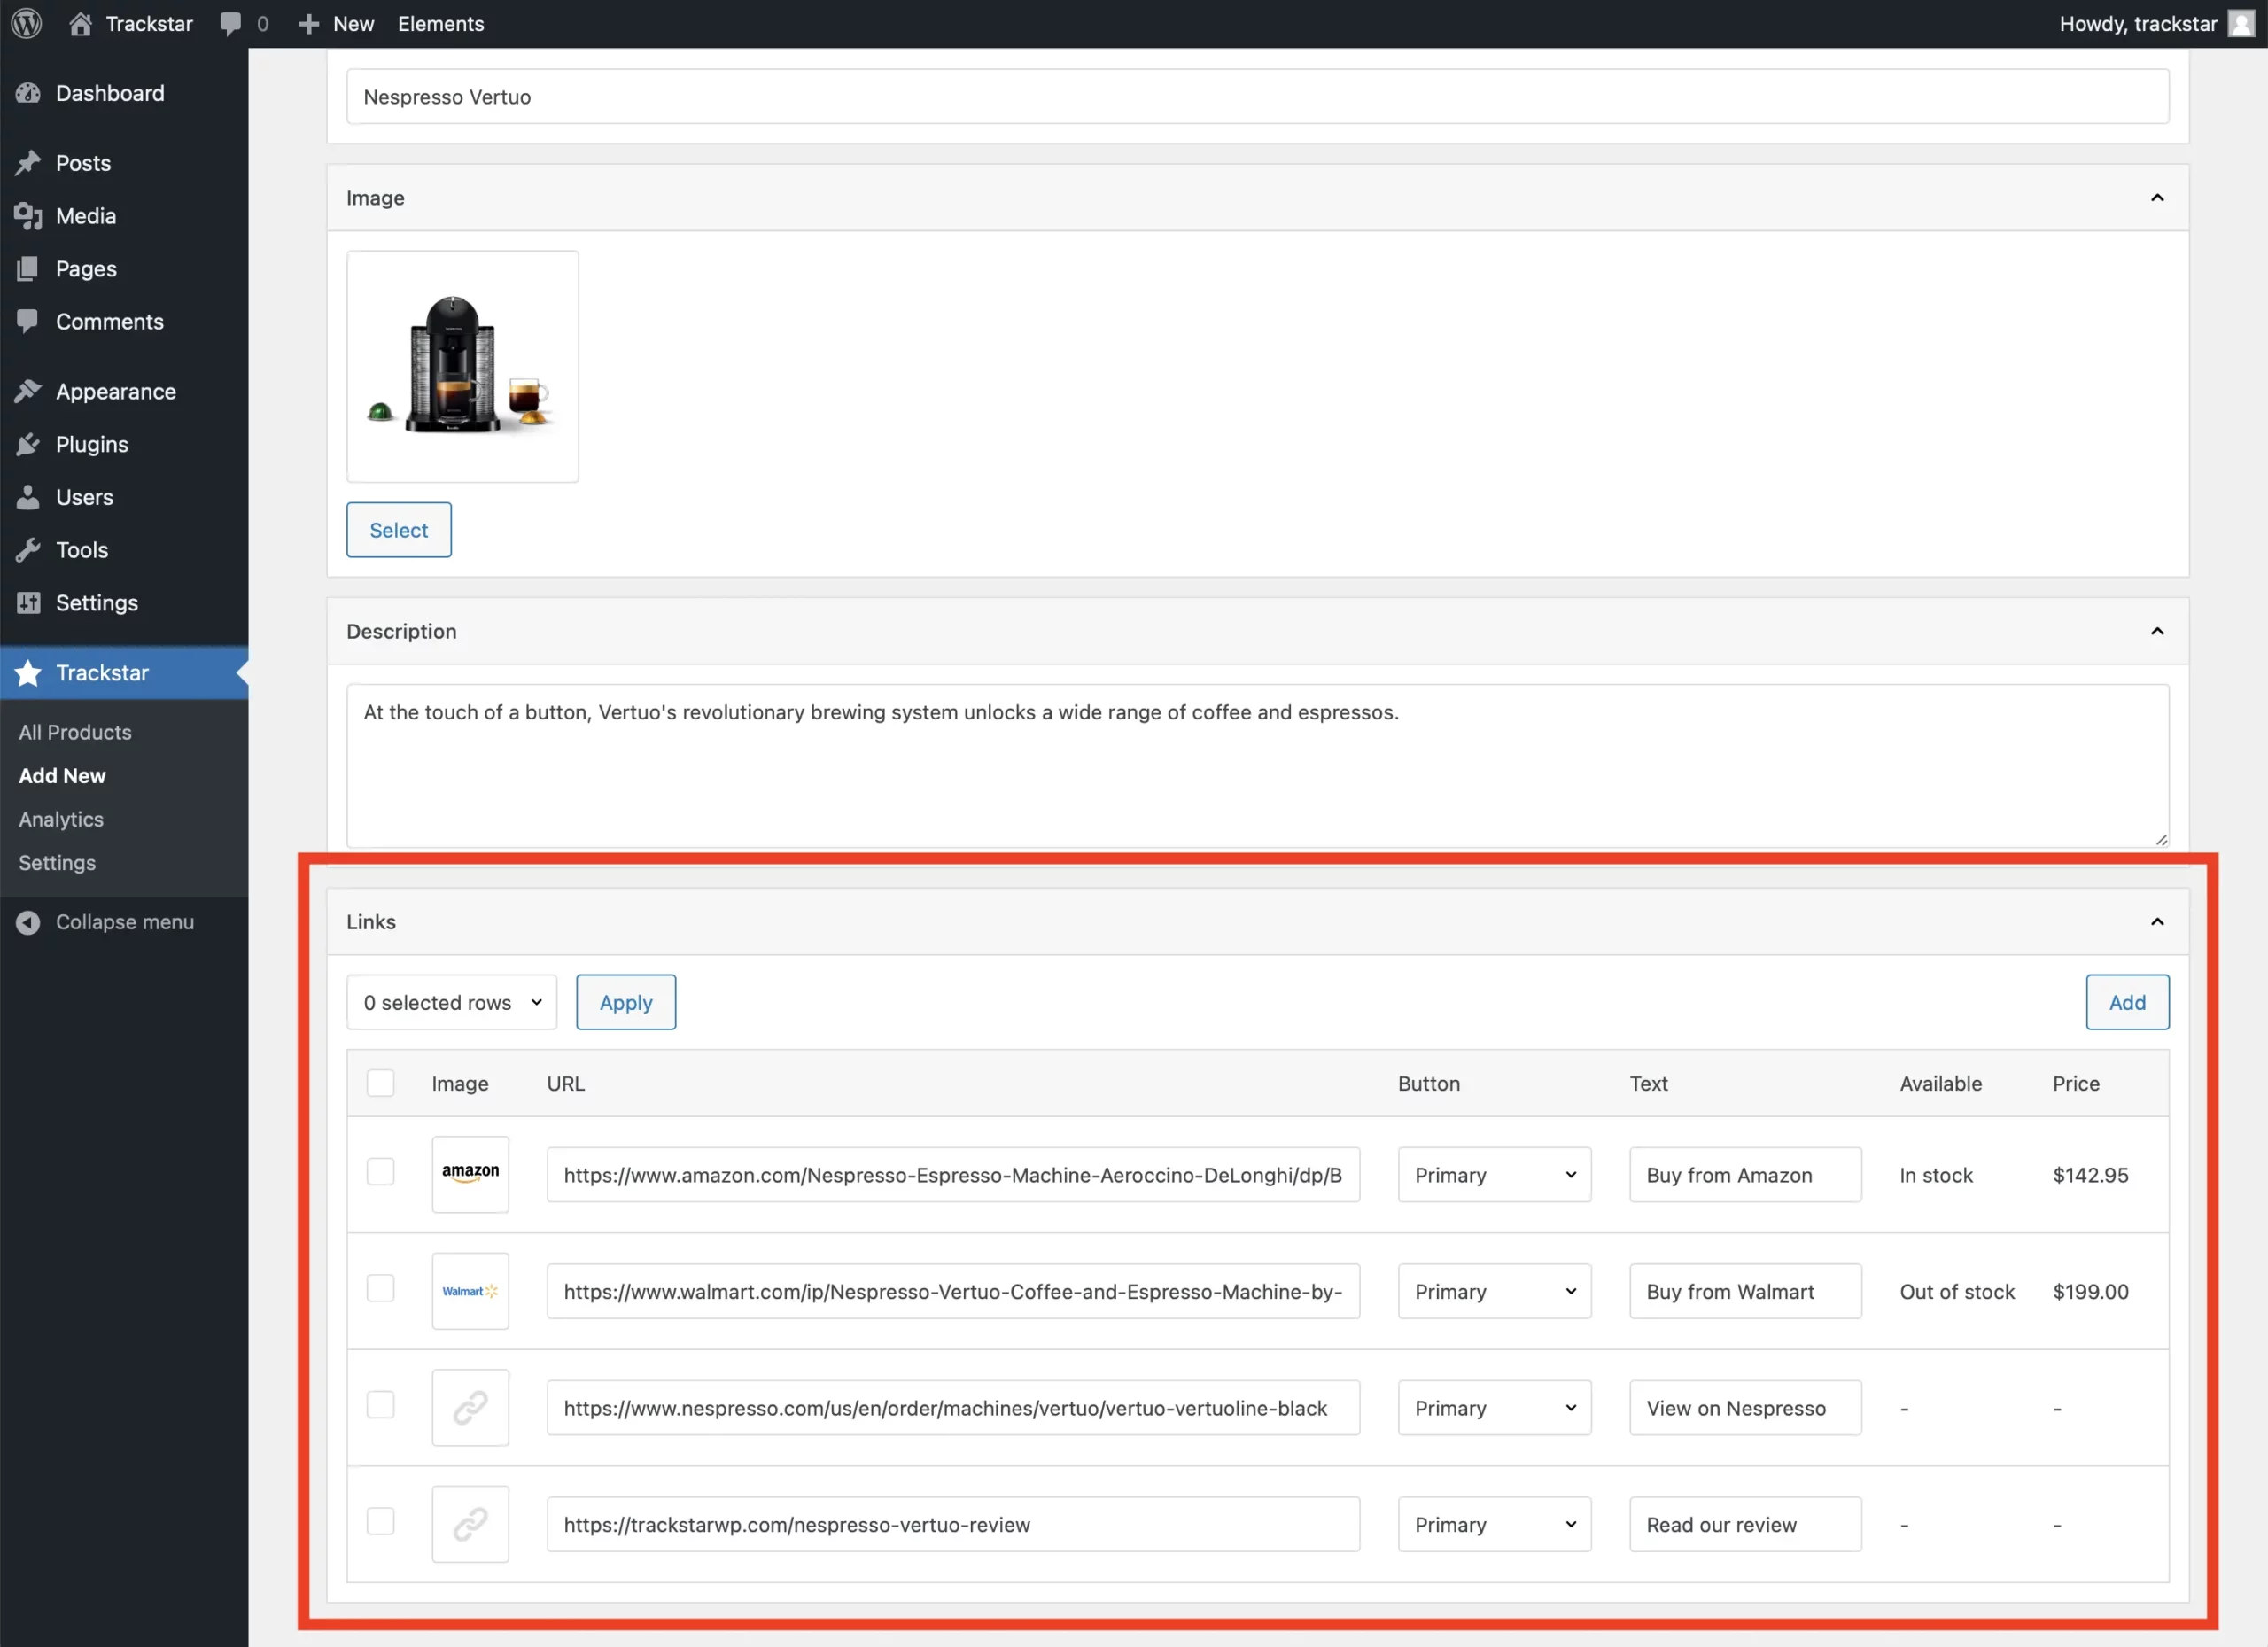
Navigate to Trackstar > Add New.
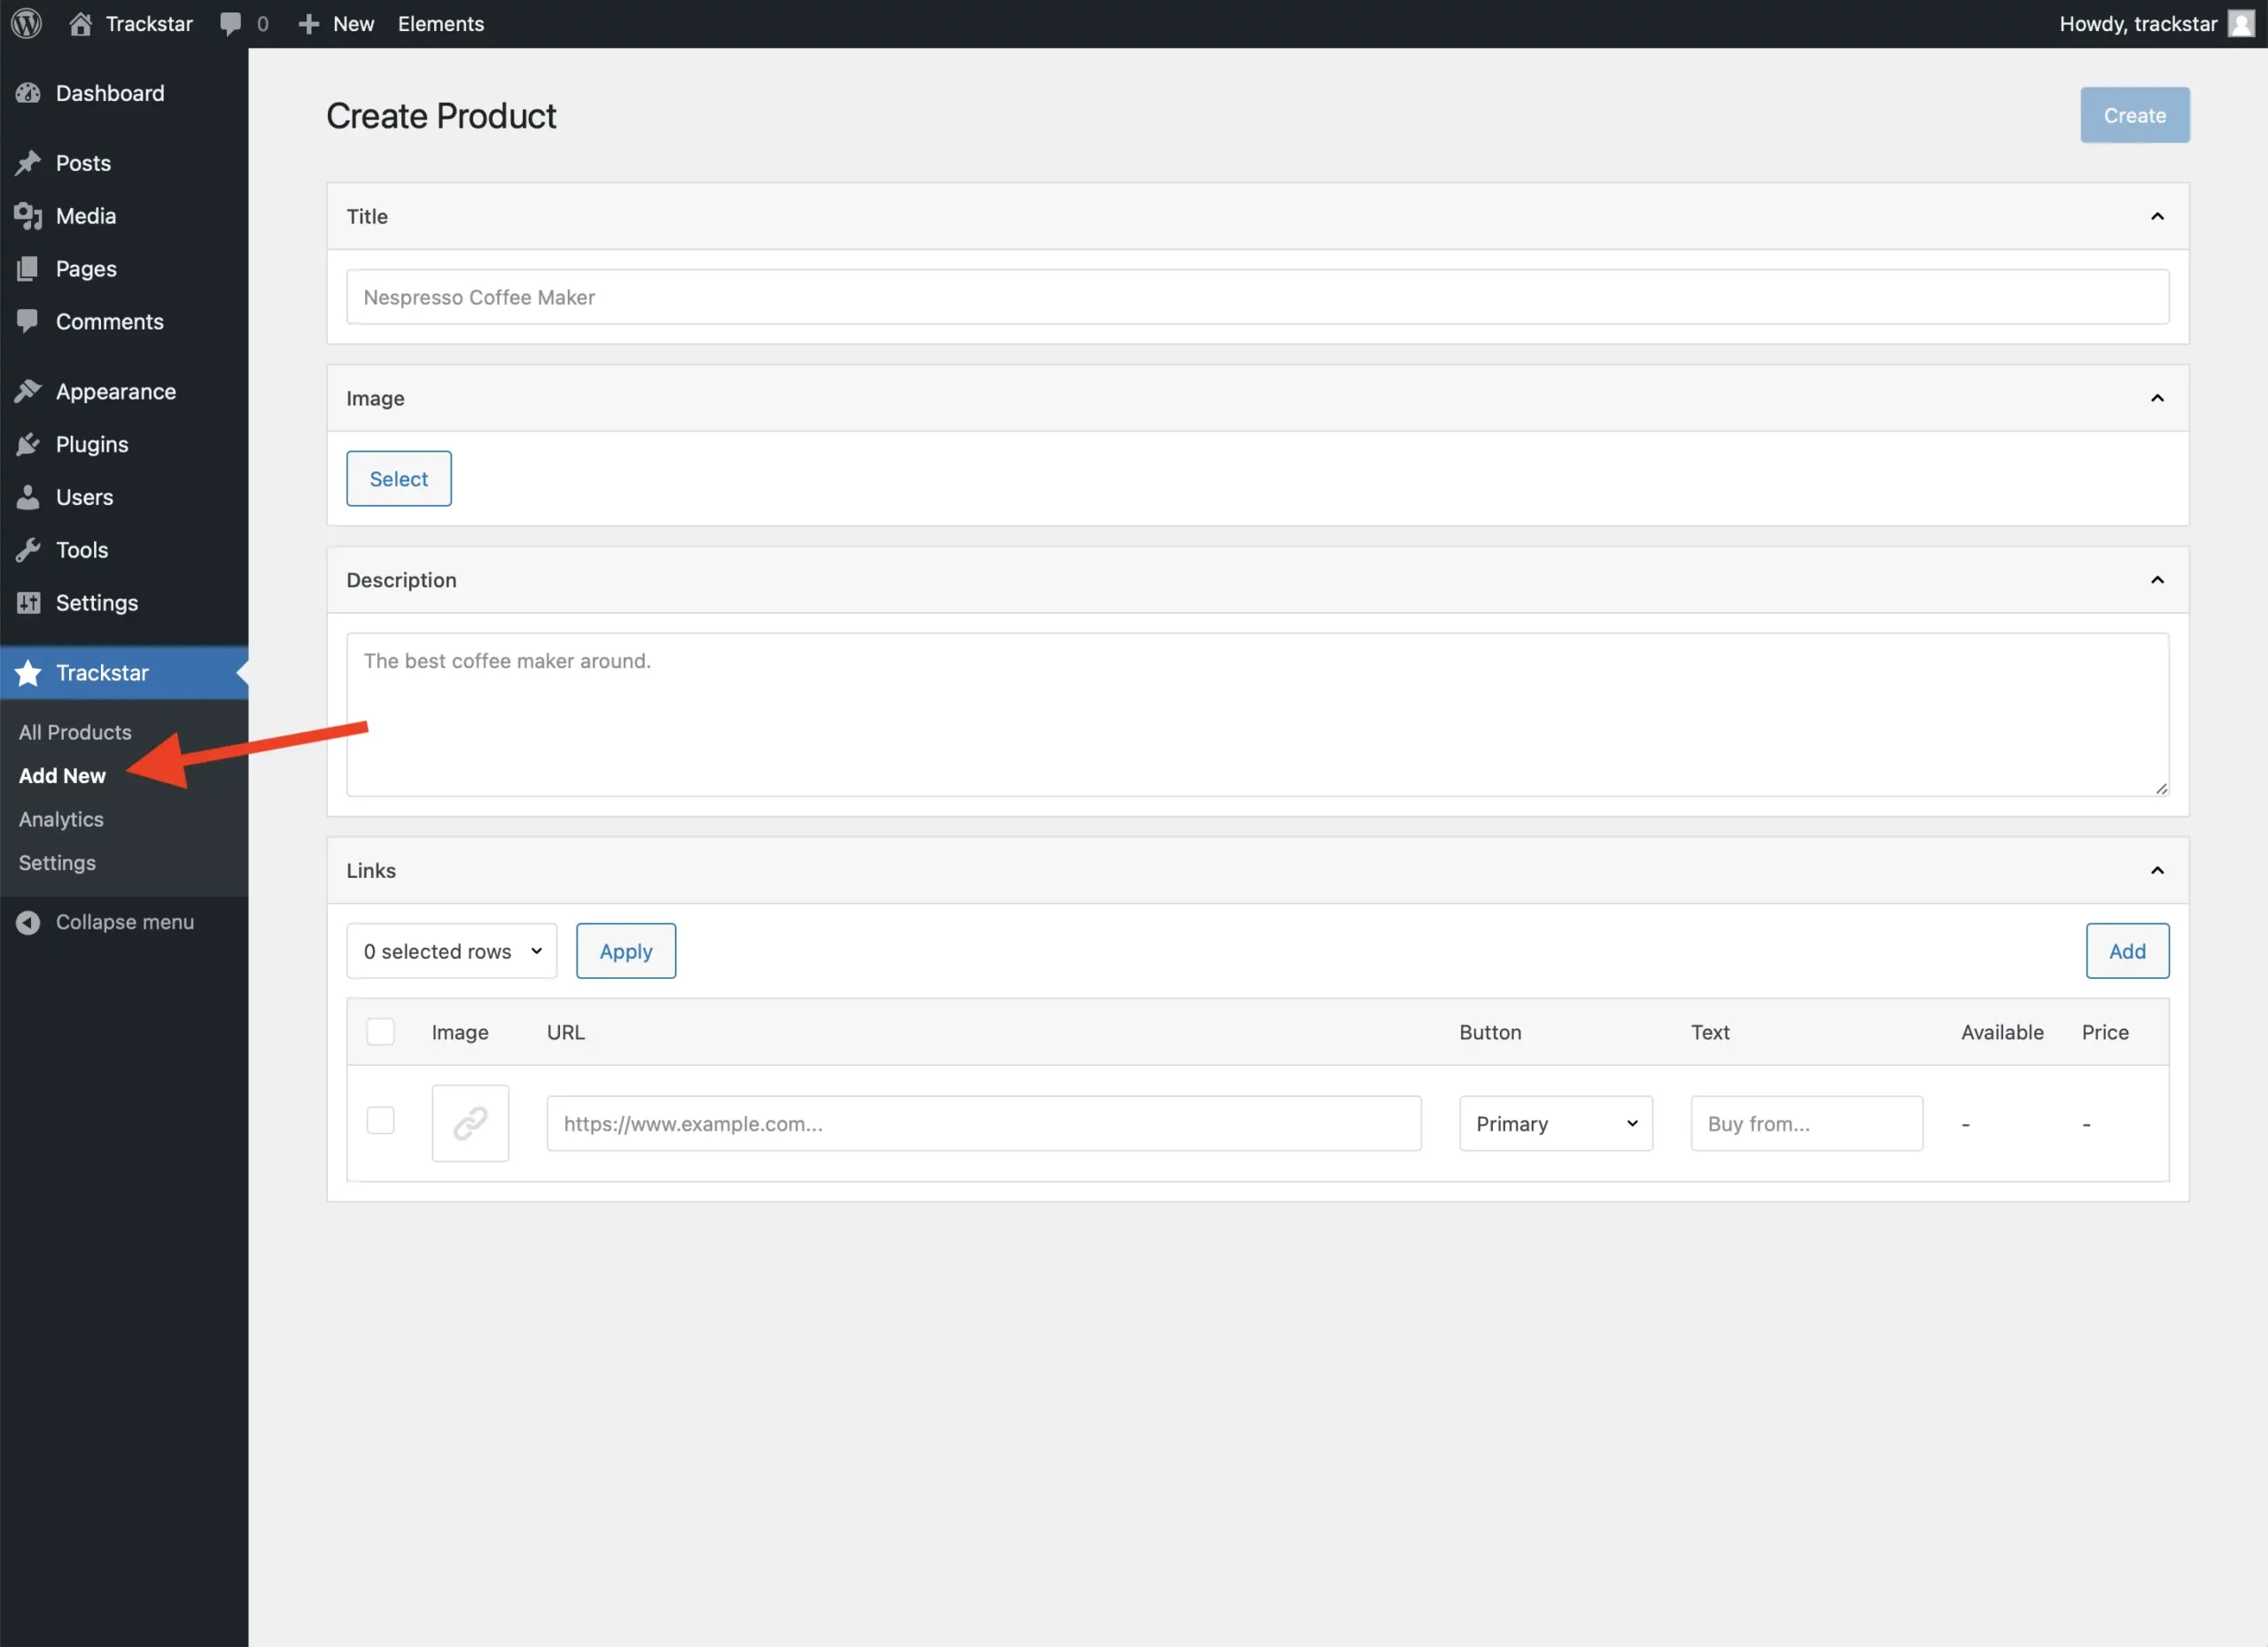
This is how you create a new product. There are fields for title, image, and description, and at the bottom of the page, there is a table to add links.
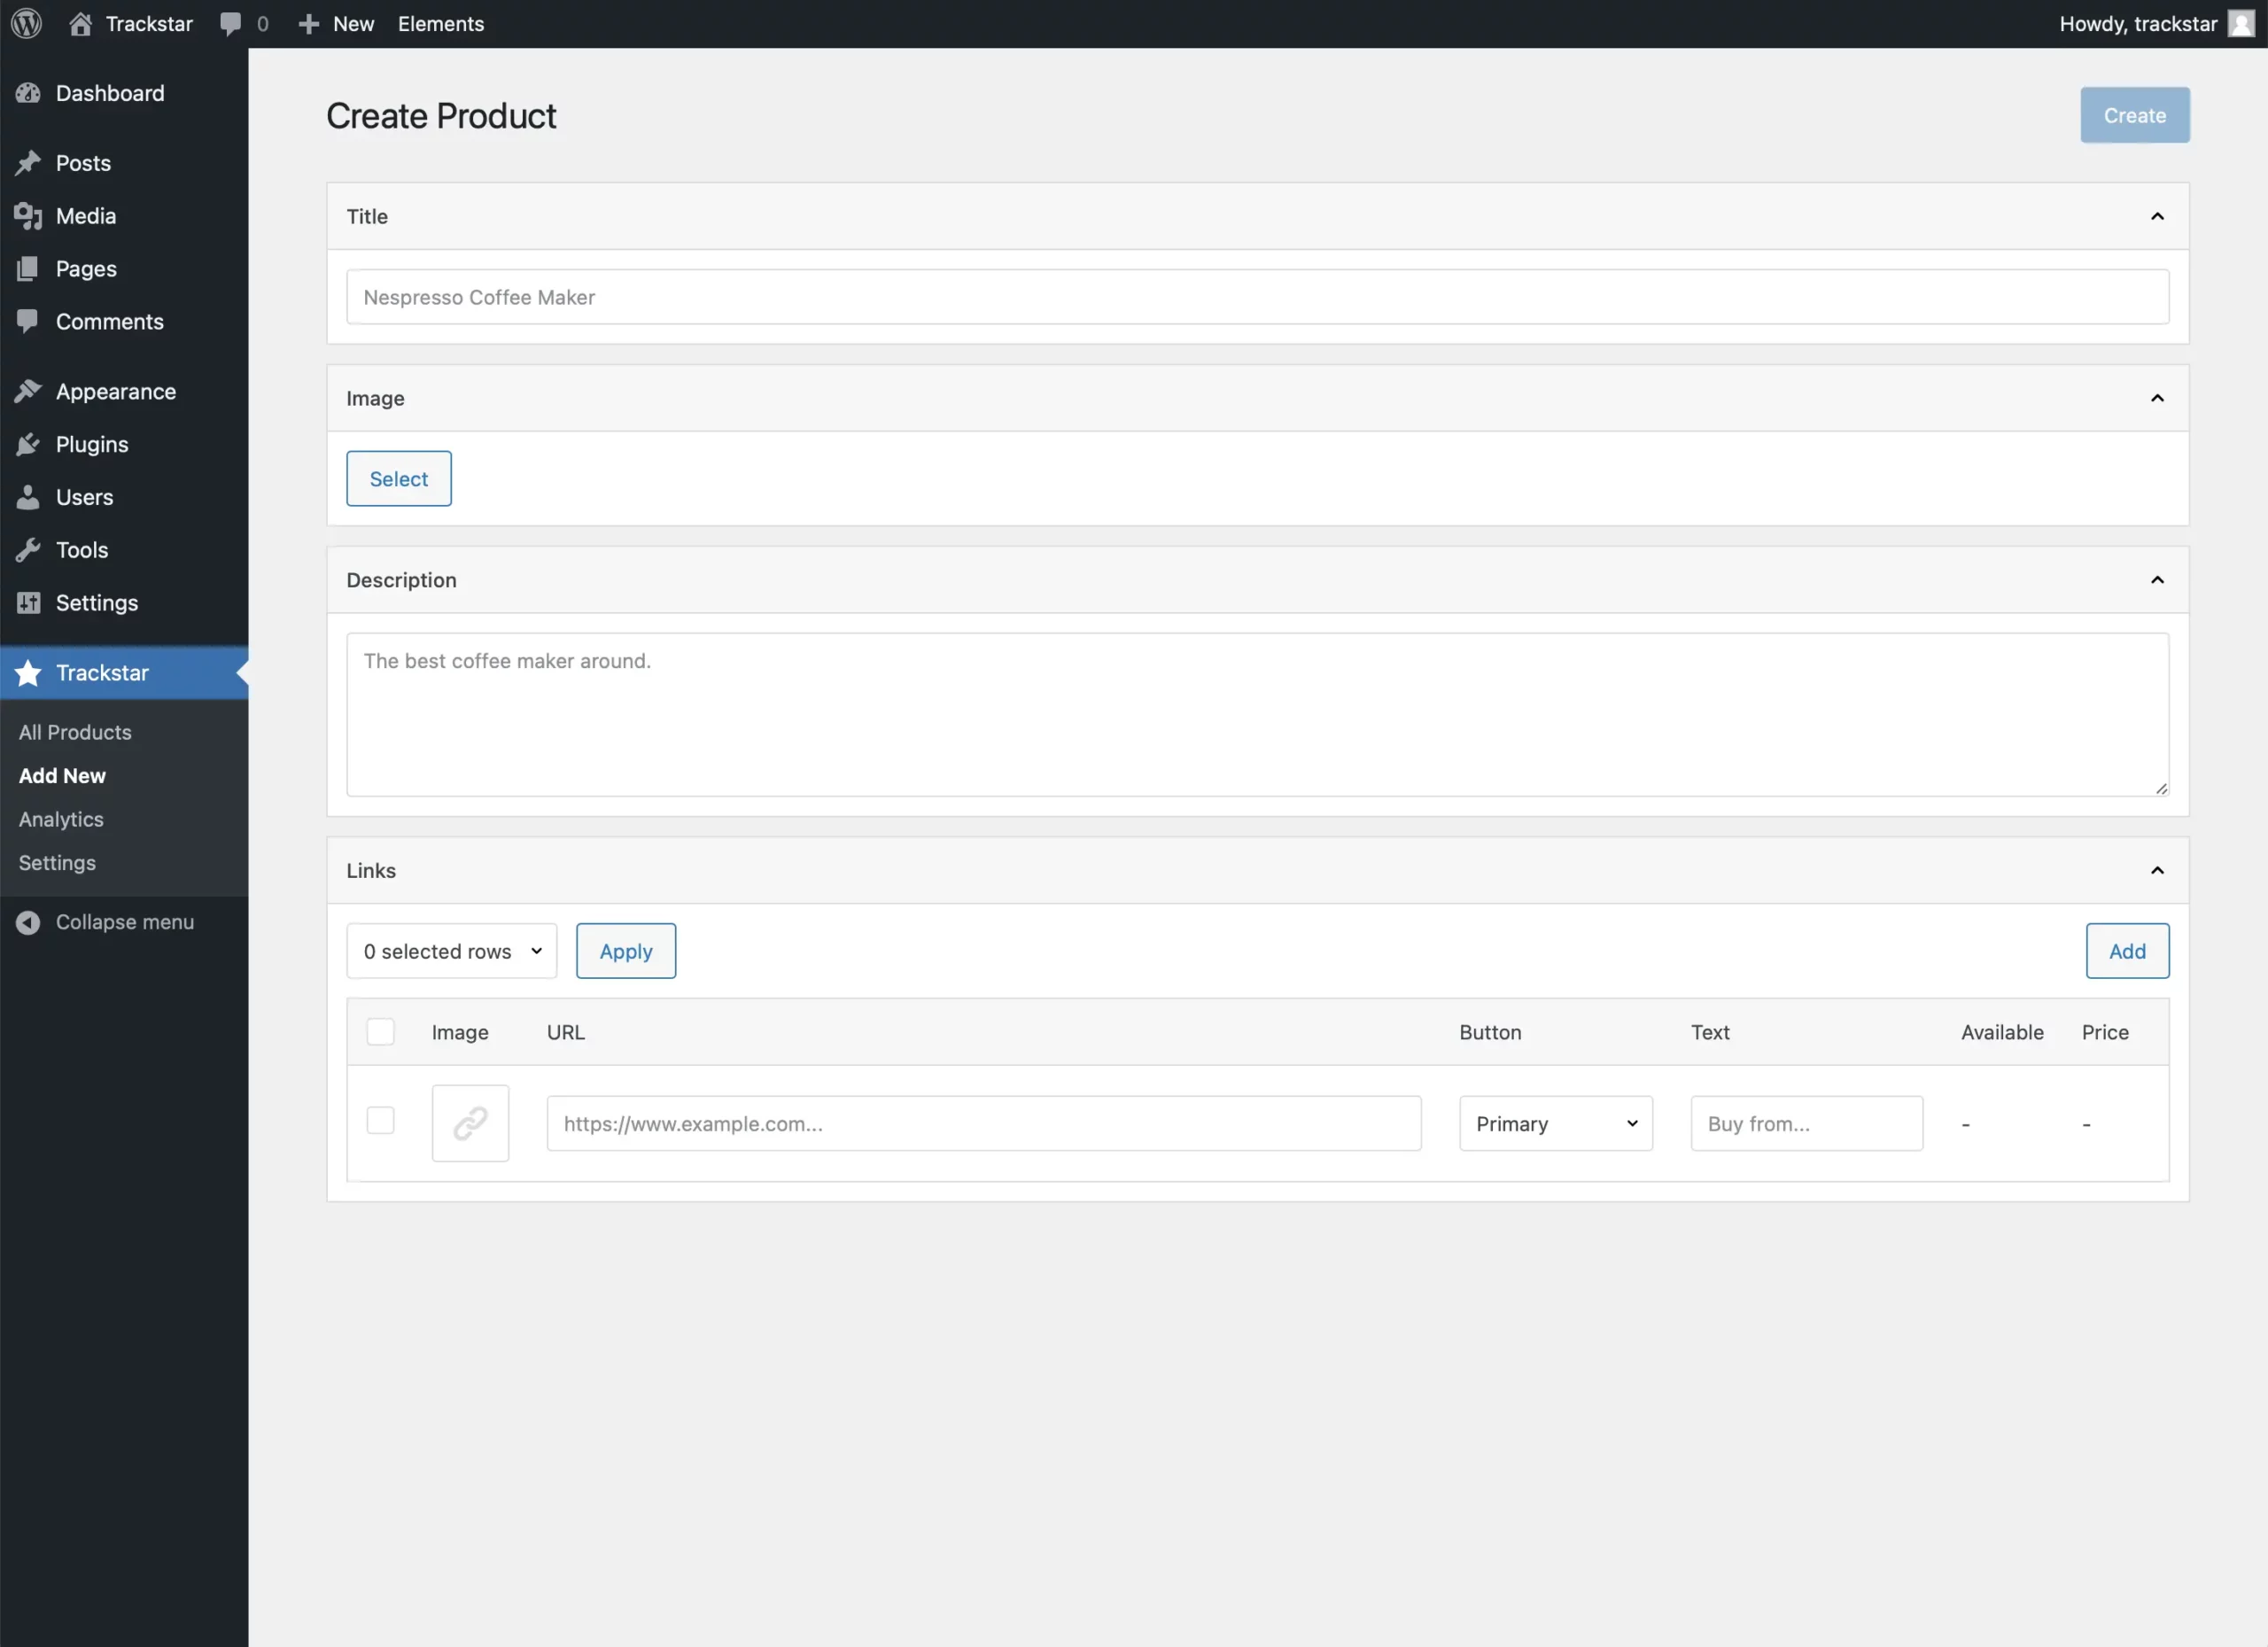
Title and description are regular text fields. Selecting an image opens the native WordPress media library.

Clicking the Add button creates a new link. There are fields for URL, anchor text for the button that will appear on product displays, and the type of button to render (which you can customize in the Display Customizer).
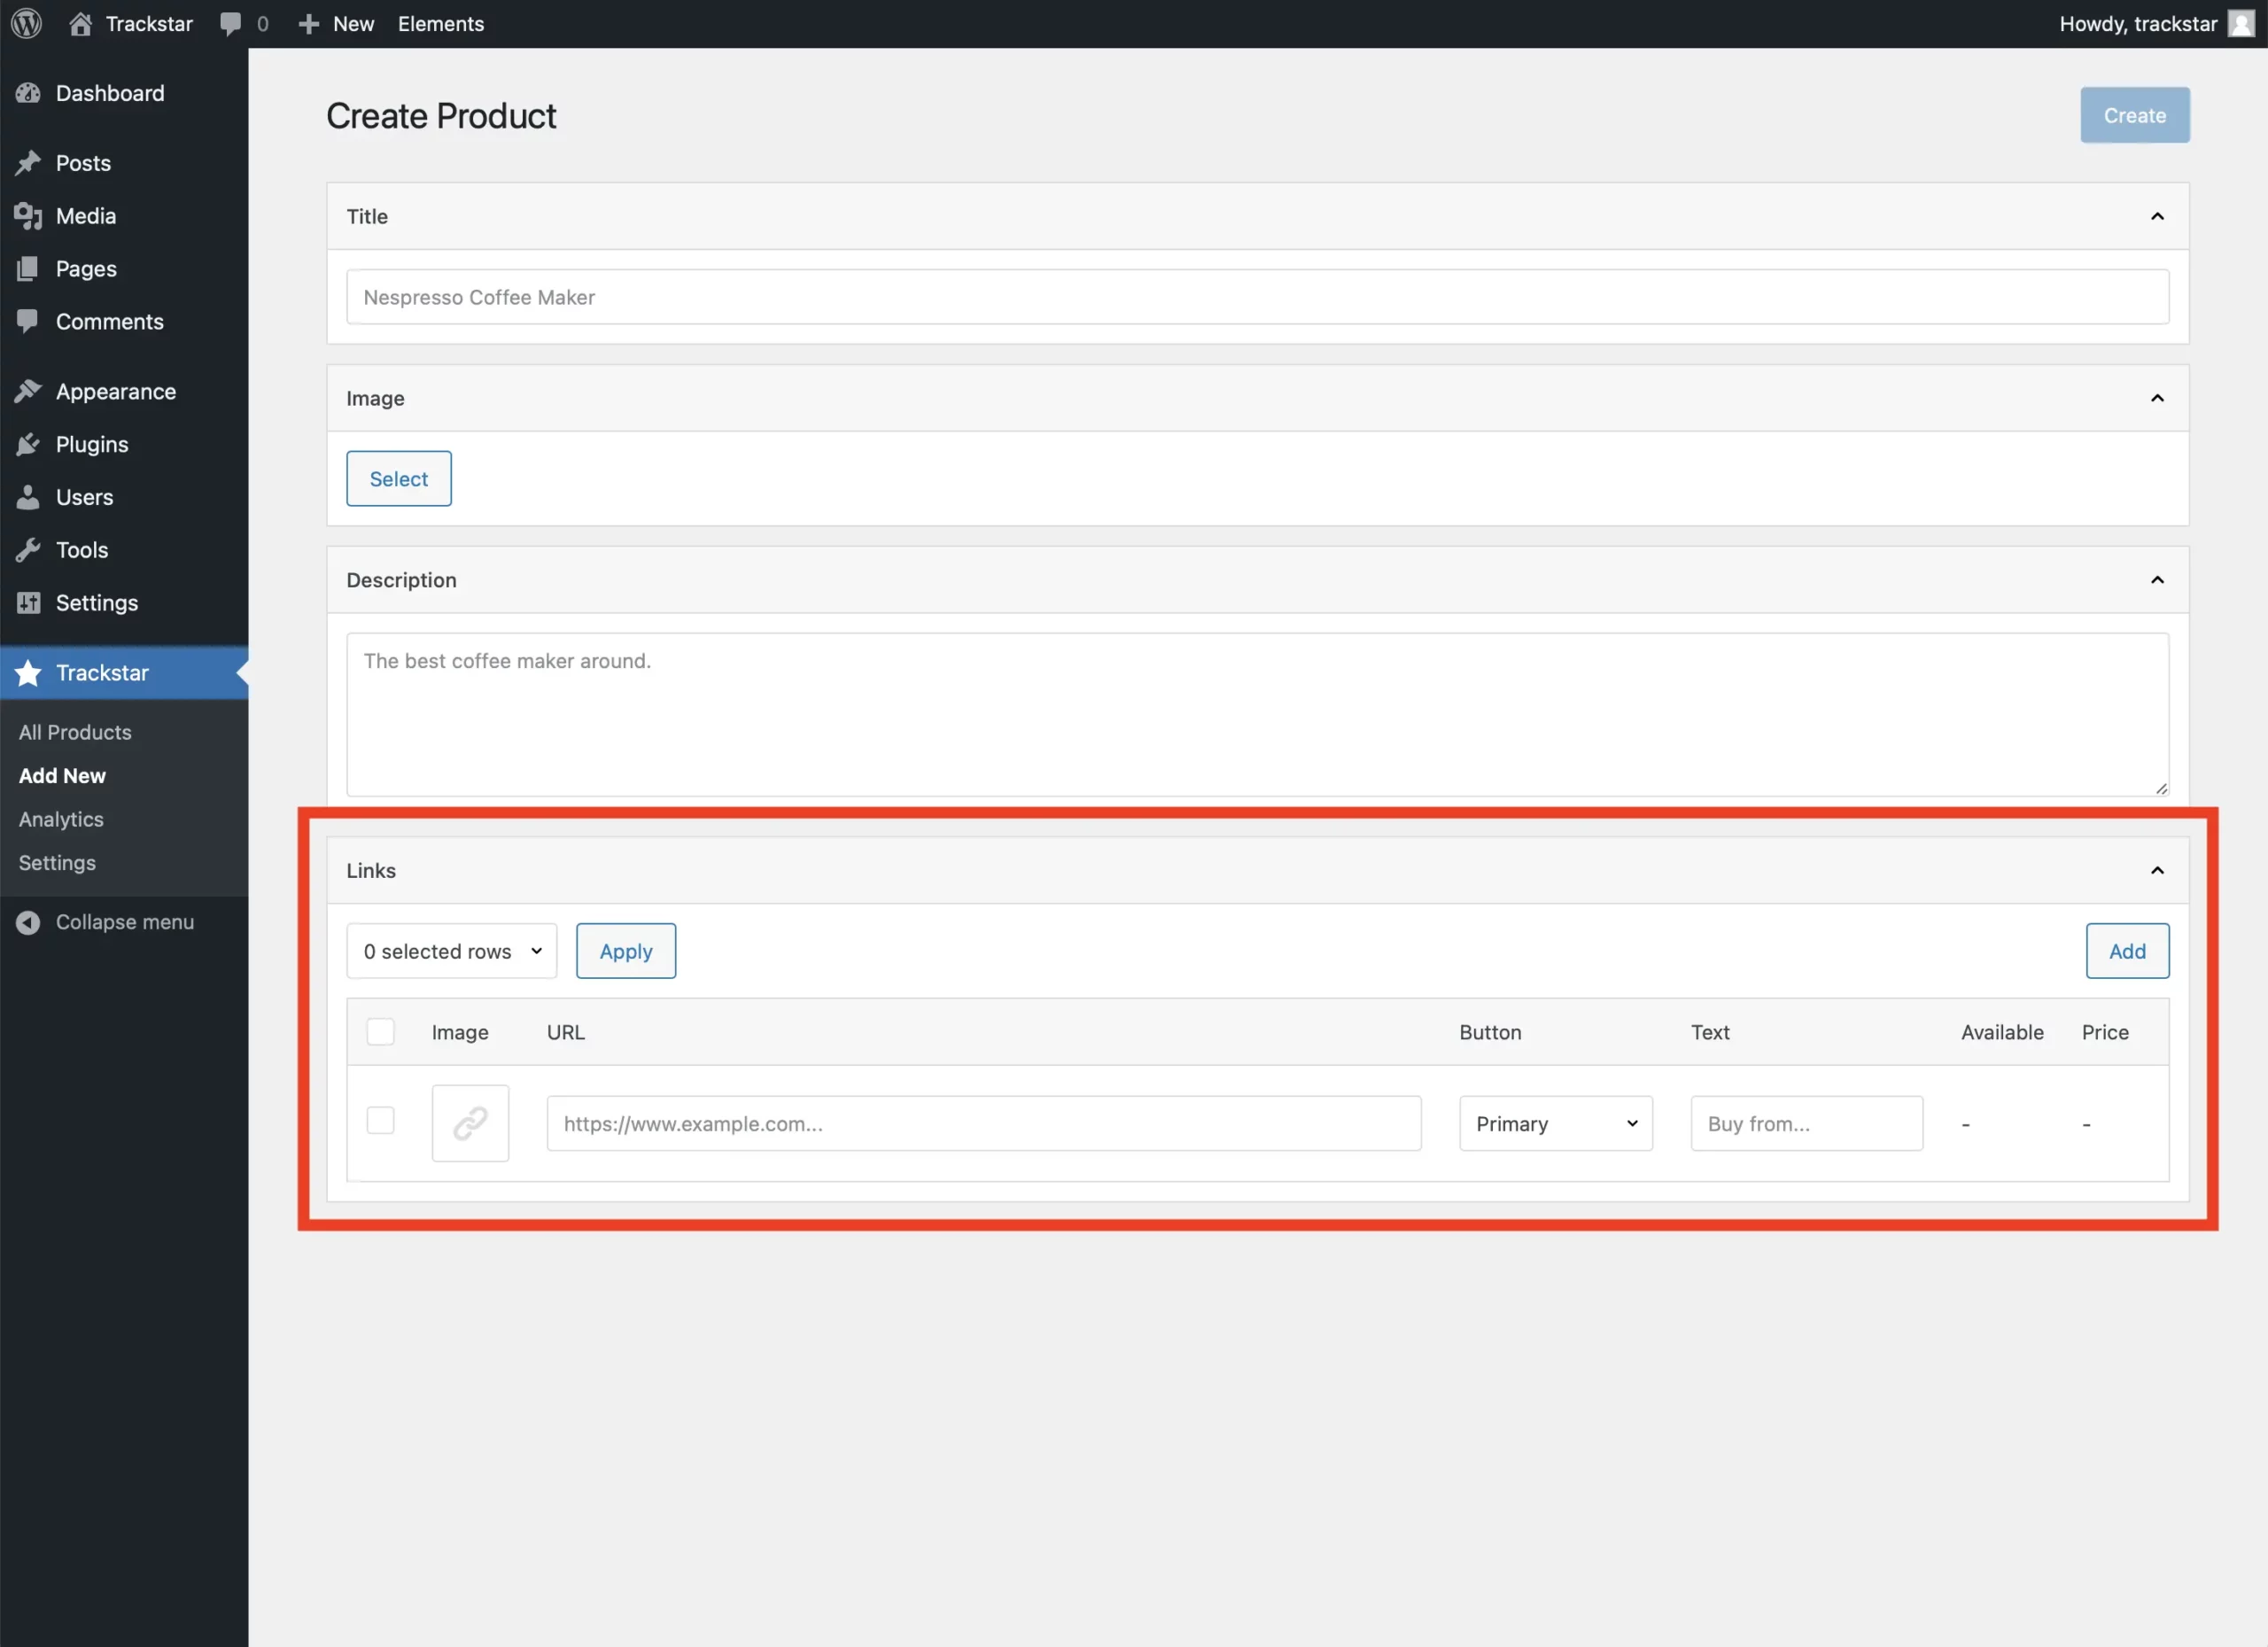
There are also two additional read-only fields, price and availability. With a Premium subscription, when you enter a link for a supported merchant, the plugin will automatically fetch the current price and availability of the product, and it will update these values daily.

It’s also worth mentioning that you can create any type of link here. For example, you can add resource links to manufacturer websites or even links to other pages on your site.
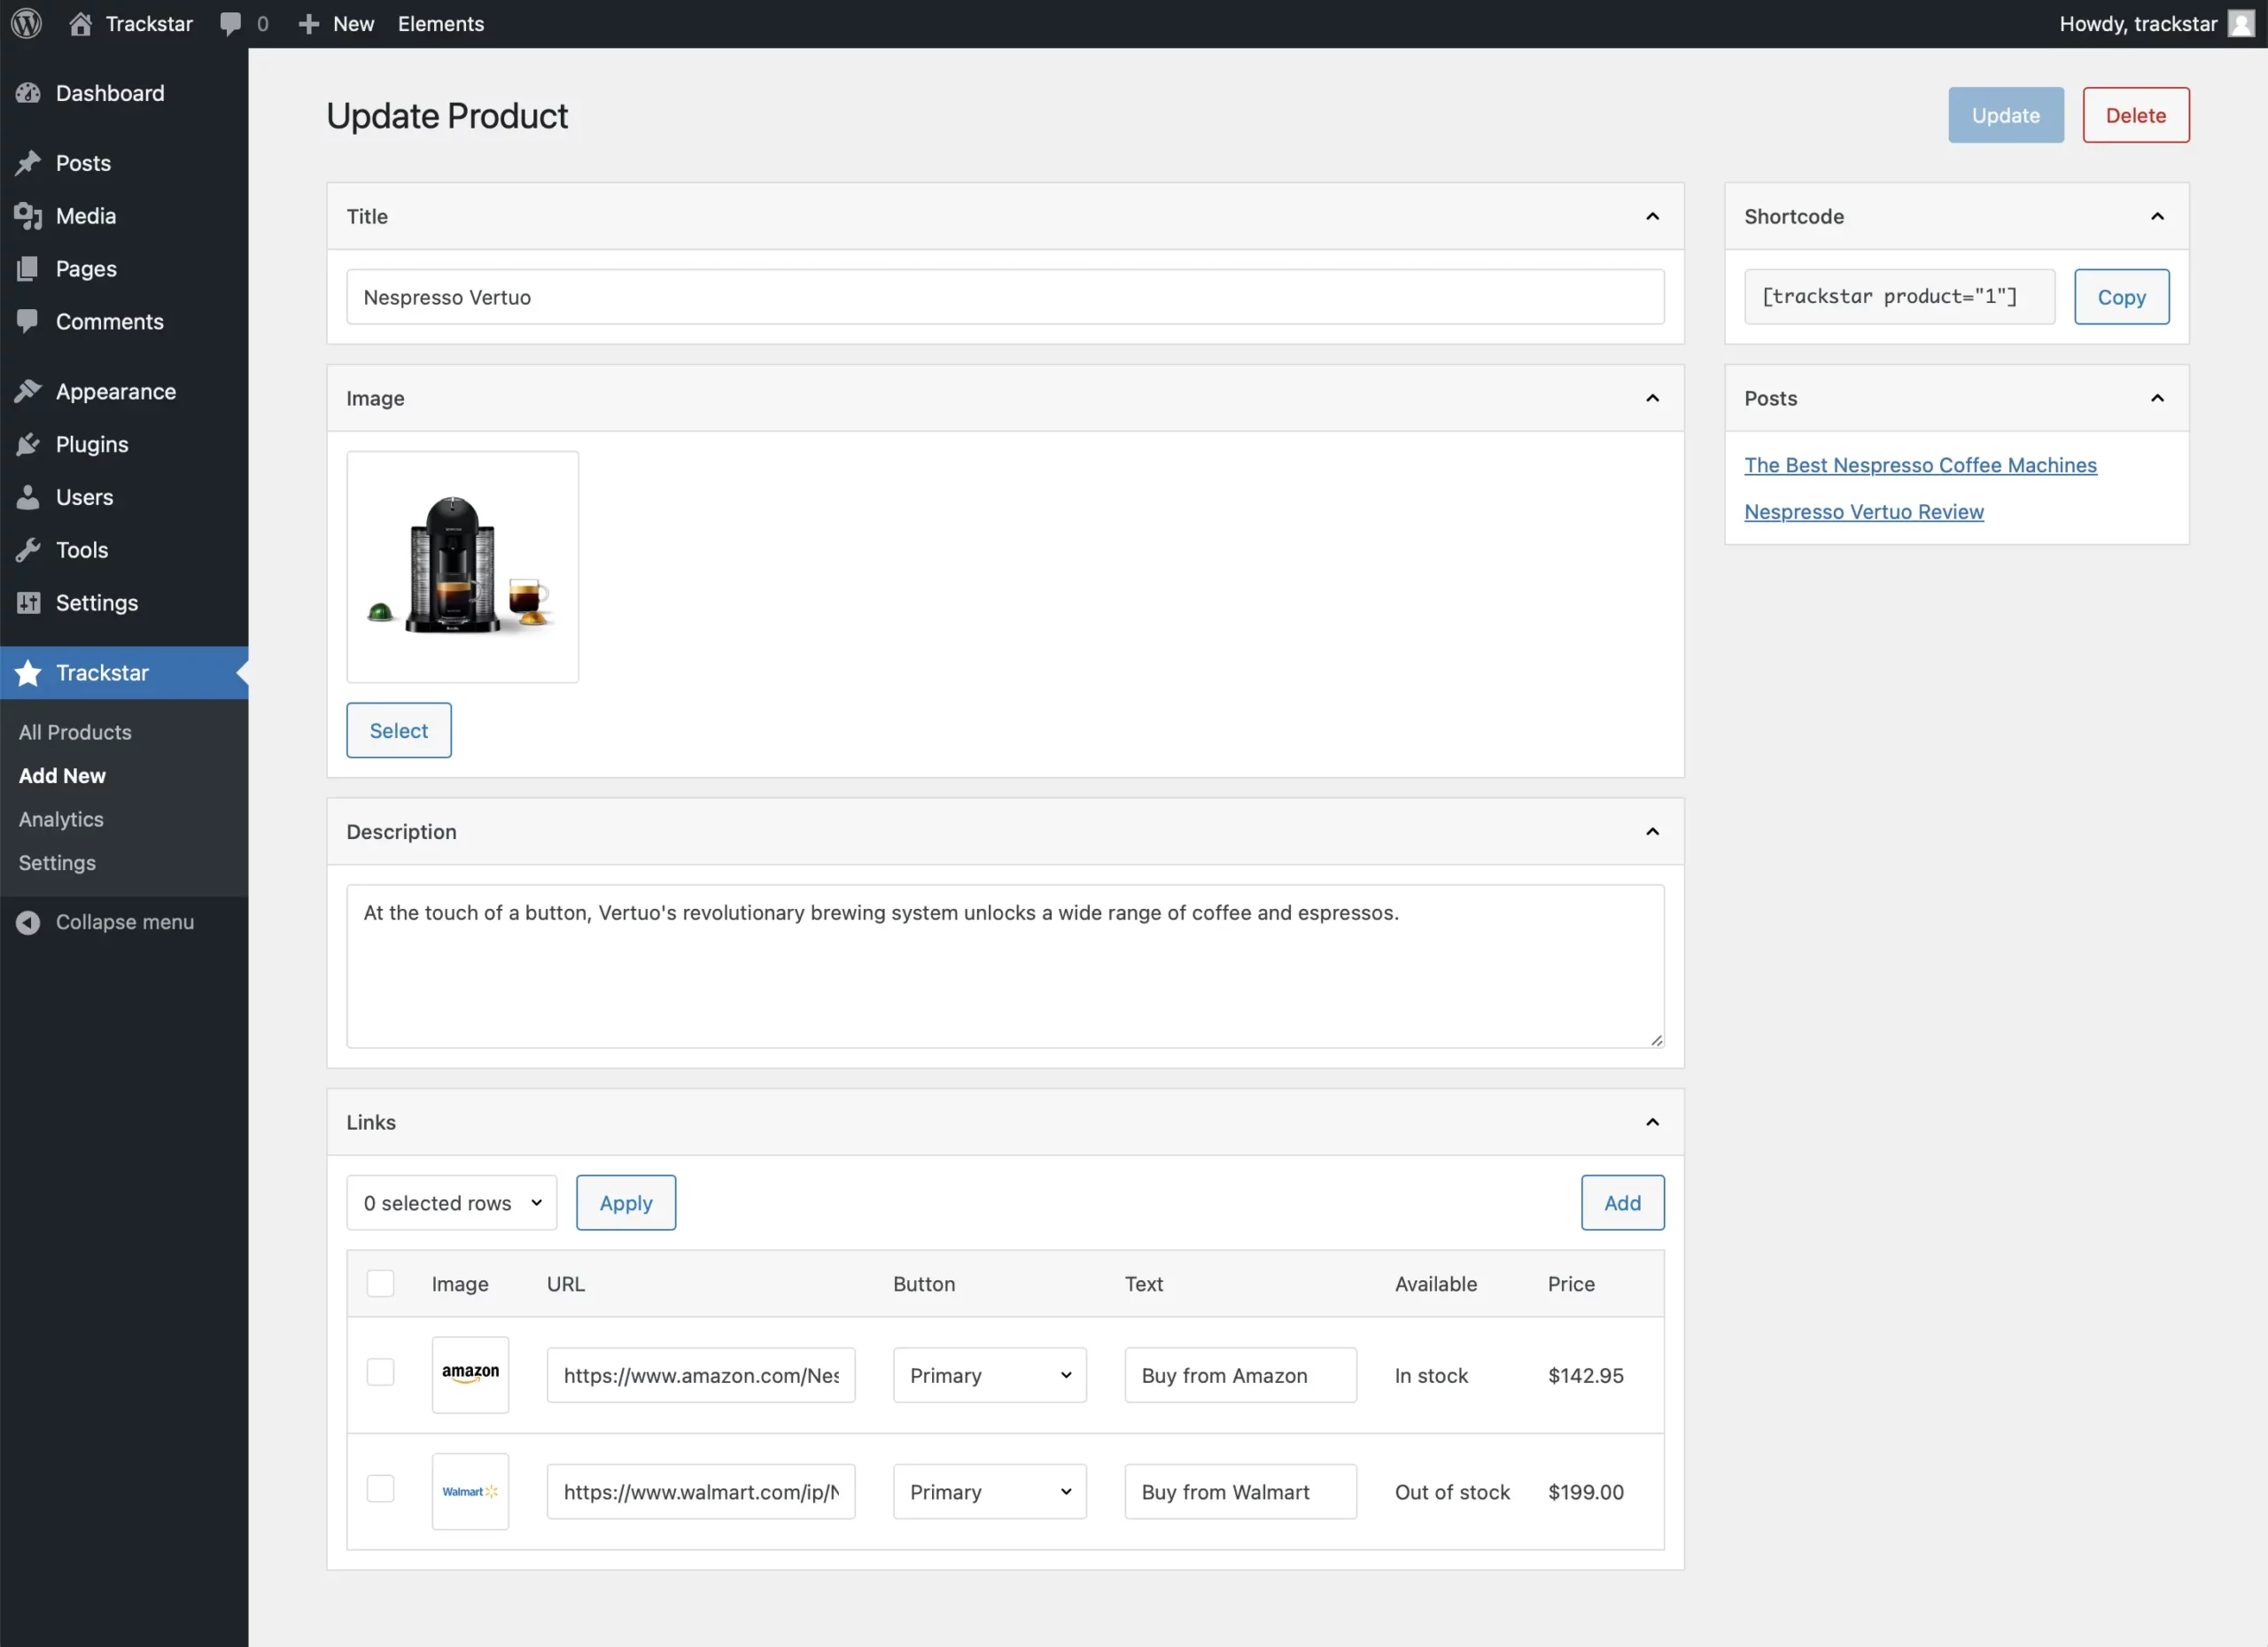
Once a product is created, a sidebar will appear. The sidebar contains a copyable shortcode which you can use to display the product, and a list of posts that contain the shortcode, for convenience.
Display customizer
Navigate to Trackstar > Settings.
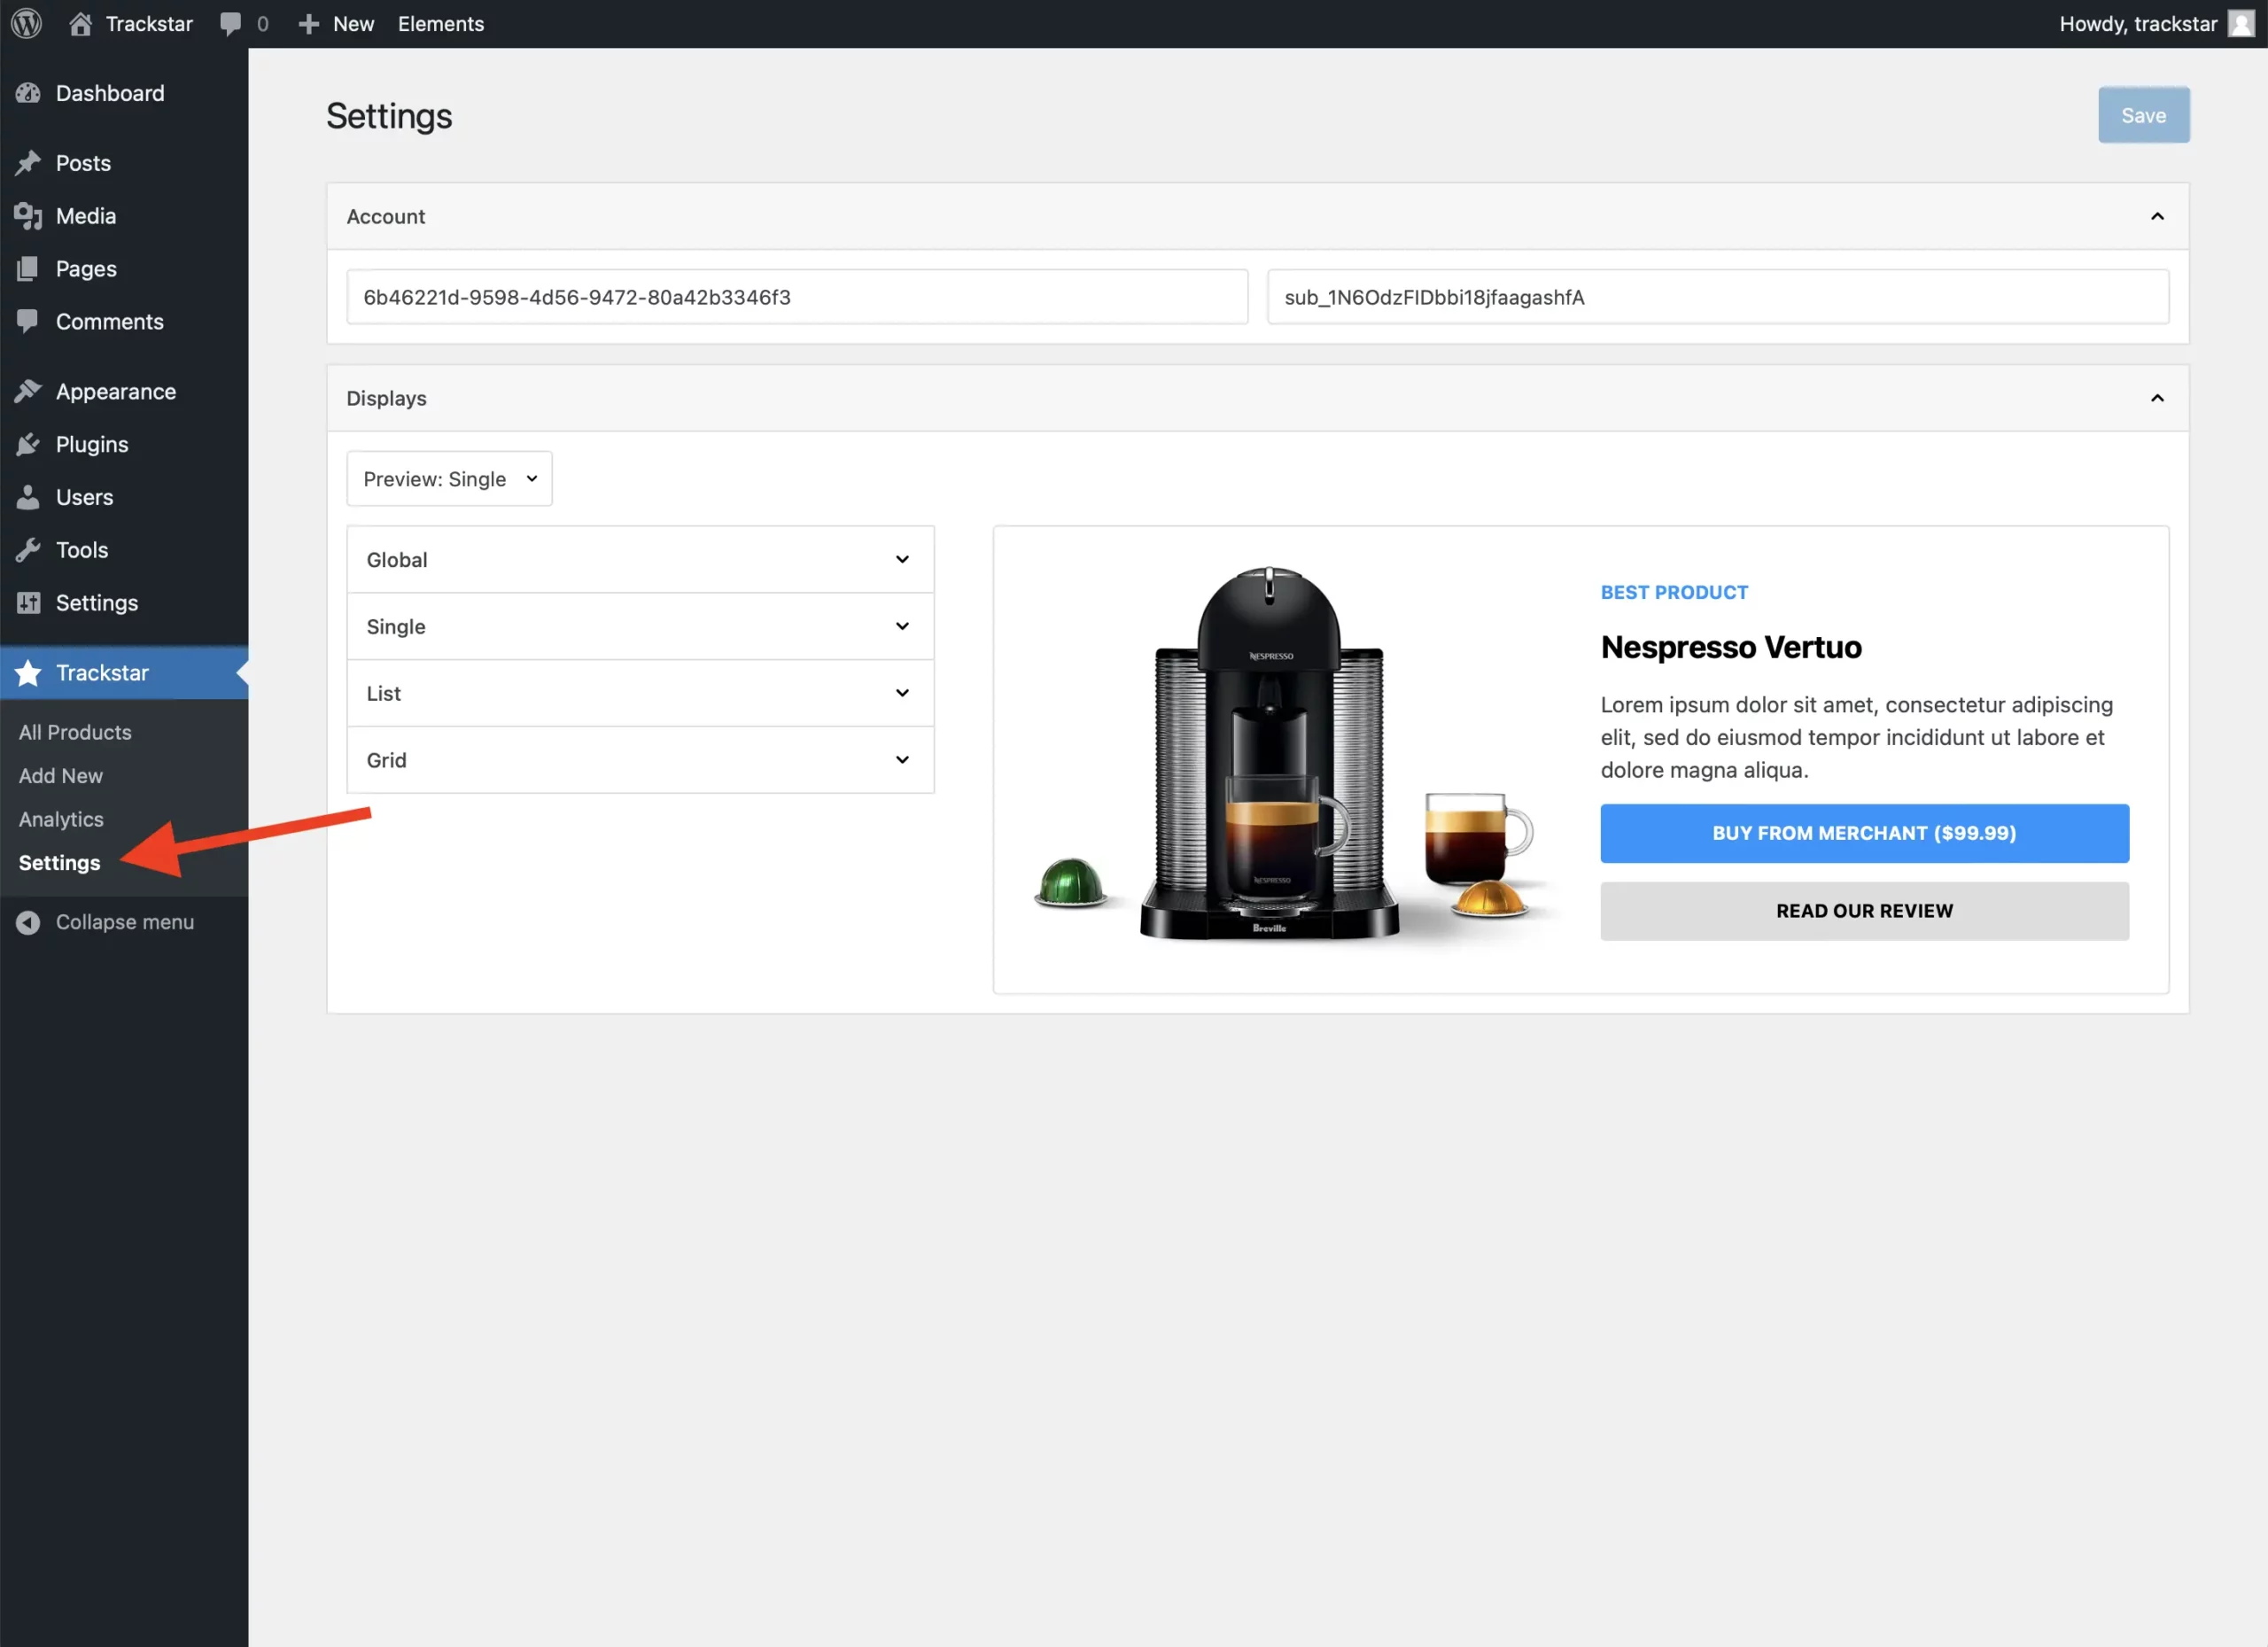
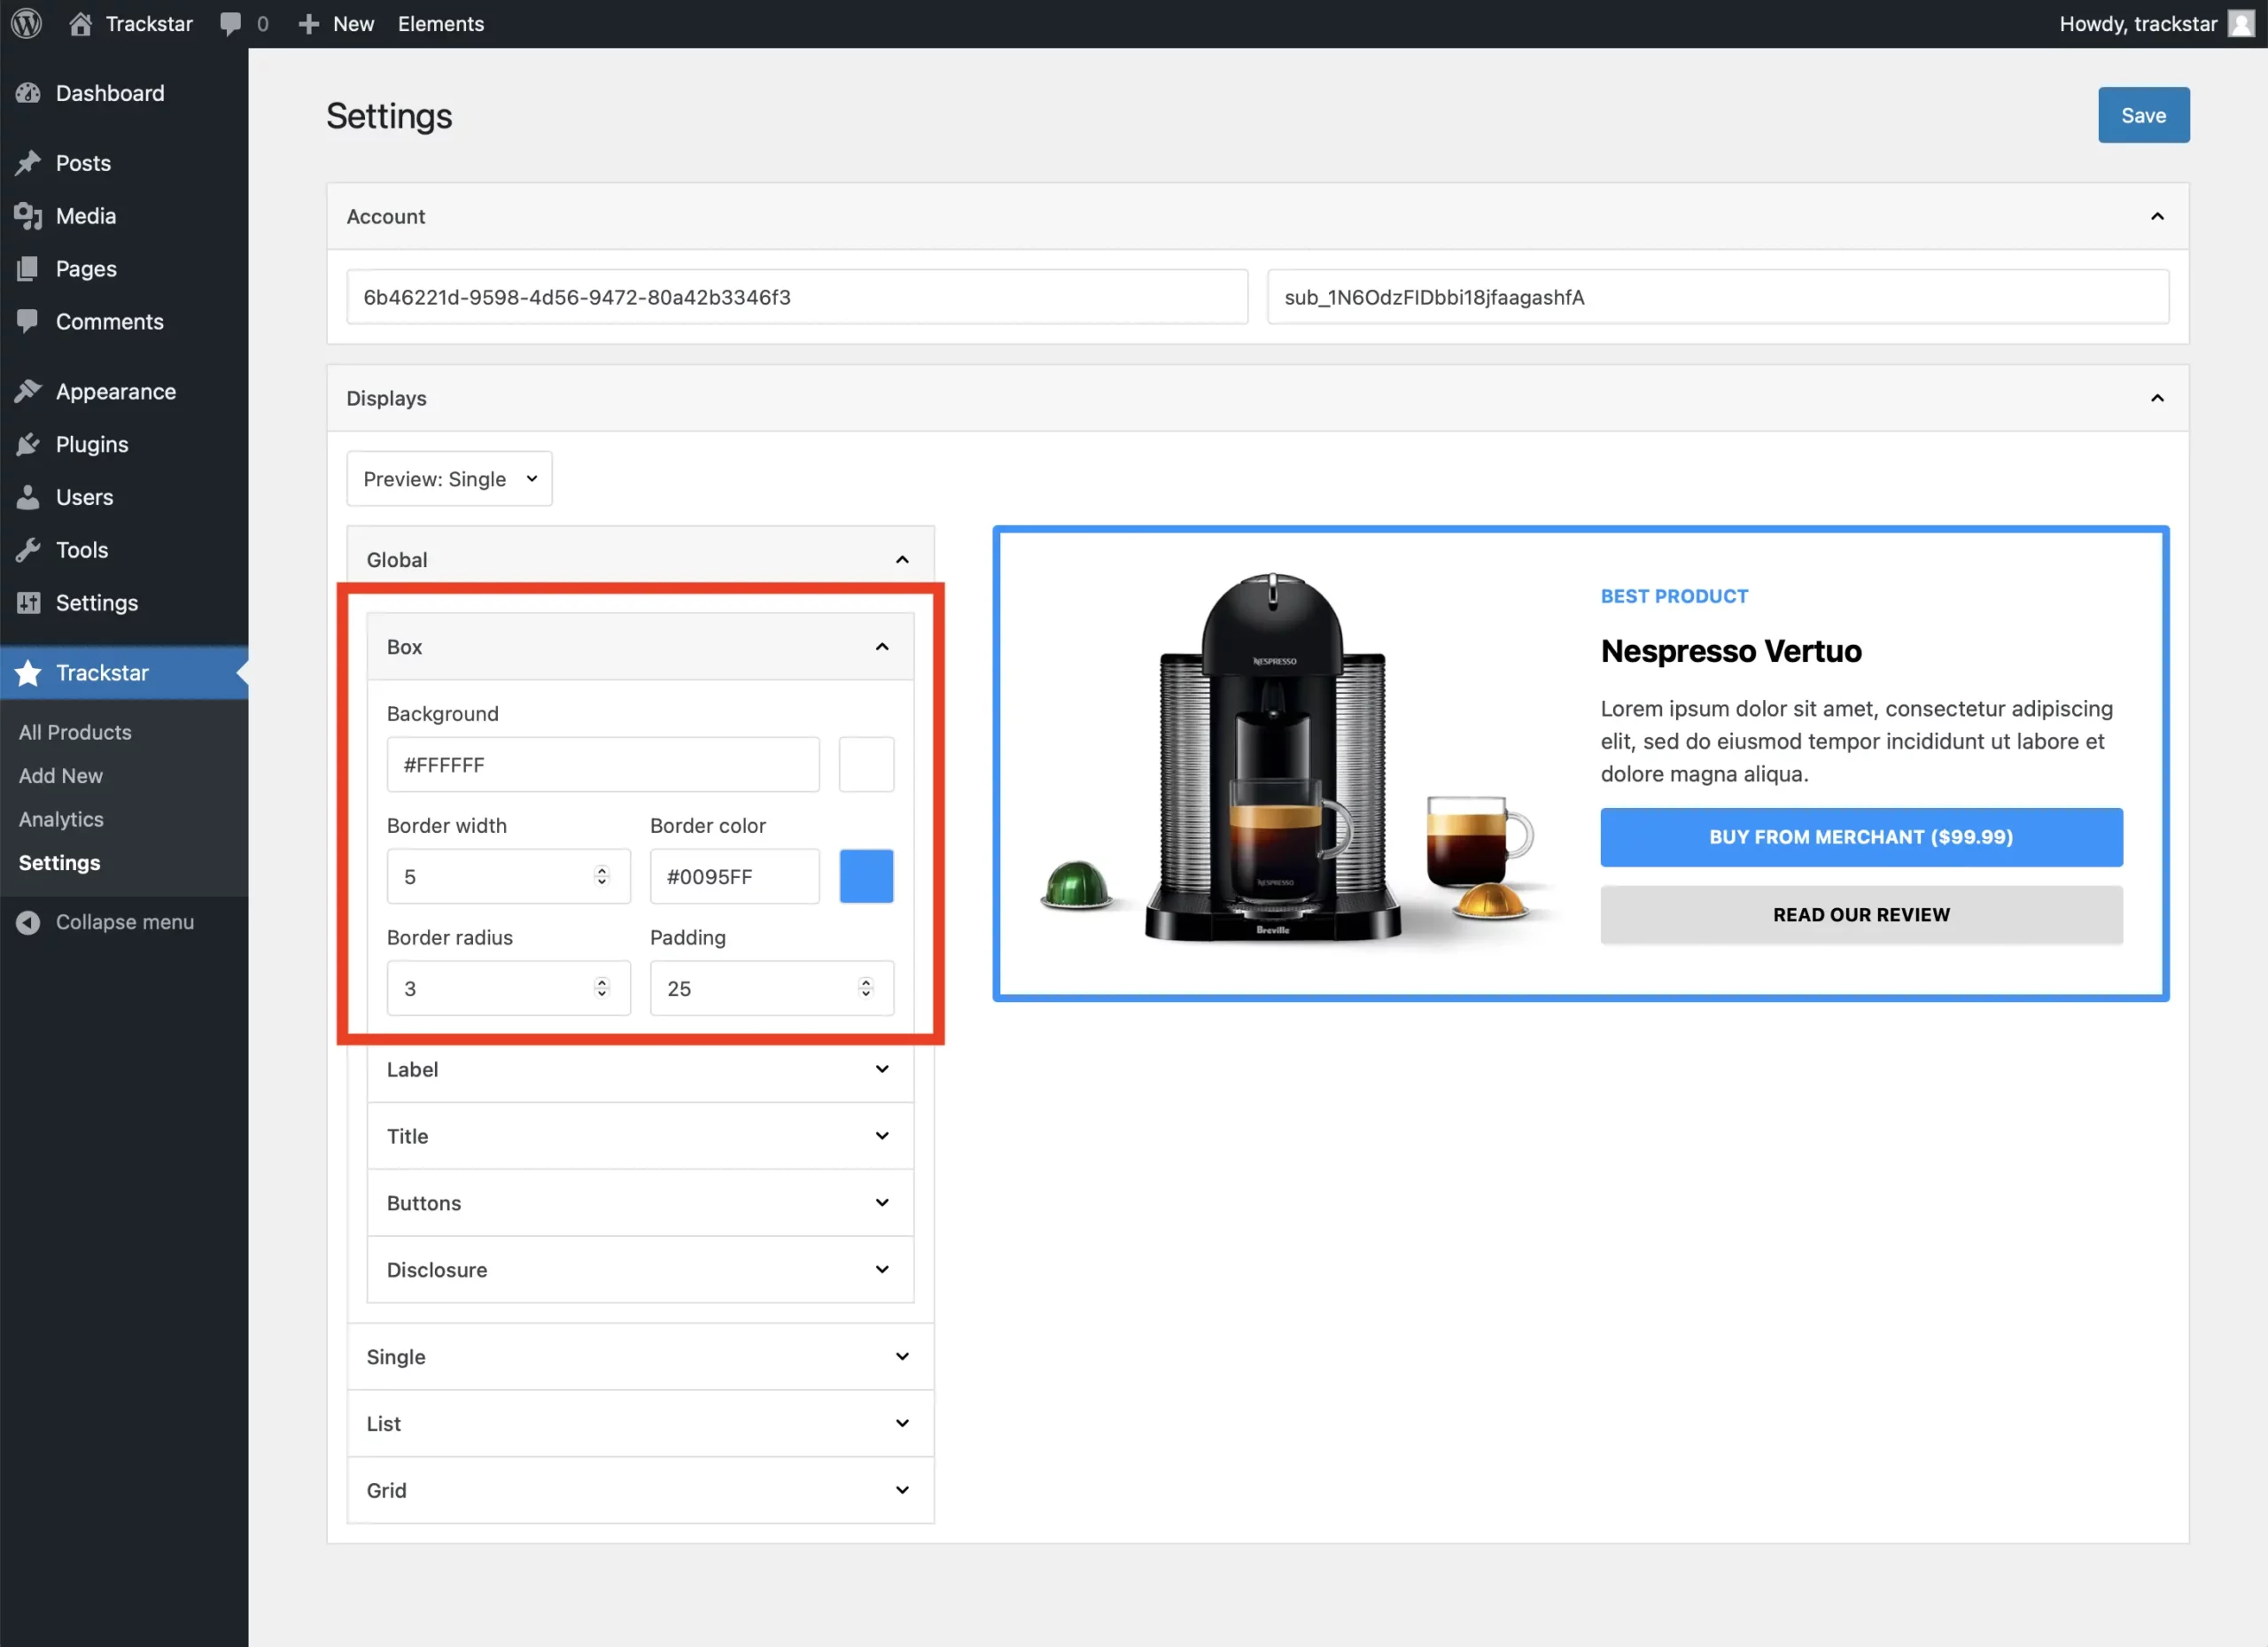
The Displays settings block, also known as the Display Customizer, is where you manage how product displays look and function. There are over 50 options and you can customize every element, including the box, title, buttons, and more.
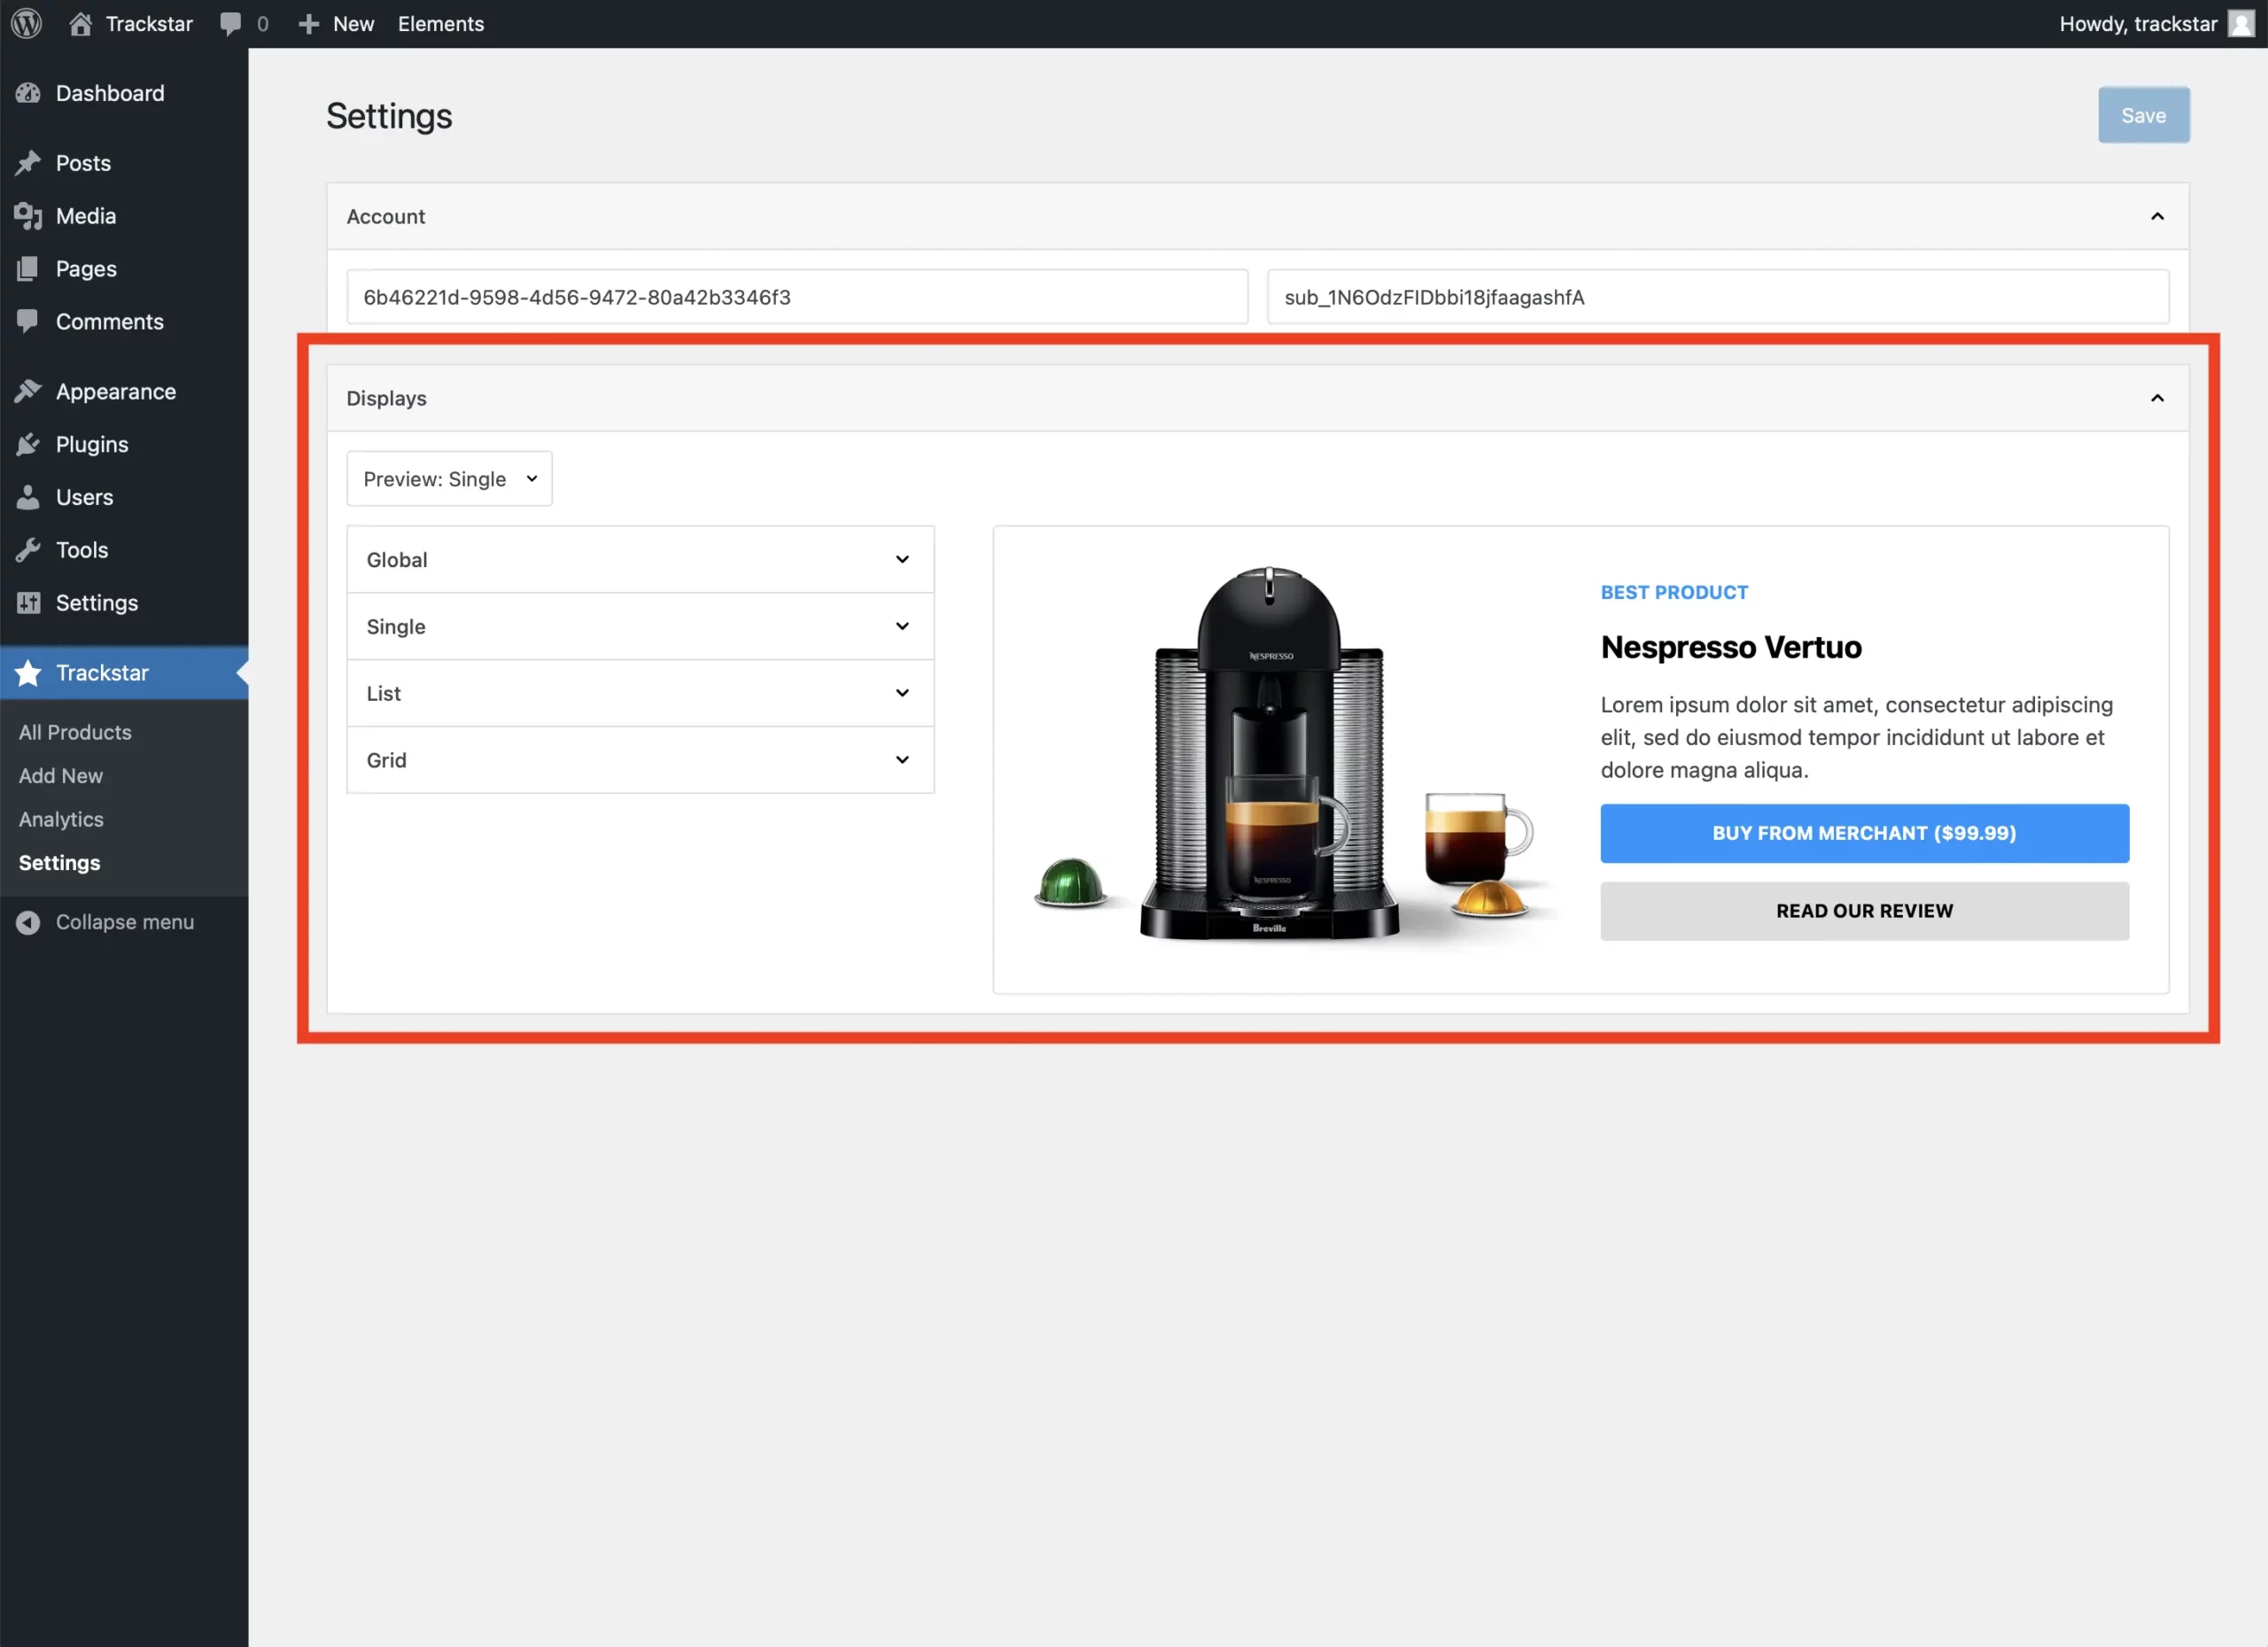
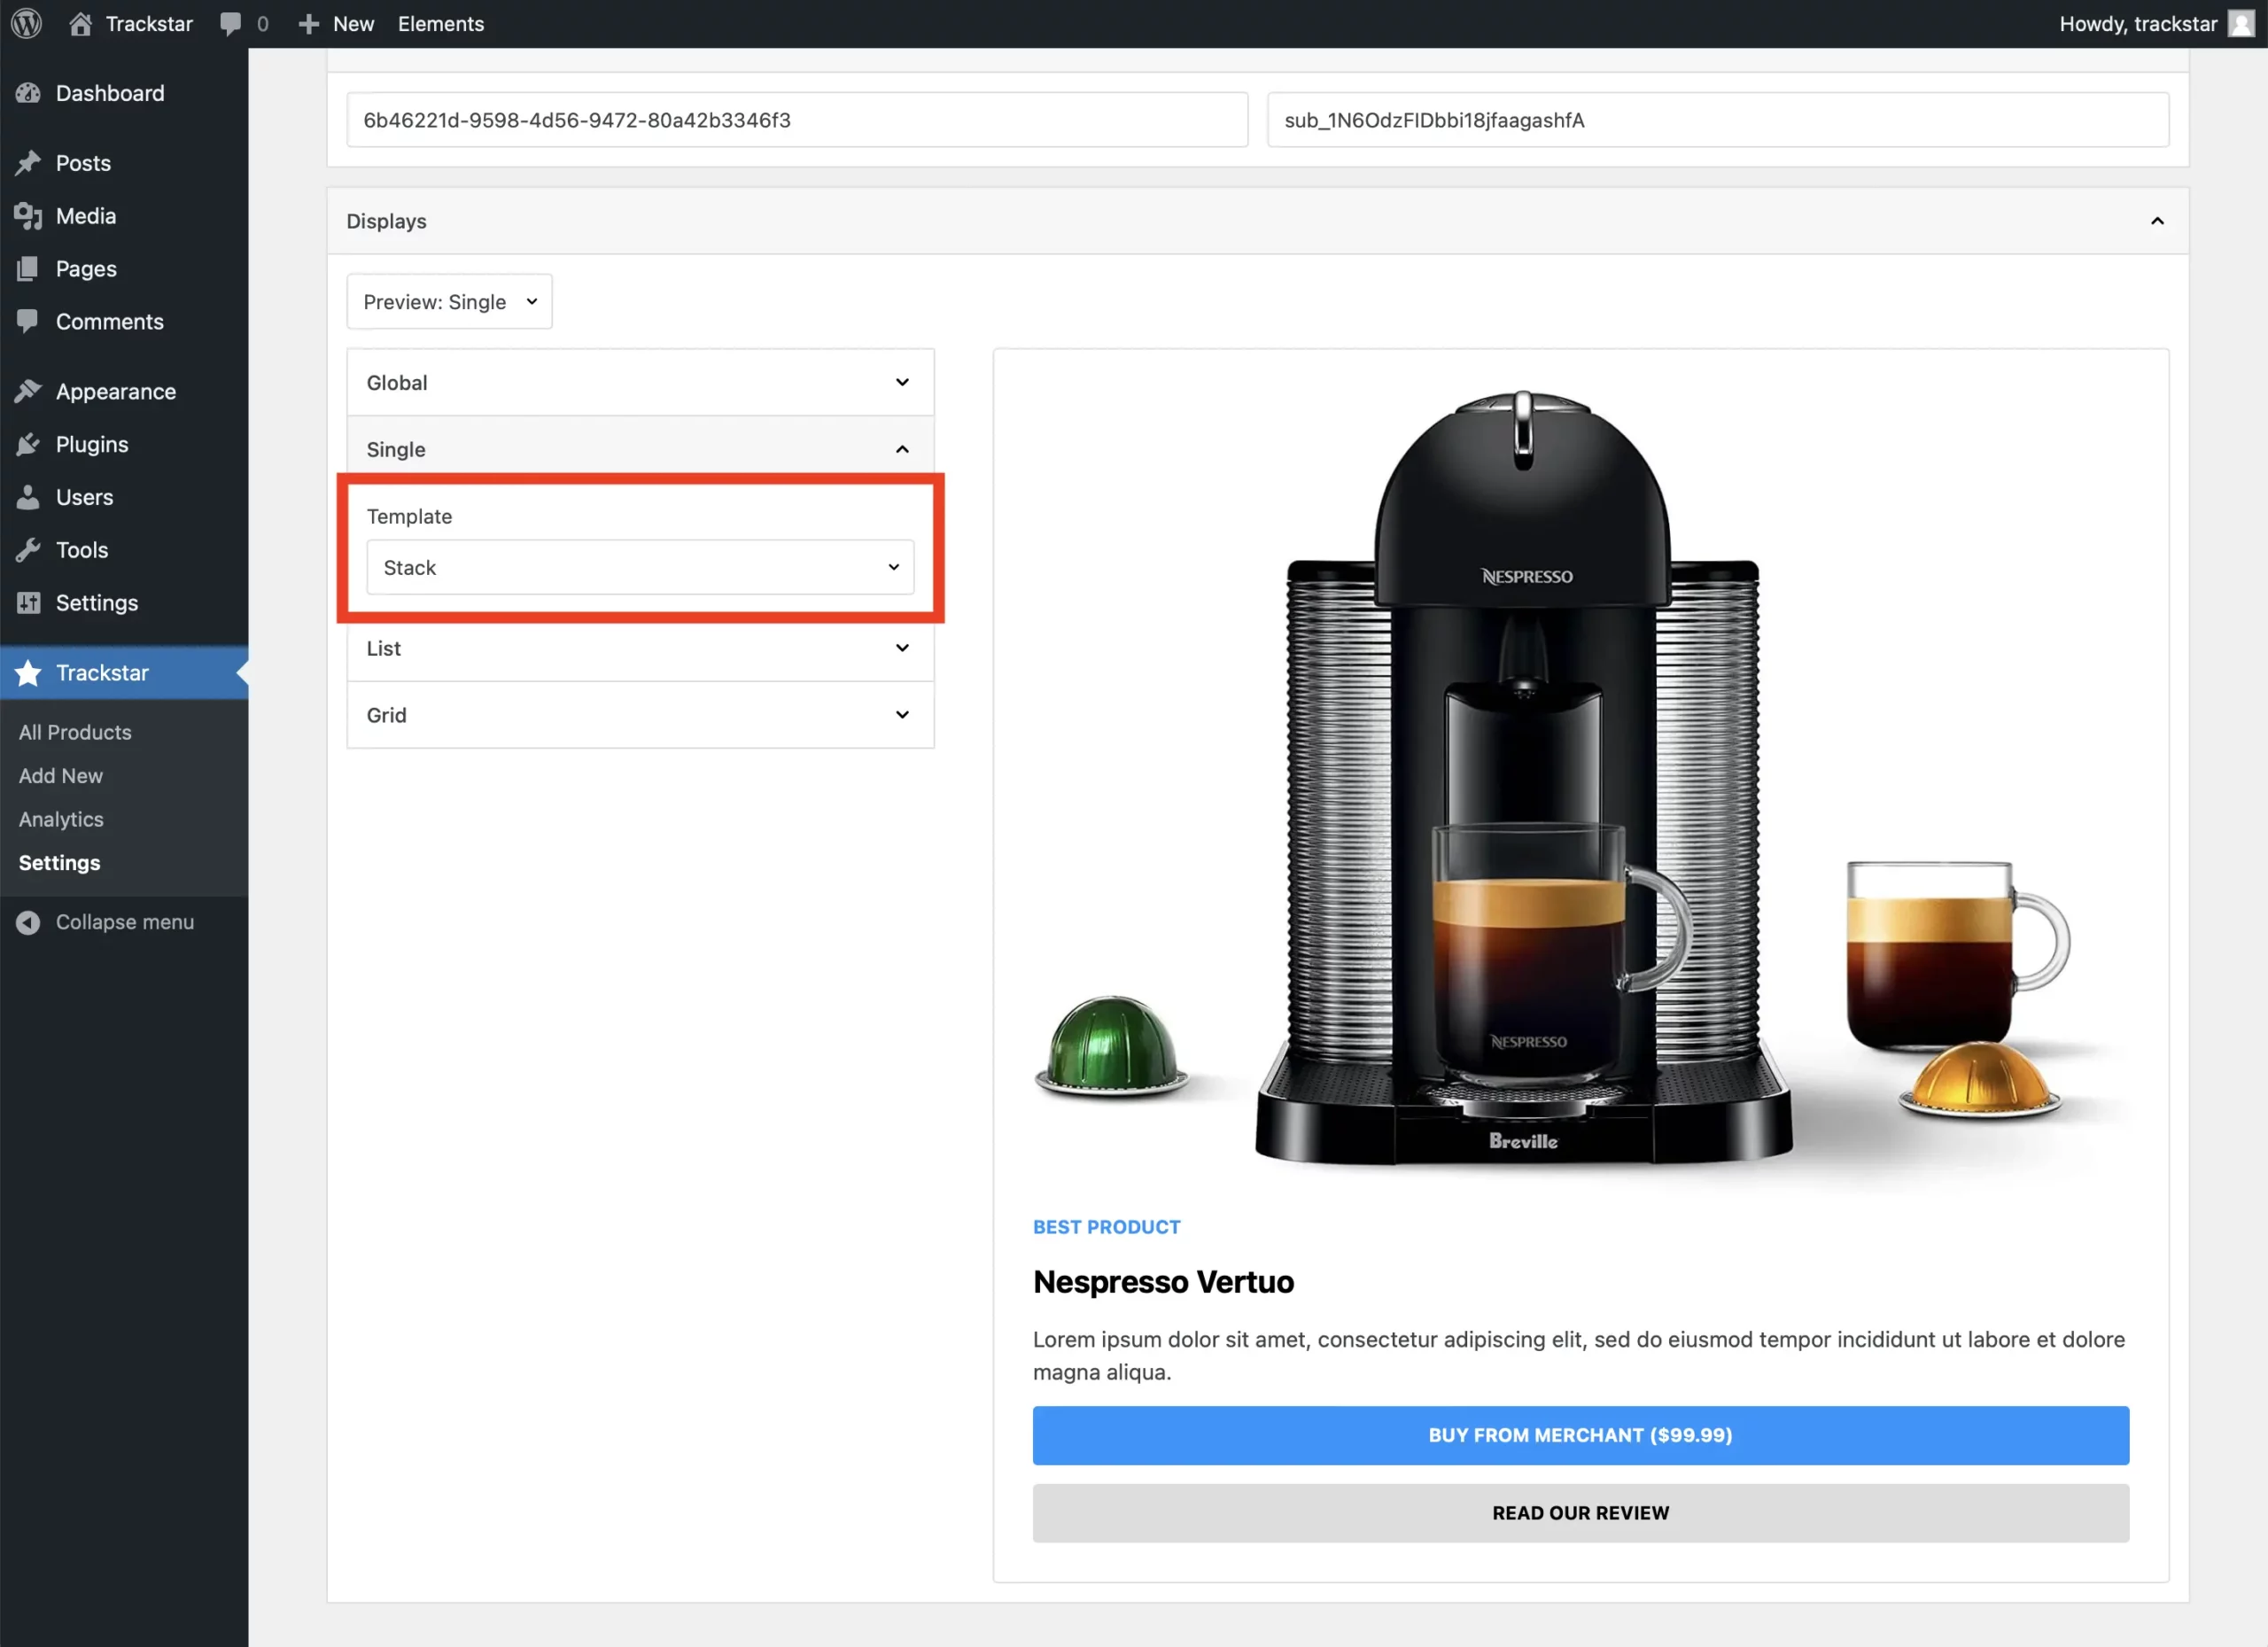
There are four main groups of options: Global, Single, List, and Grid. Global options are applied to all product displays, whereas the other three groups are only applied to those specific display types.
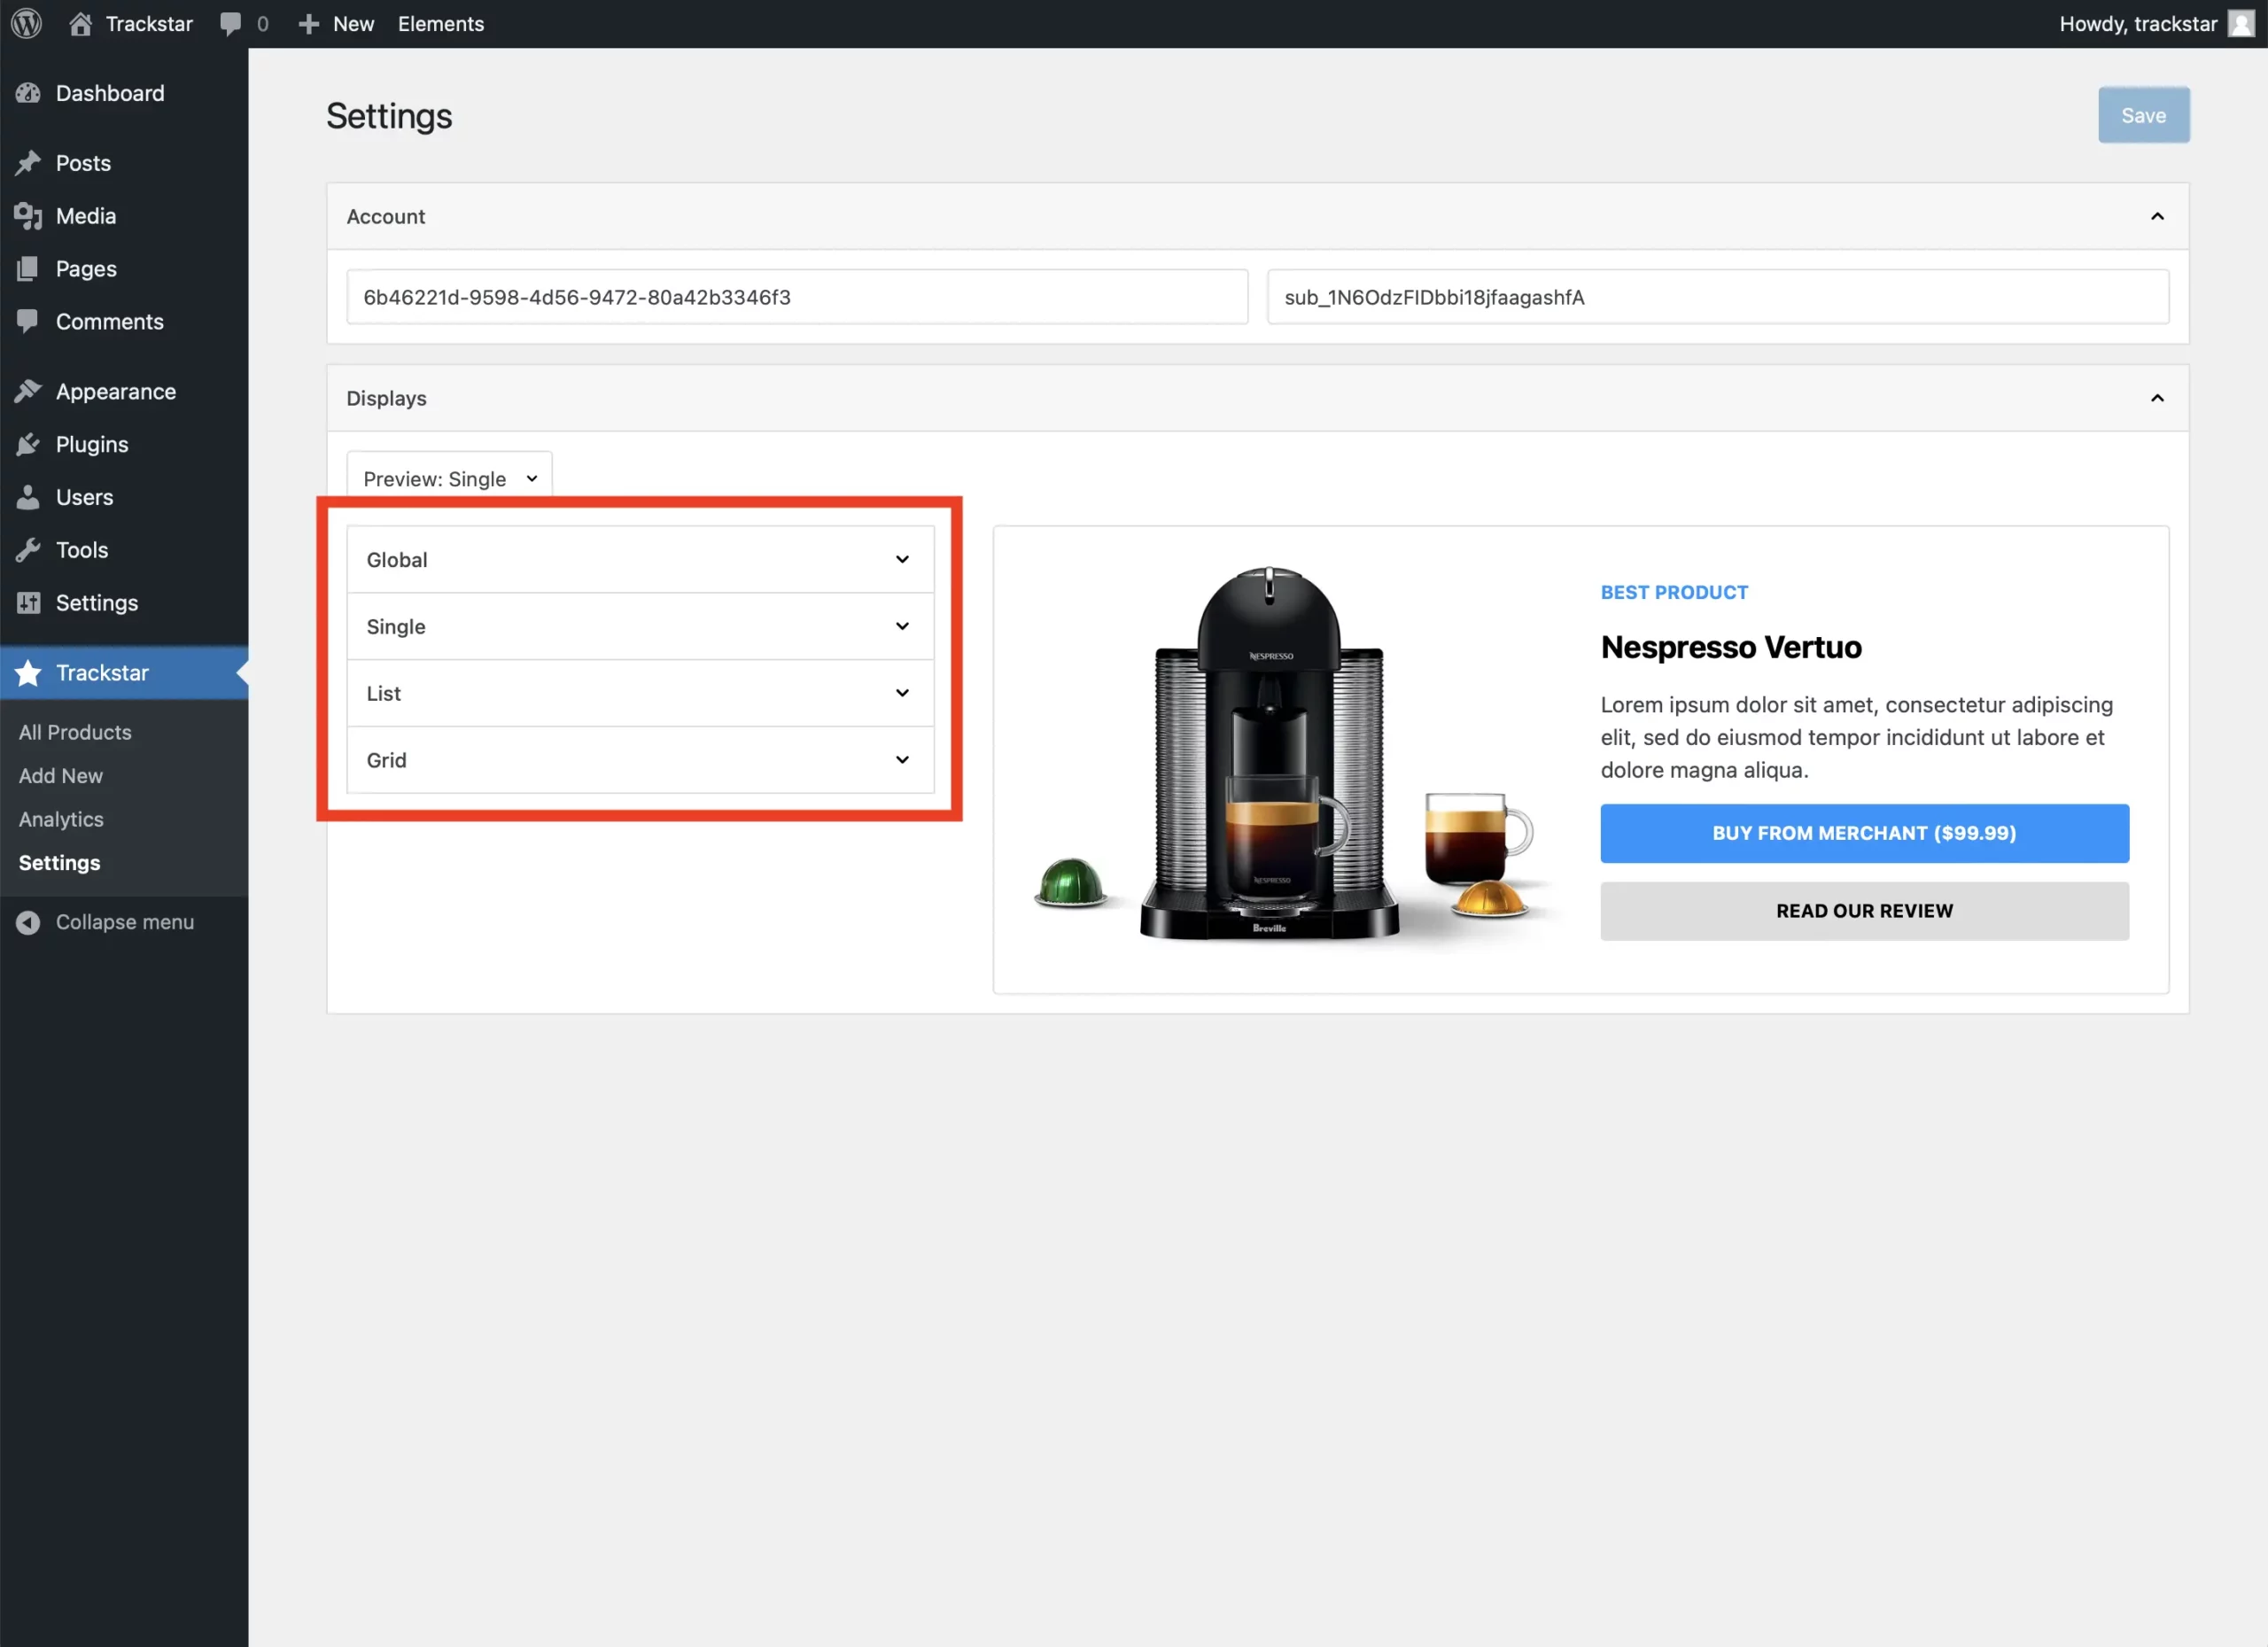
Options are pretty straightforward, but the preview on the right also updates automatically so you can view your changes live as you customize. Additionally, keep in mind that you can also use custom CSS to customize further.
One option worth discussing more is the Template option found under Single, List, and Grid. This sets the layout for each display type. However, you are not limited to these pre-defined layouts. Displays use a unique grid-based design that allows you to create any custom layout with a single, simple CSS snippet.
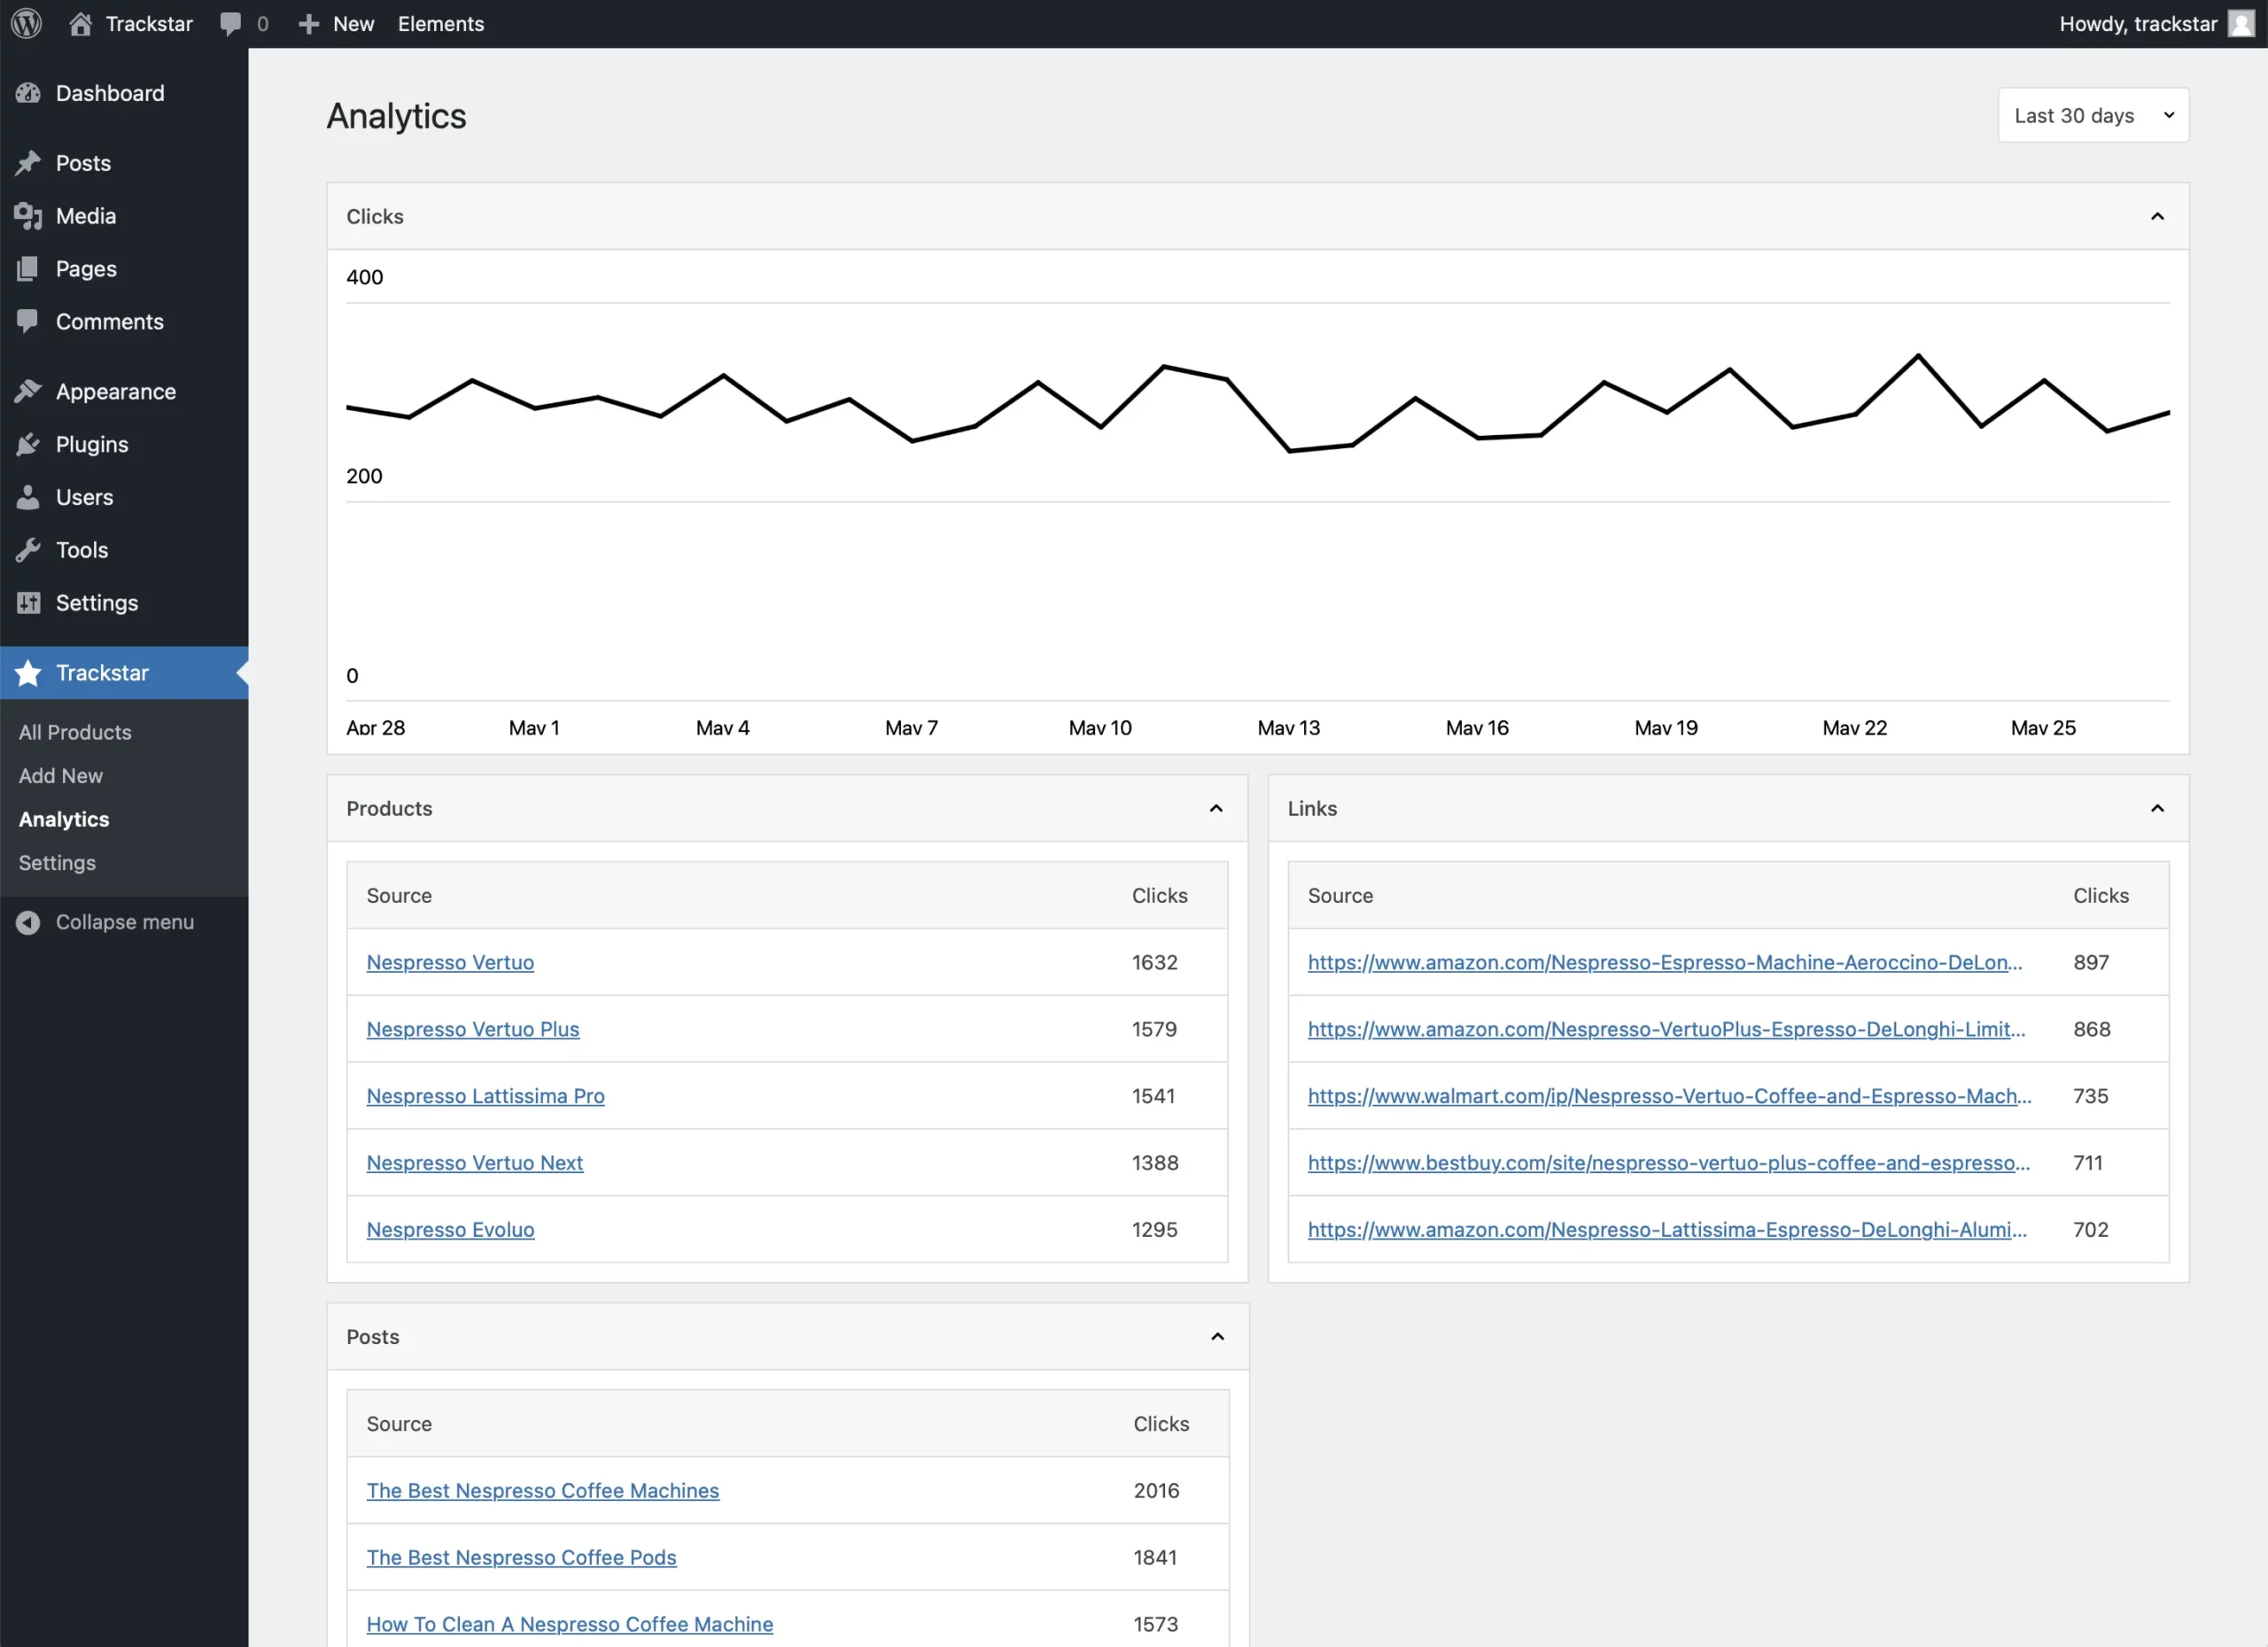
Analytics
Navigate to Trackstar > Analytics.
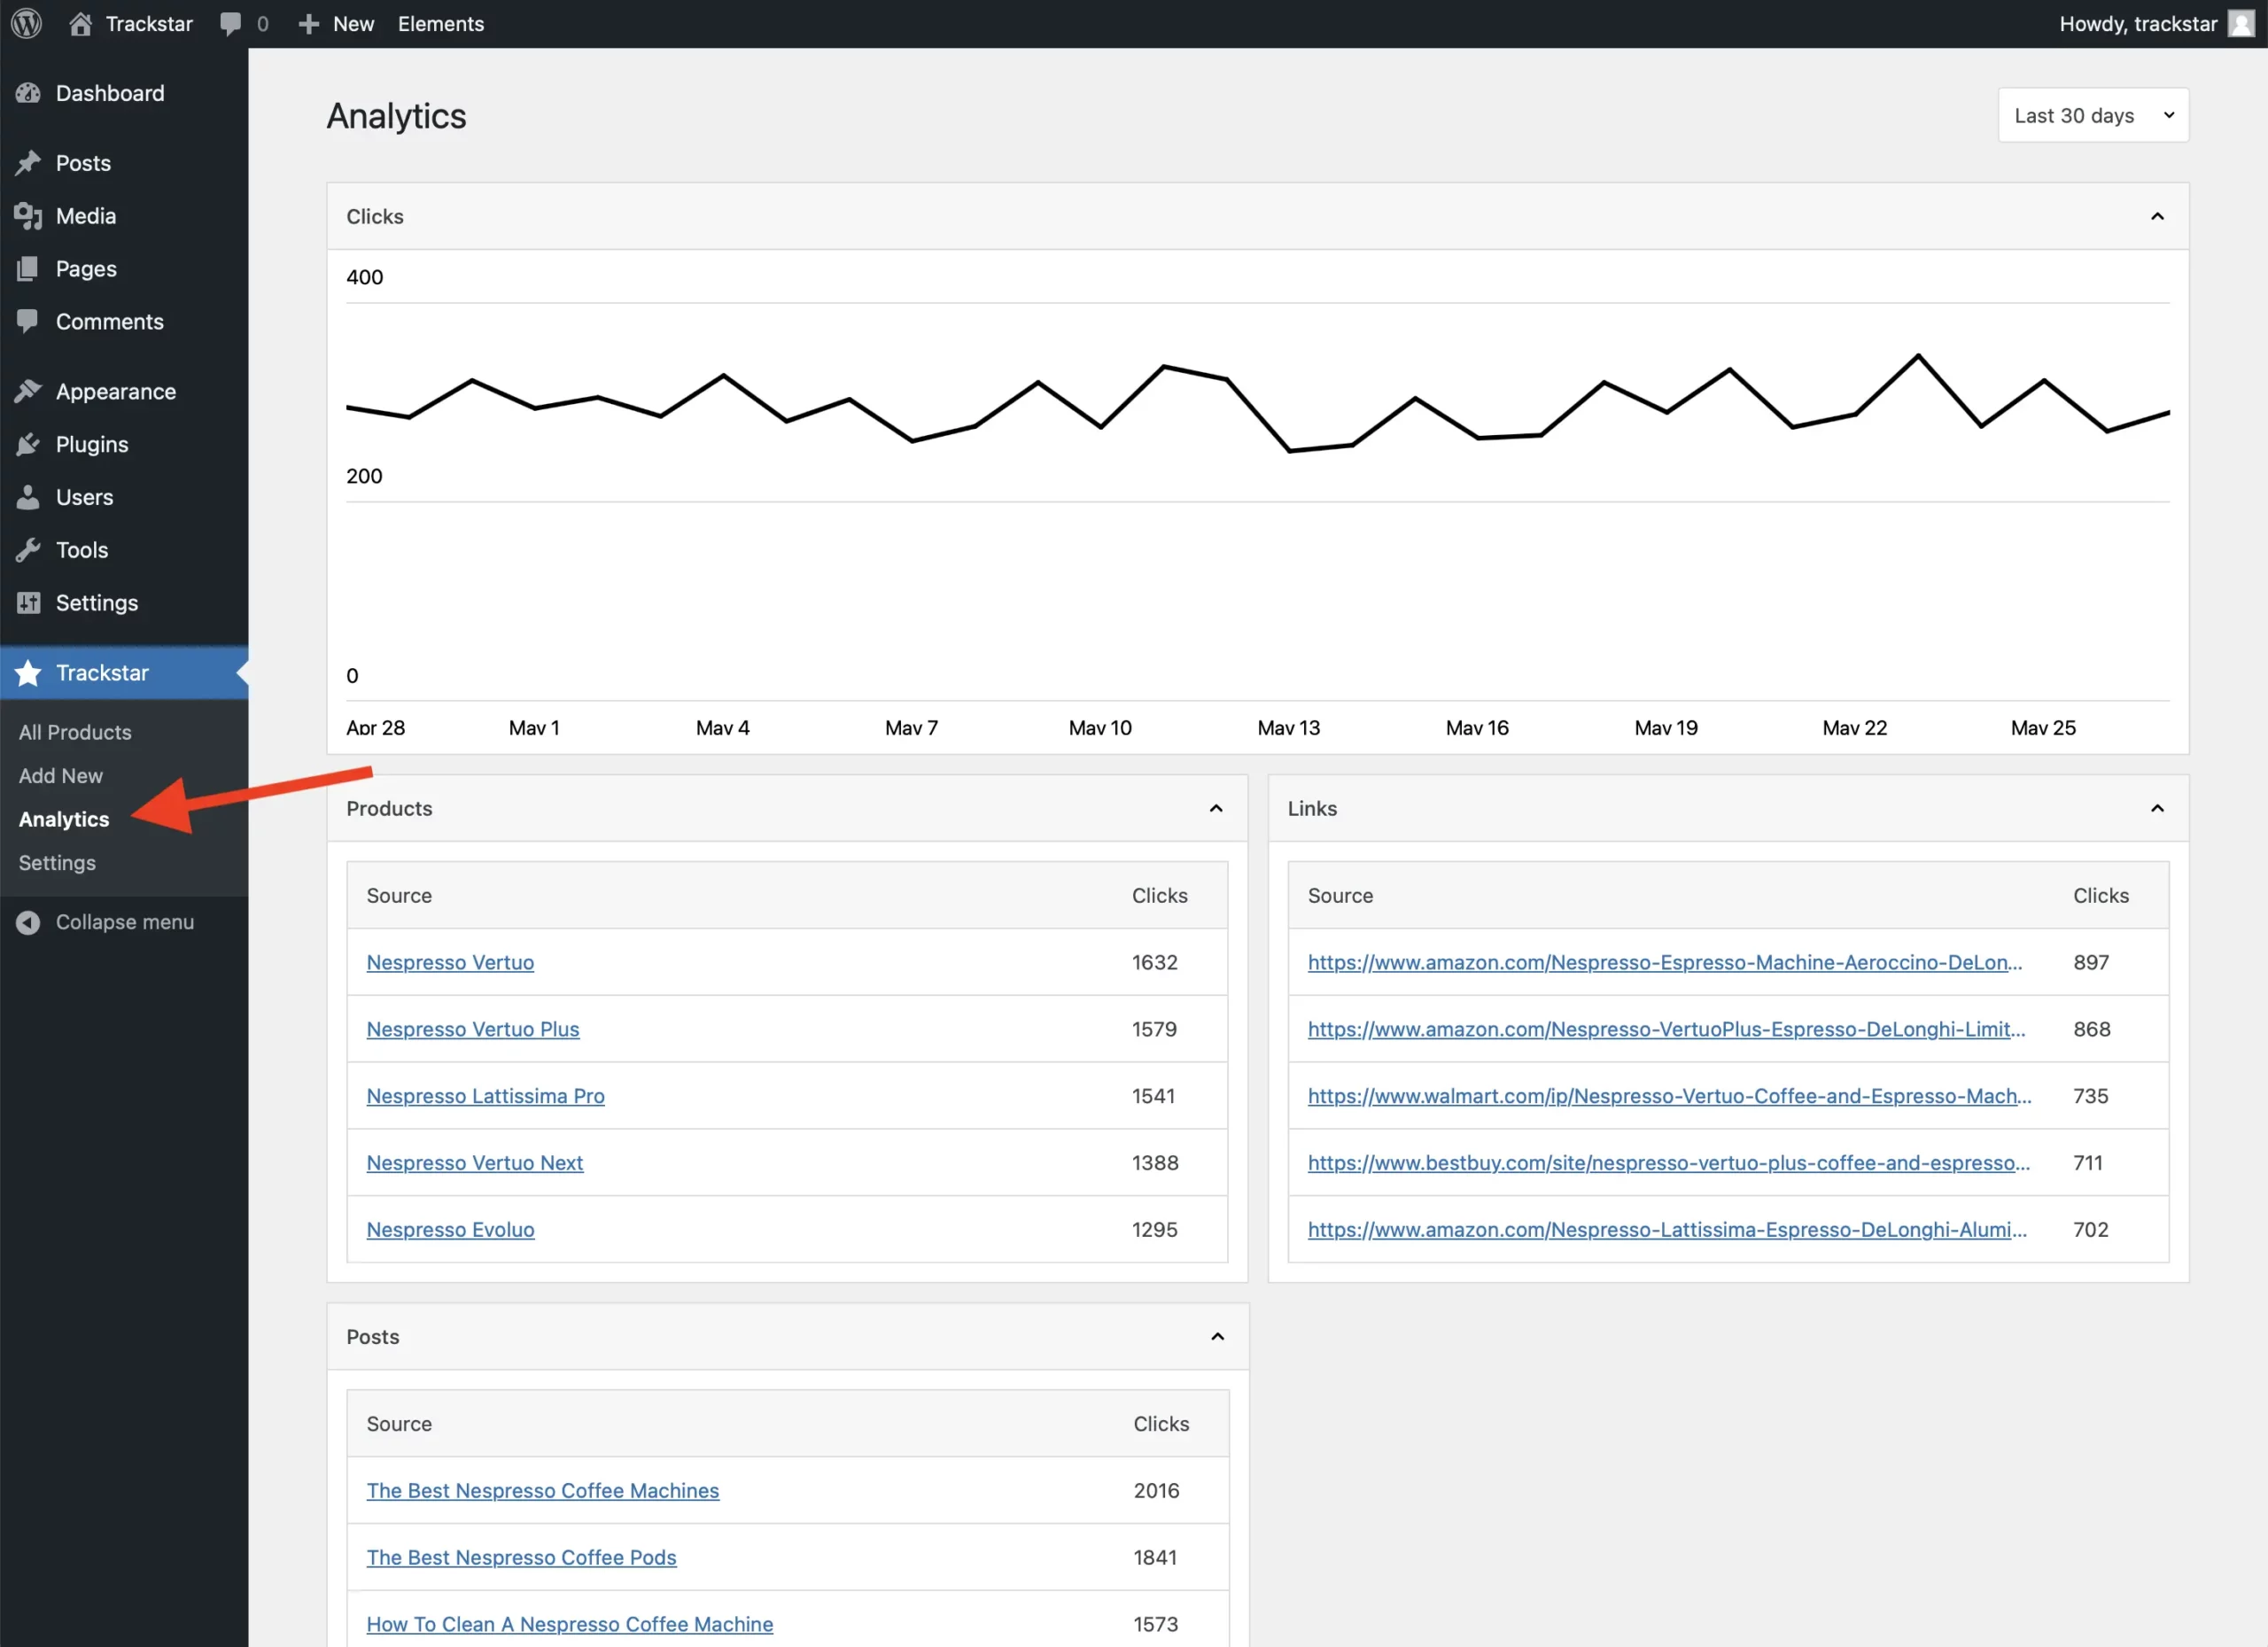
With a Premium subscription, the plugin will automatically track link clicks. This is where you can view the analytics on your clicks. There is a general overview of clicks by day, plus tables which provide insights on what and where clicks occurred.
Shortcode reference
Product displays are rendered using shortcodes. Below is a reference table with available options, plus some examples of common shortcode configurations.
| Attribute | Value | Display types |
|---|---|---|
product | The ID of the product to display. | Single |
products | The IDs of the products to display, in the order you want to display them. | List, Grid |
label | The label to display on the product box. | Single |
labels | The labels to display on the product boxes, in the order you want to display them. | List, Grid |
display | The type of display to show, either list or grid. | List, Grid |
Display a single product
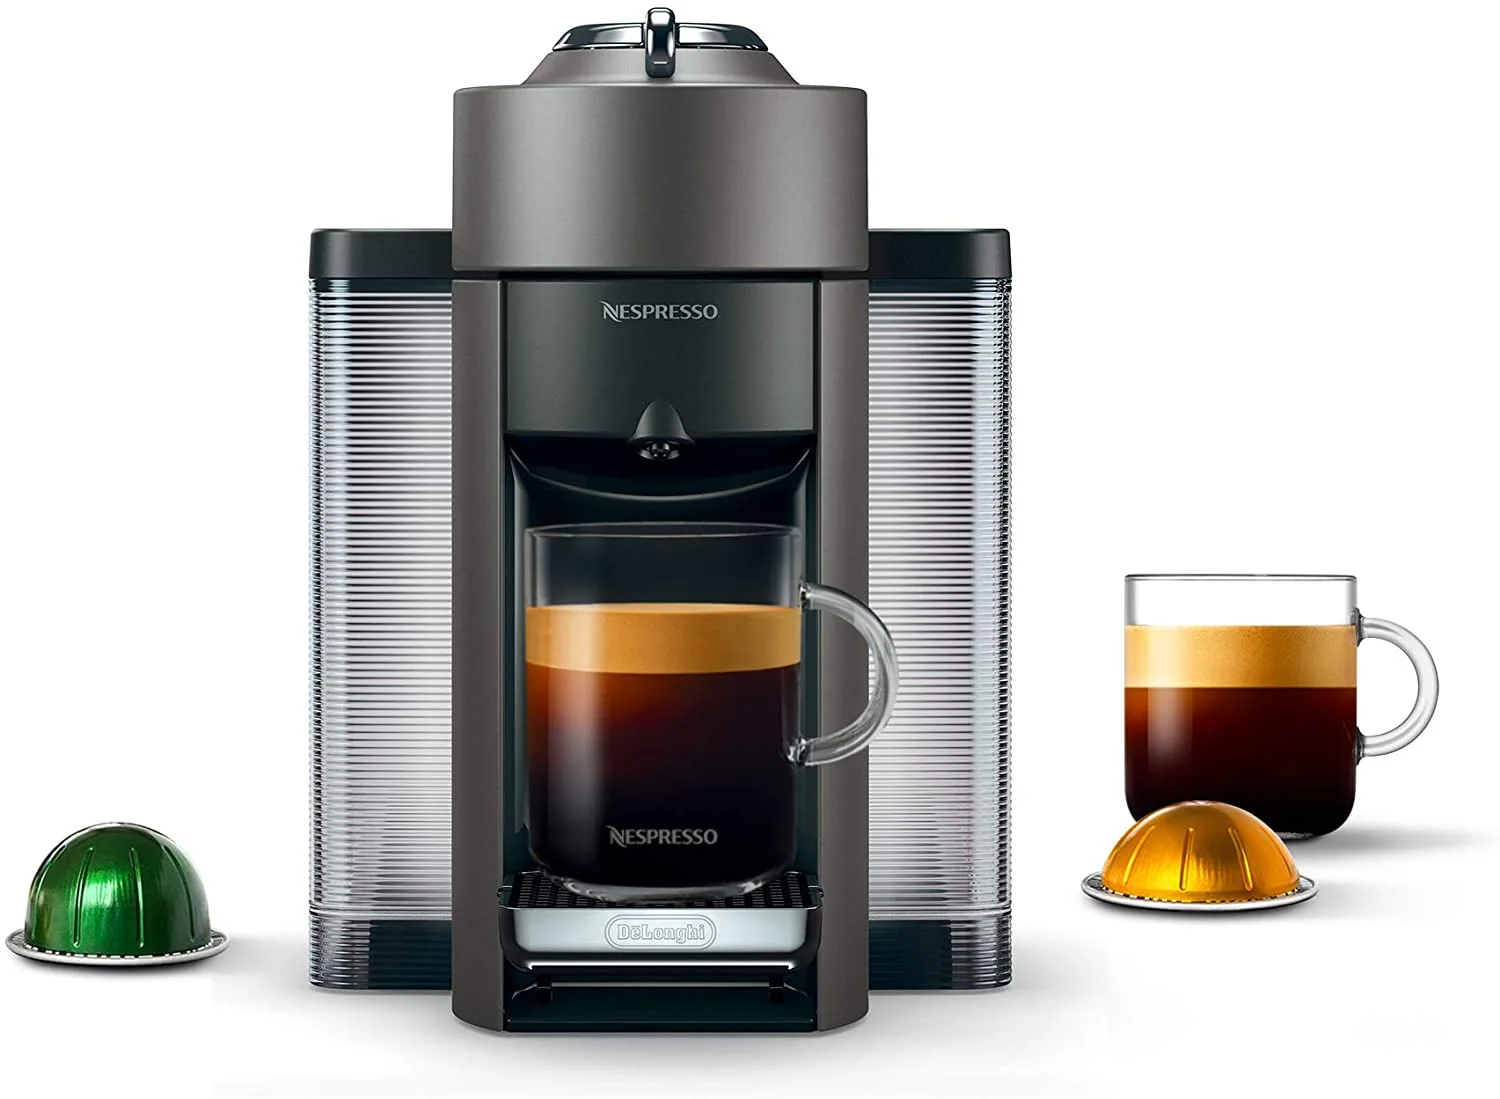
[trackstar product="1" label="Best Product"]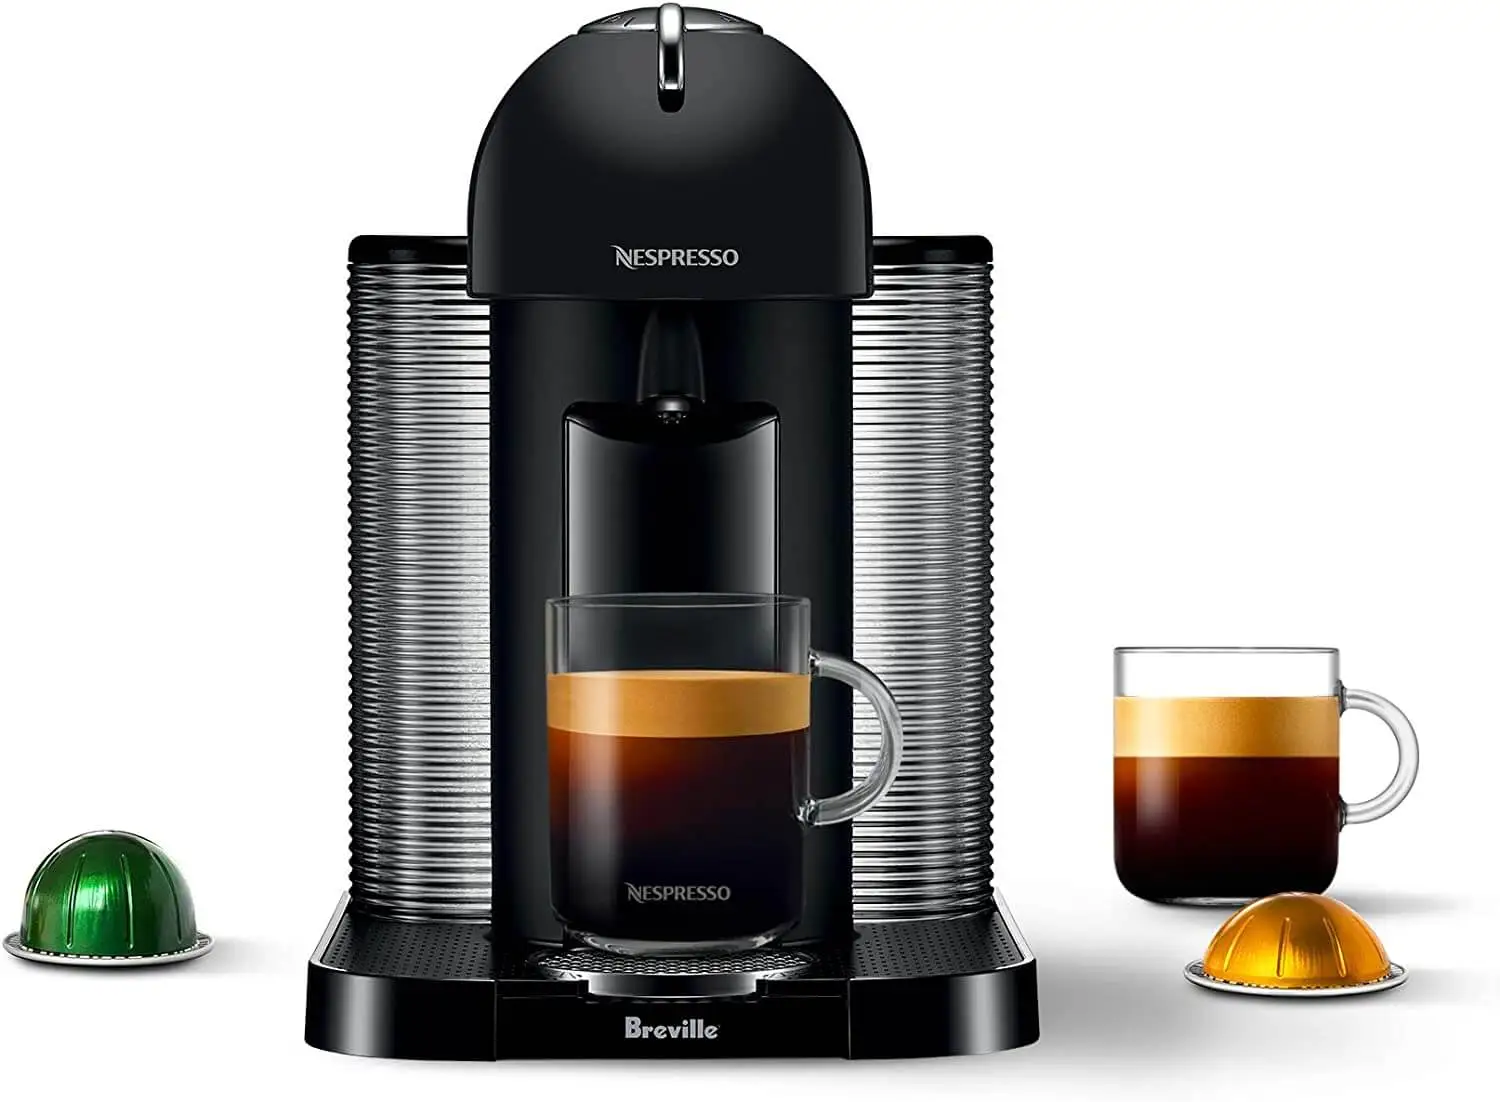
At the touch of a button, Vertuo's revolutionary brewing system unlocks a wide range of coffee and espressos.
Display a product list
[trackstar display="list" products="1,2,3" labels="Best Overall, Best Premium"]-
 Best OverallNespresso Vertuo
At the touch of a button, Vertuo's revolutionary brewing system unlocks a wide range of coffee and espressos.
-
Best PremiumNespresso Vertuo Plus
Exceptional coffee couldn't be easier, with the Vertuo Plus. Complete with automatic head & capsule ejection.
-
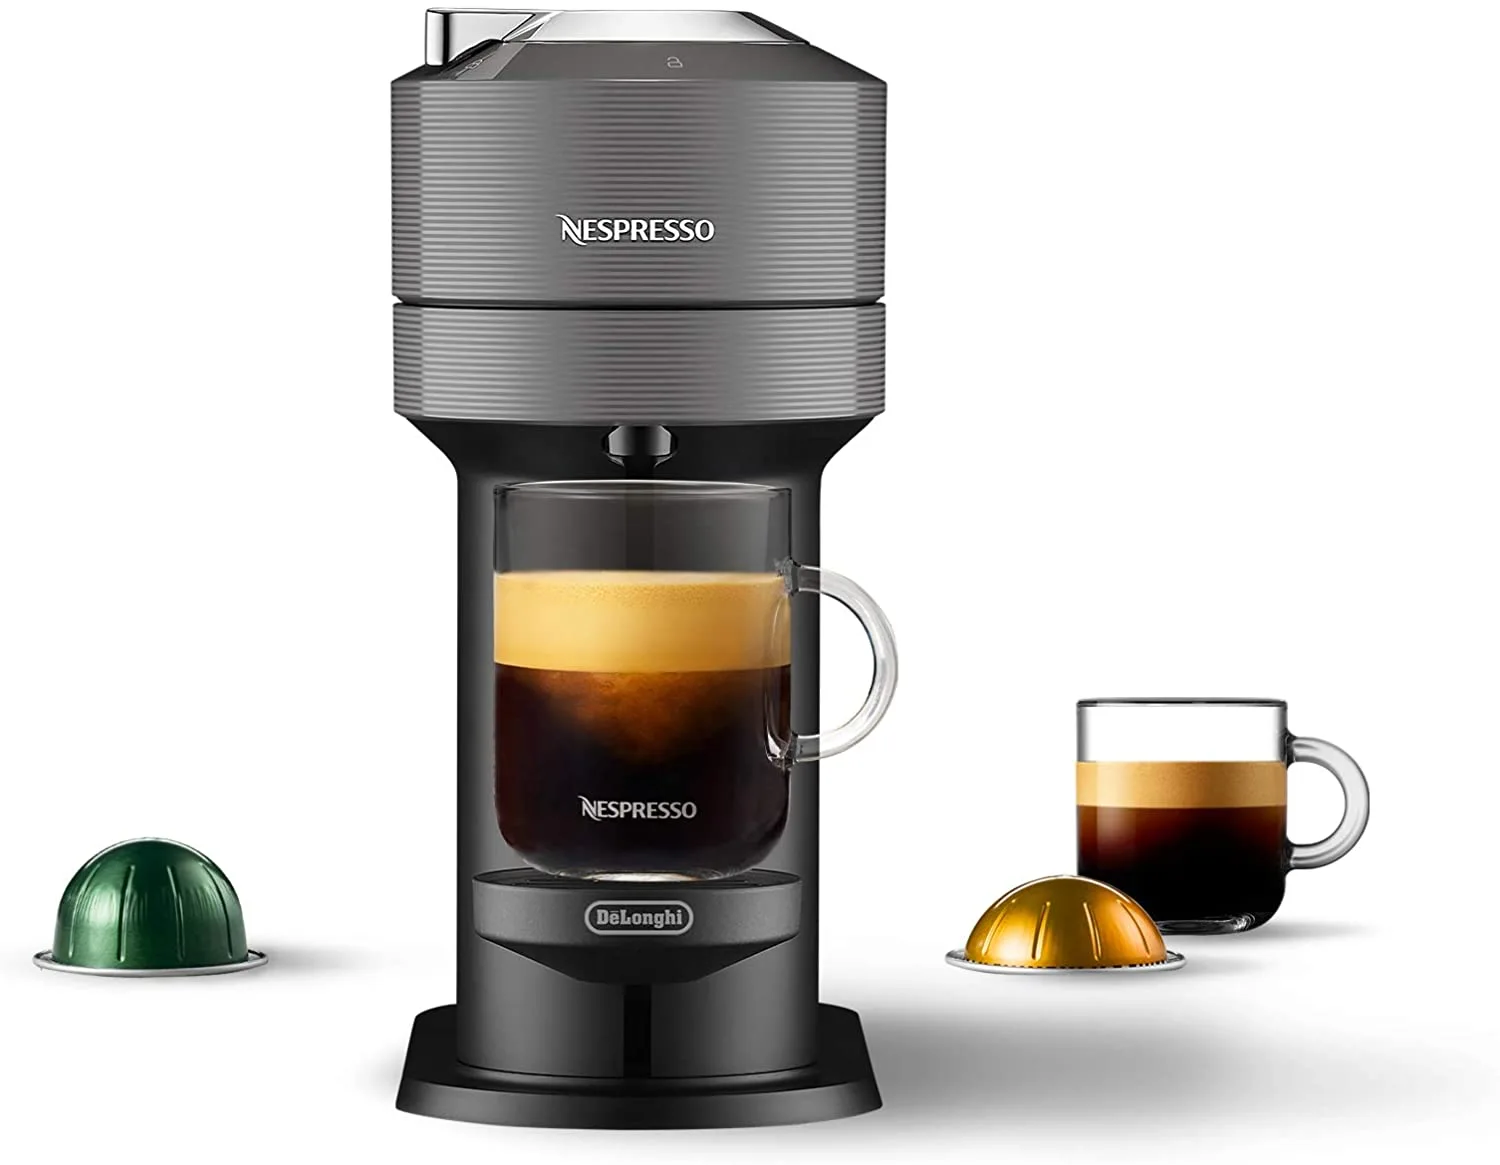
Nespresso Vertuo Next
The latest in Vertuo technology, packed into a tiny 5.5'' footprint with the ability to brew up to 18 oz. of pour-over coffee.

Display a product grid
[trackstar display="grid" products="1,2,3,4" labels="Best Overall, Best Premium"]-
Best OverallNespresso Vertuo
At the touch of a button, Vertuo's revolutionary brewing system unlocks a wide range of coffee and espressos.
-
Best PremiumNespresso Vertuo Plus
Exceptional coffee couldn't be easier, with the Vertuo Plus. Complete with automatic head & capsule ejection.
-
Nespresso Vertuo Next
The latest in Vertuo technology, packed into a tiny 5.5'' footprint with the ability to brew up to 18 oz. of pour-over coffee.
-
Nespresso Evoluo
Authentically brewed options at the touch of a button, thanks to Centrifusion™ and barcode reading technologies.